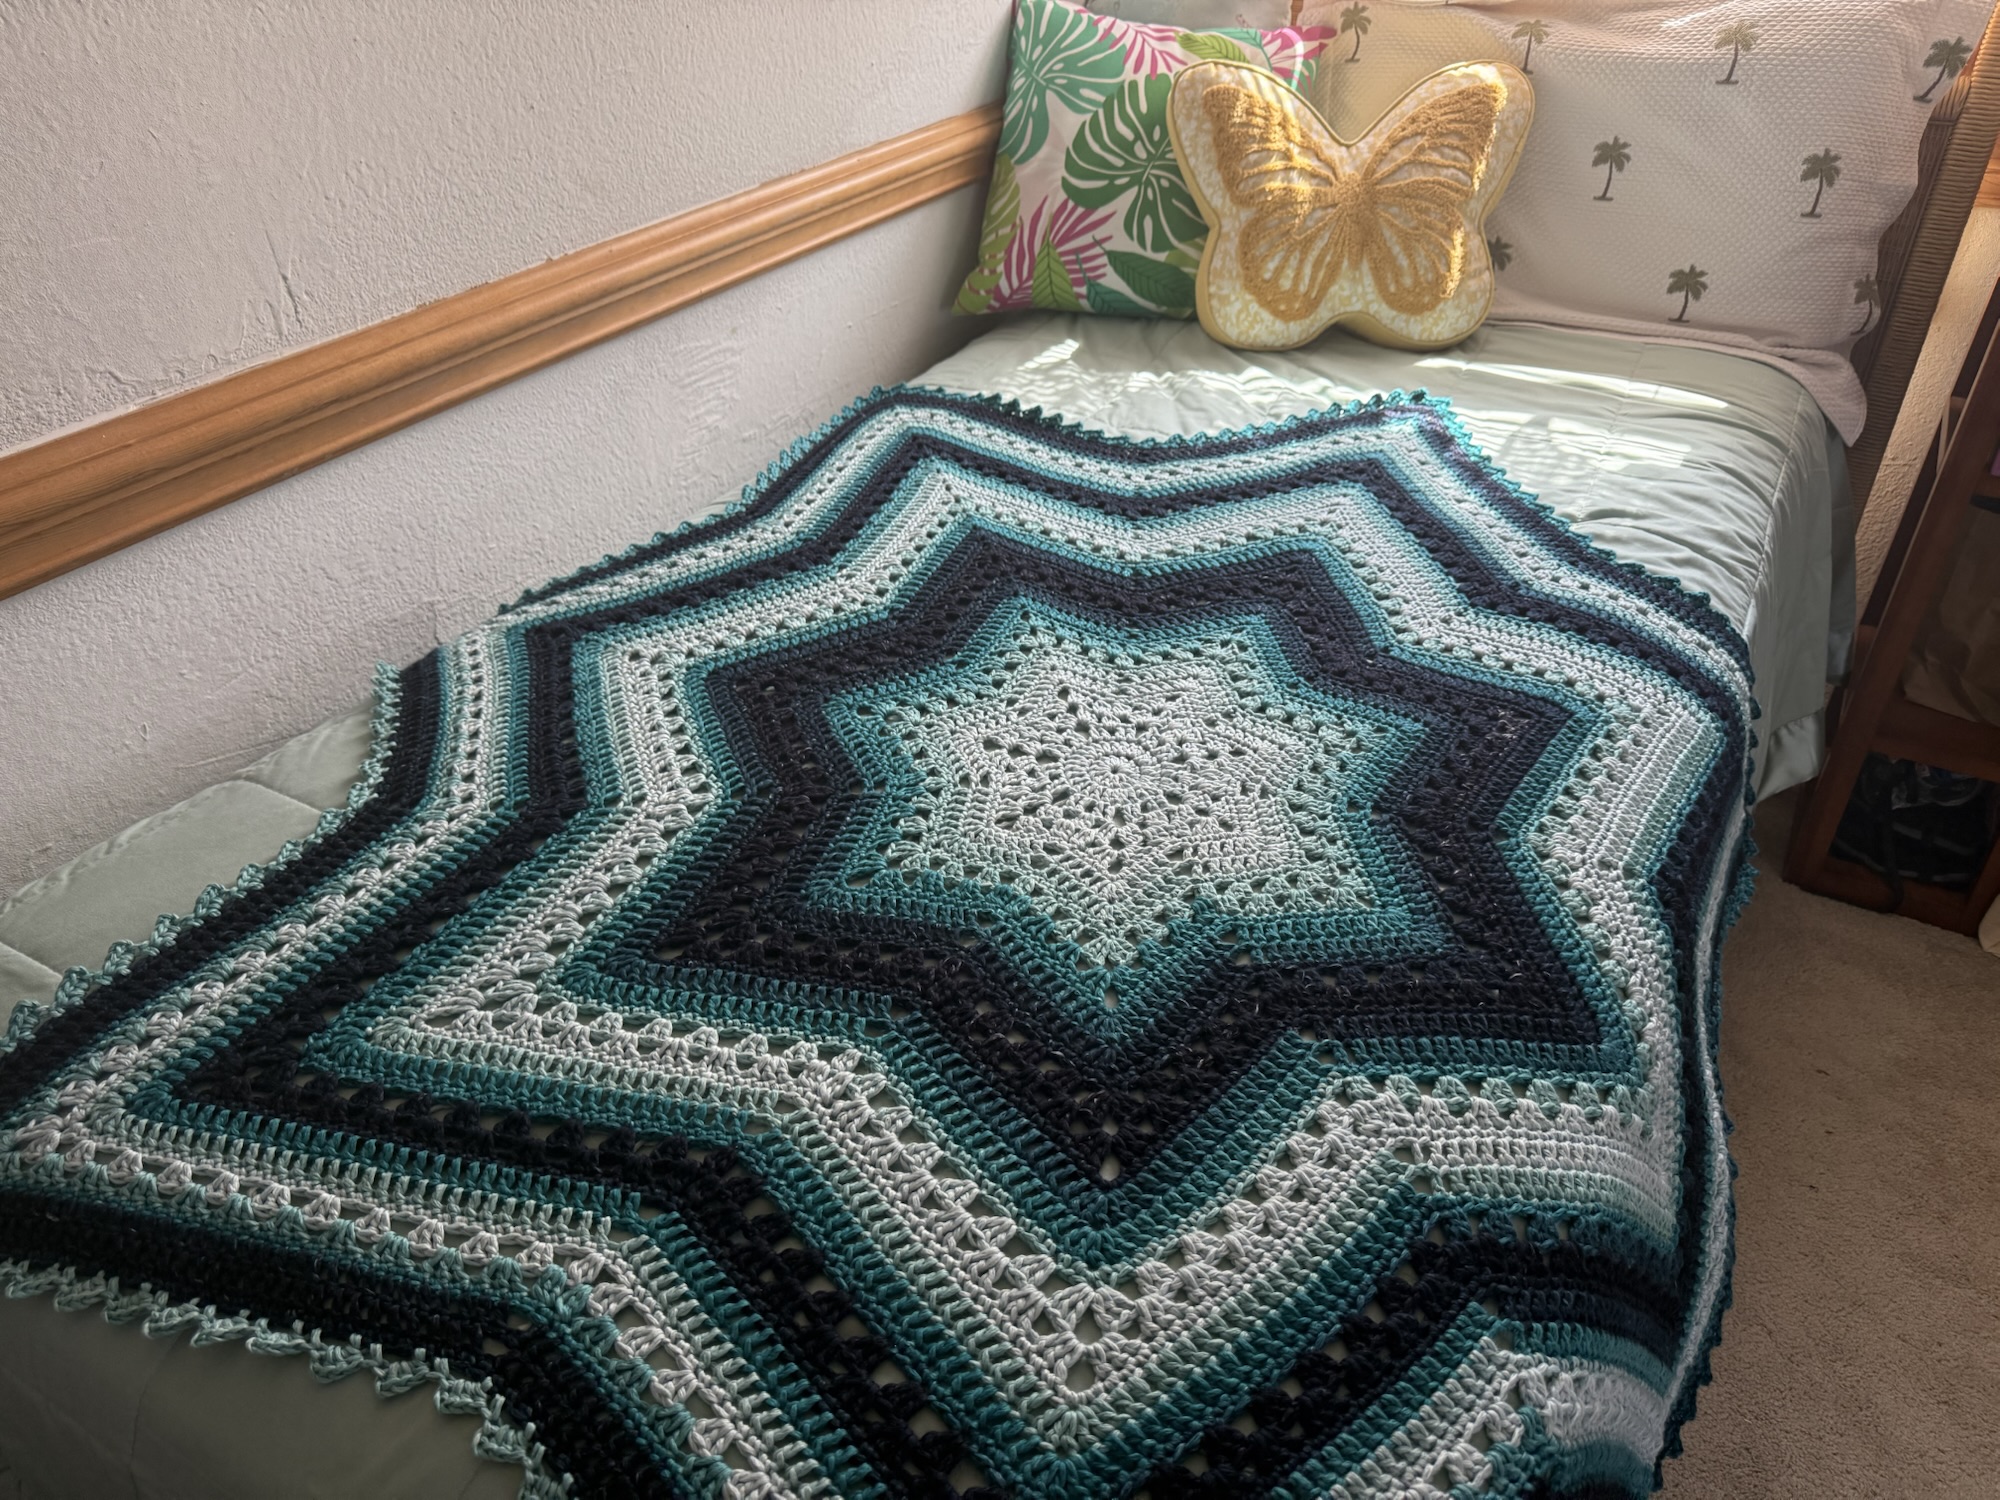
6-Day Star Poncho

A variation of the classic crochet pattern the
6-Day Kid Blanket by Betty McKnit
This page contains affiliate links. If you click these links and buy something on the page they take you to, I may, at no additional cost to you, earn a commission. I only affiliate with products and companies I feel good about. Thank you for your support!
Introduction
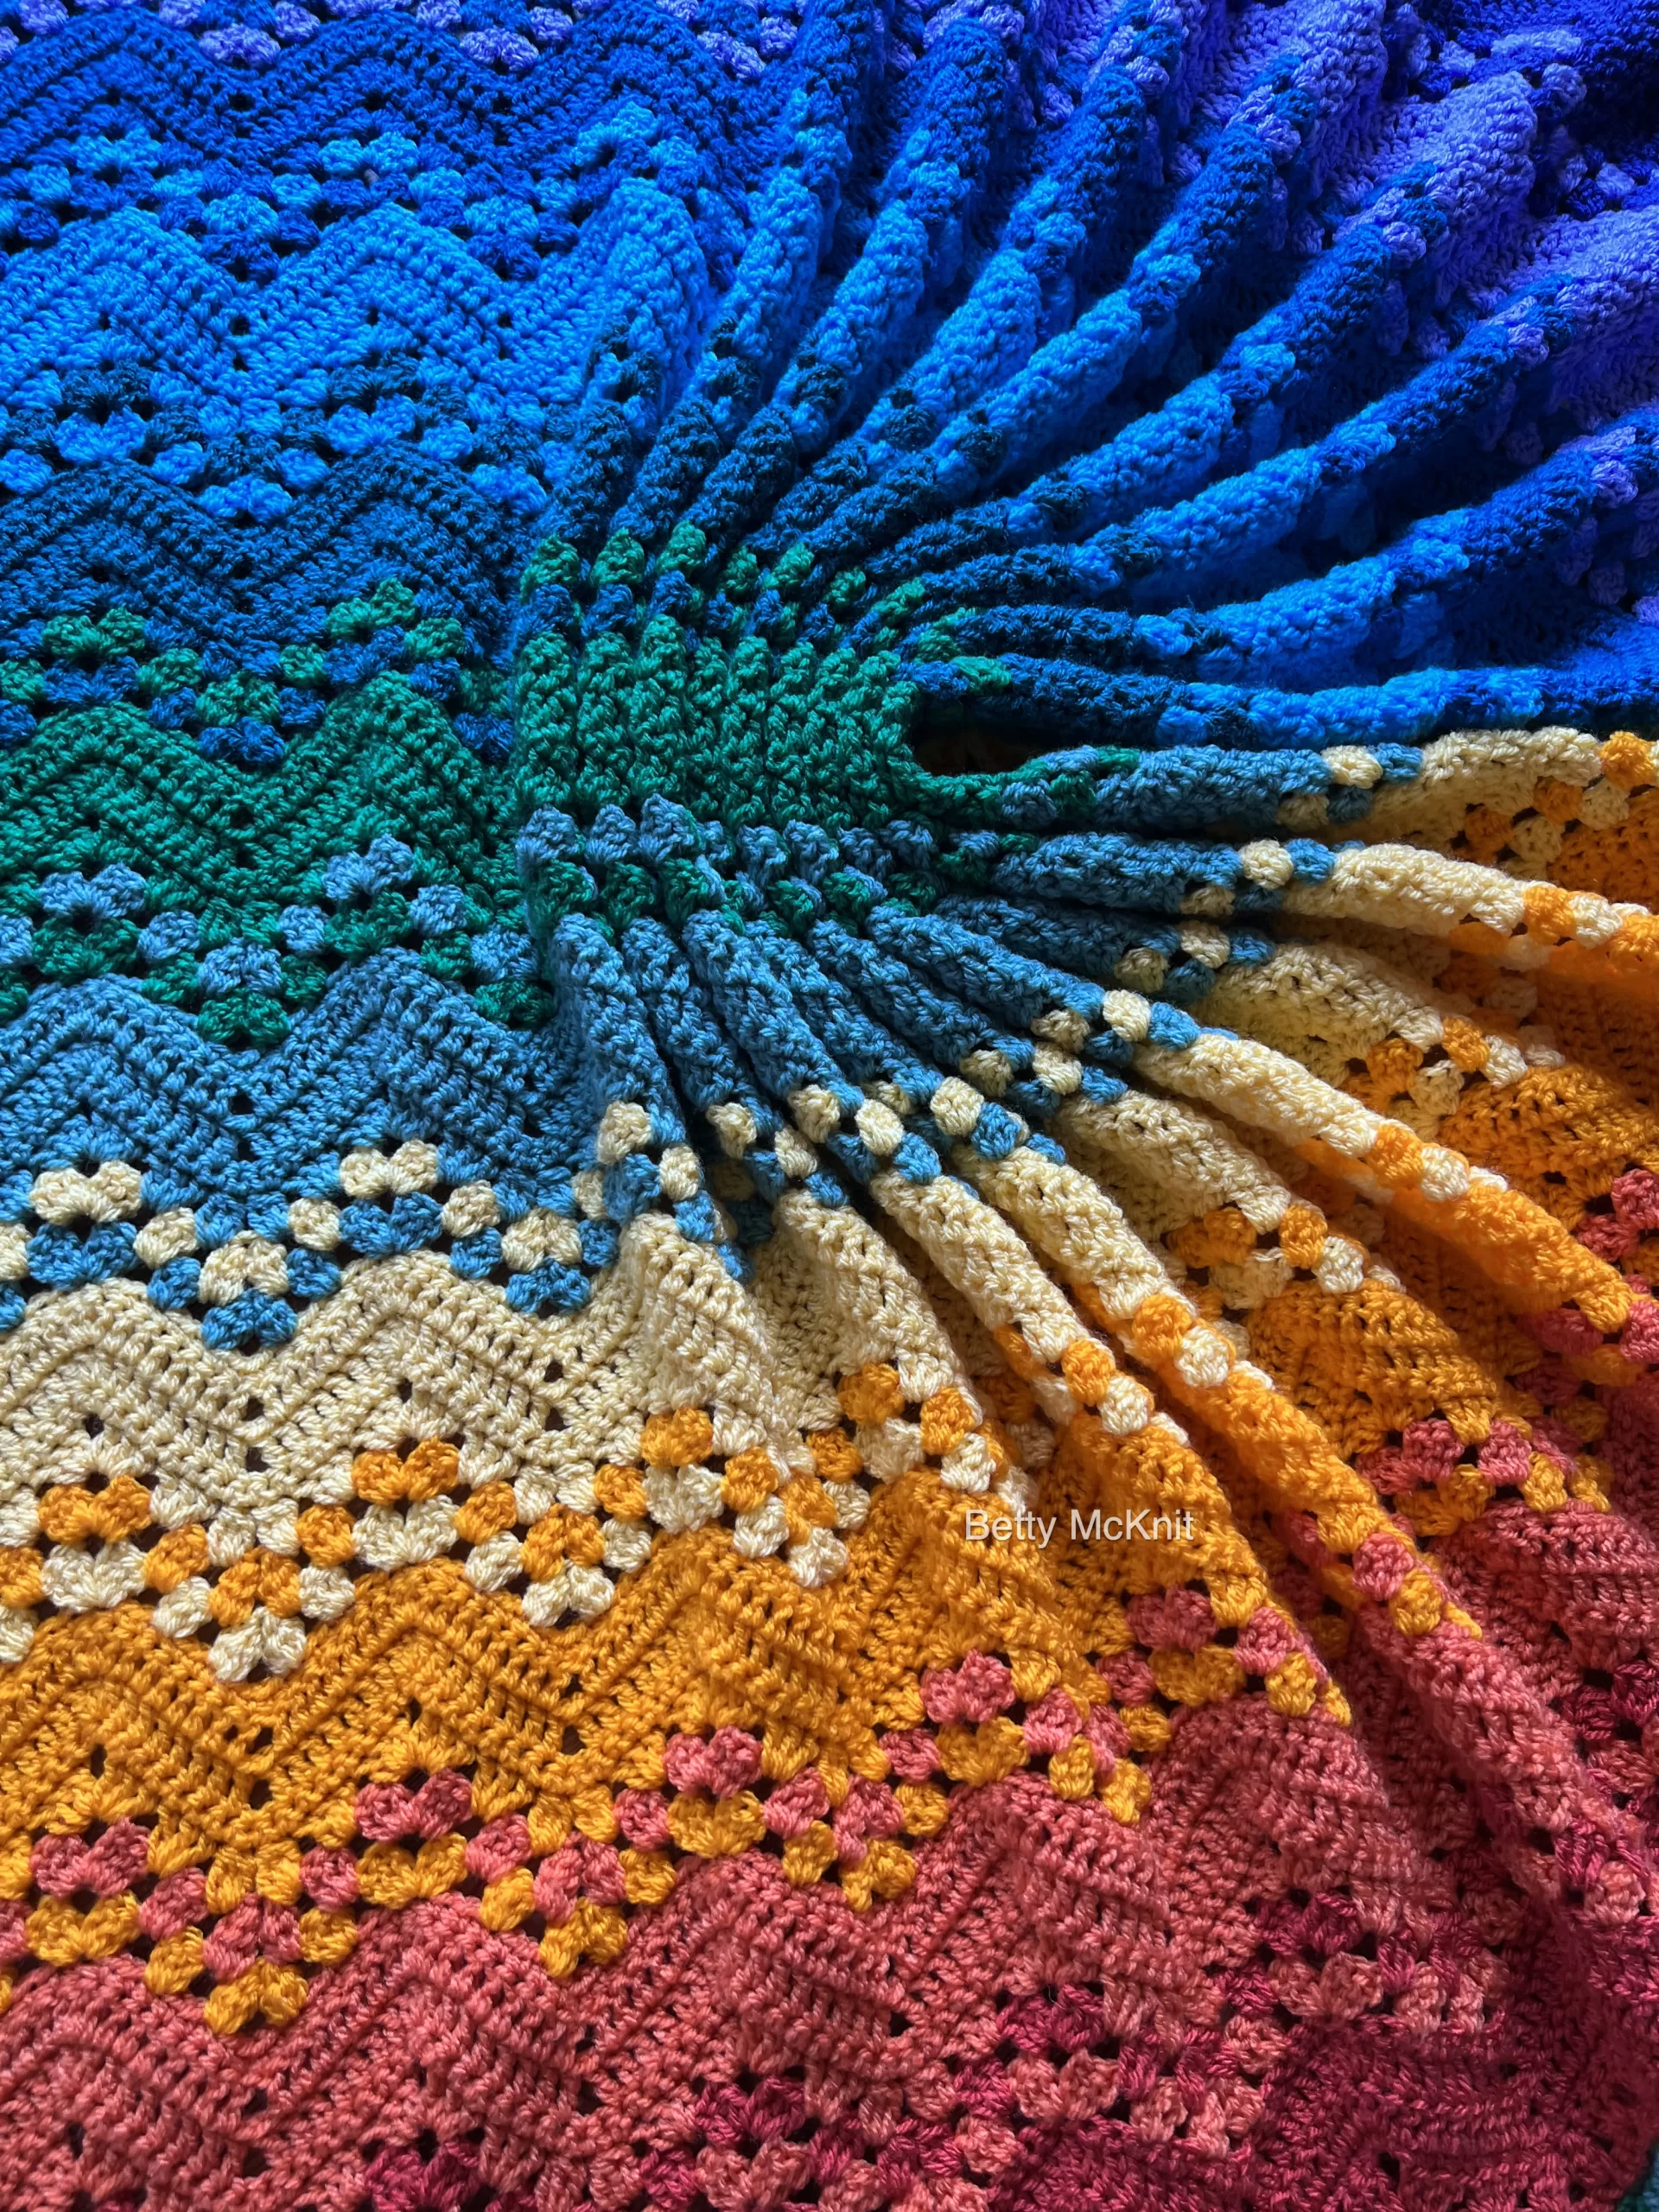
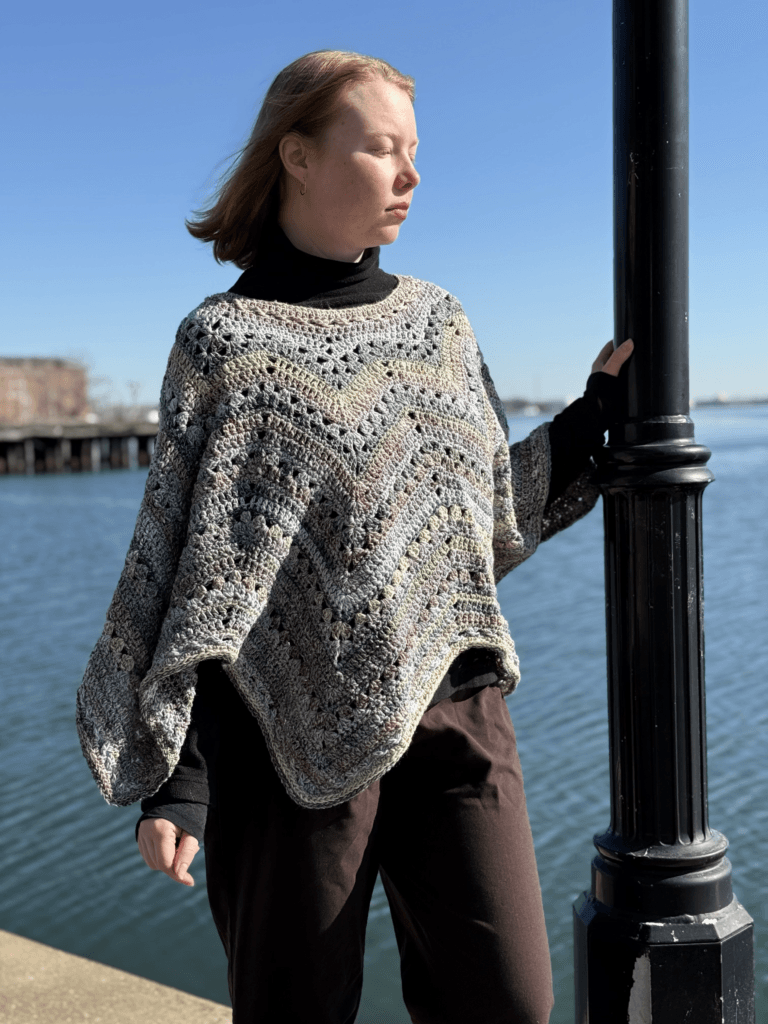
The 6-Day Star Poncho is a variation of the 6-Day Star Blanket. It is worked from the neck down. This fun and easy pattern is adaptable and made-to-measure. The shape is variable; the number of points you have in your poncho will vary depending on the number of starting chains.
This pattern is provided free with advertisements on this page. If you would like an ad-free .pdf, you can purchase one at the bottom of the page. The .pdf is the same as this pattern, with the exception of the ads.
Overview
This poncho is worked from the neck down in the round and can be adjusted to desired length. After completing the bottom edge, a collar or hood can be added to the bottom of the starting chain.
Details
US Terminology with UK Conversions
Finished Sizes
Child
#3 weight yarn: 5 points, 4 repeats = 16.5” neck opening, 17” long
#4 weigh yarn: 5 points, 5 repeats = 22.5” neck opening 23” long
Adult
#3 weight yarn: 7 points, 4 repeats = 23” neck opening, 17” long
#4 weight yarn: 7 points, 5 repeats = 31.5” neck opening 23” long
Skill Level: Easy (NOT Beginner)
Gauge: Varies
Materials
Approximate yardage for four sizes and 2 weights of yarn:
- DK or #3 weight 1400 yards for a 17” long poncho,
- Worsted or #4 weight 1800 yards for a 23” long poncho
Hook: H (5 mm) and I (5.5 mm) for 3 weight yarn
I (5.5 mm) and J (6 mm) for 4 weight yarn
You will not need to change hook sizes like you do with the 6-Day Star Blanket.
Stitch Markers
Yarn Needle
Scissors
Abbreviations
6DKB: 6-Day Kid Blanket
6DSB: 6-Day Star Blanket
ch: chain
dc: double crochet
dc2tog: double crochet 2 together cluster
dc3tog: double crochet 3 together cluster
dec dc2tog
hdc: half double crochet
sc: single crochet
sl st: slip stitch
sp(s): space or spaces
stsc: stacked single crochet
st(s): stitch(es)
yo: yarn over
| US terms abbreviation | UK terms abbreviation |
| single crochet sc | double crochet dc |
| half double crochet hdc | half treble crochet htr |
| double crochet dc | treble crochet tr |
Special Stitches
dc2tog – worked as a cluster into one stitch
[yarn over, pull up a loop, yo and pull through two loops] twice. Yarn over, and pull through all loops on the hook. (Be sure to pull up a loop in the same stitch every time.) dc2tog complete.
dc3tog – worked as a cluster into one stitch – not over three stitches
[yarn over, pull up a loop, yo and pull through two loops] 3 times. Yarn over, and pull through all 4 loops on the hook. (Be sure to pull up a loop in the same stitch every time.) dc3tog complete.
dec dc2tog: [yo, pull up a loop in the next st/sp, yo, pull through two loops] twice. yo and pull through all loops on the hook.
stsc: stacked single crochet: only used at the beginning of the row. sc in first st of the row, insert the hook into the side the sc just made, and pull up a loop, yarn over and pull through both loops. stsc complete.
Repeats
( ) Work stitches in parentheses in the same st or sp.
[ ] Repeat everything within the brackets the indicated number of times.
*Indicates beginning of repeat.
** Indicates end of repeat on last repeat only (ignore it until last repeat).
Stitch Counts
- Stitch counts between < >
- Counts for child sizes given with adult in parenthesis, like so <5 (7) dc3tog>
- I’ve given the counts I feel are most helpful, sometimes in lieu of a total stitch count.
- Counts for subsequent rounds are given in parentheses like so: repeat 1 (repeat 2, repeat 3) etc.
- If your stitch counts are off, avoid the temptation to self-correct without understanding your mistake. The pattern should work out as written.
Notes:
- Do not join rounds with a sl st unless instructed to do so.
- Mark the first stitch of each round.
- Unless indicated otherwise, ch 3 counts as dc.
Does it Really Only Take Six Days?
All of my patterns that use the same six rows of alternating sc, dc, and clusters, with or without chevrons is called 6-Day Crochet. The name of this pattern comes from the original 6-Day Kid Blanket, which was toddler sized and made with chunky yarn, and took me an easy six days to make. This variation uses the same stitches as that original pattern, but you can use any yarn and make it any size you want, so whether you can meet the six day deadline will depend on several factors including your experience and speed with which you crochet, and how much time you have to spend each day crocheting.. It is 100% possible to complete a even large poncho using this pattern in six days.
For more information please see my article, Why is it Called the 6-Day Kid Blanket?
First Timers
This is an easy pattern but it is not a beginner pattern. It assumes you already know how to chain, single crochet, and double crochet, and it does not teach those skills. There are lots of free resources online that you can take advantage of to learn the beginning crochet stitches needed to make this poncho. Feel free to join one of my communities if you need ongoing support.
It will be frustrating to attempt to make this project without reading this entire pattern. I have very good tutorials on YouTube for the 6-Day Star Blanket that may help you, but they are not standalone nor meant to be a replacement for any pattern.
Swatch First
I highly recommend you swatch for this project by chaining 27 and following the pattern instructions for the setup rounds. Use your swatch to determine sizing and to get a feel for the pattern stitches. For more detailed instructions about how to measure and resize your swatch, please see my article “How to Swatch for the 6-Day Star Poncho.”

How to Resize
This pattern offers two size options, five points, and seven points, but it can be resized to accommodate a variety of options. See my article “How to Swatch for the 6-Day Star Poncho” for more information.
Child
#3 weight yarn: 5 points, 4 repeats = 16.5” neck opening, 17” long
#4 weigh yarn: 5 points, 5 repeats = 22.5” neck opening 23” long
Adult
#3 weight yarn: 7 points, 4 repeats = 23” neck opening, 17” long
#4 weight yarn: 7 points, 5 repeats = 31.5” neck opening 23” long
Determine the size of the neck opening you would like your poncho to have- anywhere from 14”-38”and chain a multiple of 13+1 that is closest to that measurement. Your poncho will have one point for each set of 13 chains.
If you’re not sure how large the opening should be, start with the head circumference measurement, as the poncho must fit over the head and add 2-4” or more of ease depending on how loose you would like your poncho opening to be. You can measure the head of the intended poncho wearer or you can find head measurements on the Craft Yarn Council website.
The wider the opening, the lower the poncho will rest on the shoulders. A poncho with seven or eight points will lay flat, like the 6-Day Star Blanket with a hole in the middle. If you add more than 8 points, the poncho will be more than circular and will ruffle. Anything with six points or smaller will be cone-shaped.
You can make your poncho to the desired length by working fewer or more pattern repeats. The Small option here gives four repeats, and the Medium option gives five. End your last repeat with Round 4. For length, you can adjust as you go. Completed length can be anywhere from 13”- 40.” Remember that a larger neckline opening will cause the poncho to hang lower on the body.
About the Row/Round Numbers
In order to provide consistency across all of the 6DKB pattern variations, the repeating rounds correspond to the original 6DKB. The cluster rows are always Row or Round 2 and 3, the dc rows are always Row or Round 5 and 6, and the sc rows are always Row or Round 4 and 7. This makes it easy to adapt any pattern to the Snowflake Effect, Viral Stripes, Popsicle, Ridgy Didge, or the original Vivid Chevrons. It also helps me answer your questions and keep my many 6-Day Crochet patterns straight.
You will start with a Setup Row and ten Setup Rounds which you will only work once. After that, you will repeat Rounds 2-7 until your poncho reaches the size you would like it to be. Do not repeat the Setup Rounds. You can end the poncho on Round 4 or 7 before working the edge.
You will be guided to work the rows and rounds in the proper order; don’t let the numbers throw you off or overthink a change in the sequence.
Joining the Rounds
Only join with a sl st at the end of the round when instructed to do so.

Yarn: I Love This Yarn Metallic and Big Twist
Take care that you do not create extra stitches at the joining of rounds by working into your sl st as if it is a stitch. Mark the first and last stitches of each round to avoid making this mistake. If your counts do not match the pattern, you have made a mistake. Improvising will throw off the pattern from that point forward.
Changing Colors
This version does not give color changes. See my article “No Two 6-Day Kid Blankets are Alike” for more information on different ways to stripe your 6-Day Crochet projects. If you choose to change colors, fasten off the old color at the end of the round, rotate the work and begin the next color with a standing stitch in a different valley.
The 6-Day Star Blanket variations look amazing in color changing cake yarn and gradients. Crocheters are frequently asked if they control the colors when using these beautiful yarns; most often little color control is required. Let it flow!
Begin Pattern
With larger hook, chain 66 (92) (multiple of 13 +1)
Setup Row 1: beginning with the second ch from the hook, sc across. Do not turn.
<65 (91)>
Change to smaller hook.
Setup Round 2: taking care not to twist,join with sc in the round to first st (mark it),sc in next 2 sts, *hdc in next 3 sts, dc in next st, ch 1, dc in next st, hdc in next 3 sts,** sc in next 5 sts, repeat from * around, ending last repeat at **, sc in next 2 sts (do not join with a sl st unless instructed to do so, here and throughout).
<65 (91) sts, 2 ch-1 sps>
Setup Round 3: joining with first sc, *sc in next 3 sts, hdc in next 3 sts, dc in next st, (dc, ch 2, dc) in ch-1 sp, dc in next st, hdc in next 3 sts, sc in next 2 sts, repeat from * around.
<80 (112), 2 ch-2 sps>
Setup Round 4: join with sc in first st and mark it, sc in next 7 sts, *3 sc in ch-2 sp, sc in next 15 sts, repeat from * to last ch-2 sp, 3 sc in ch-2 sp, sc in last 7 sts. Join with sl st to first sc.
<90 (126)>

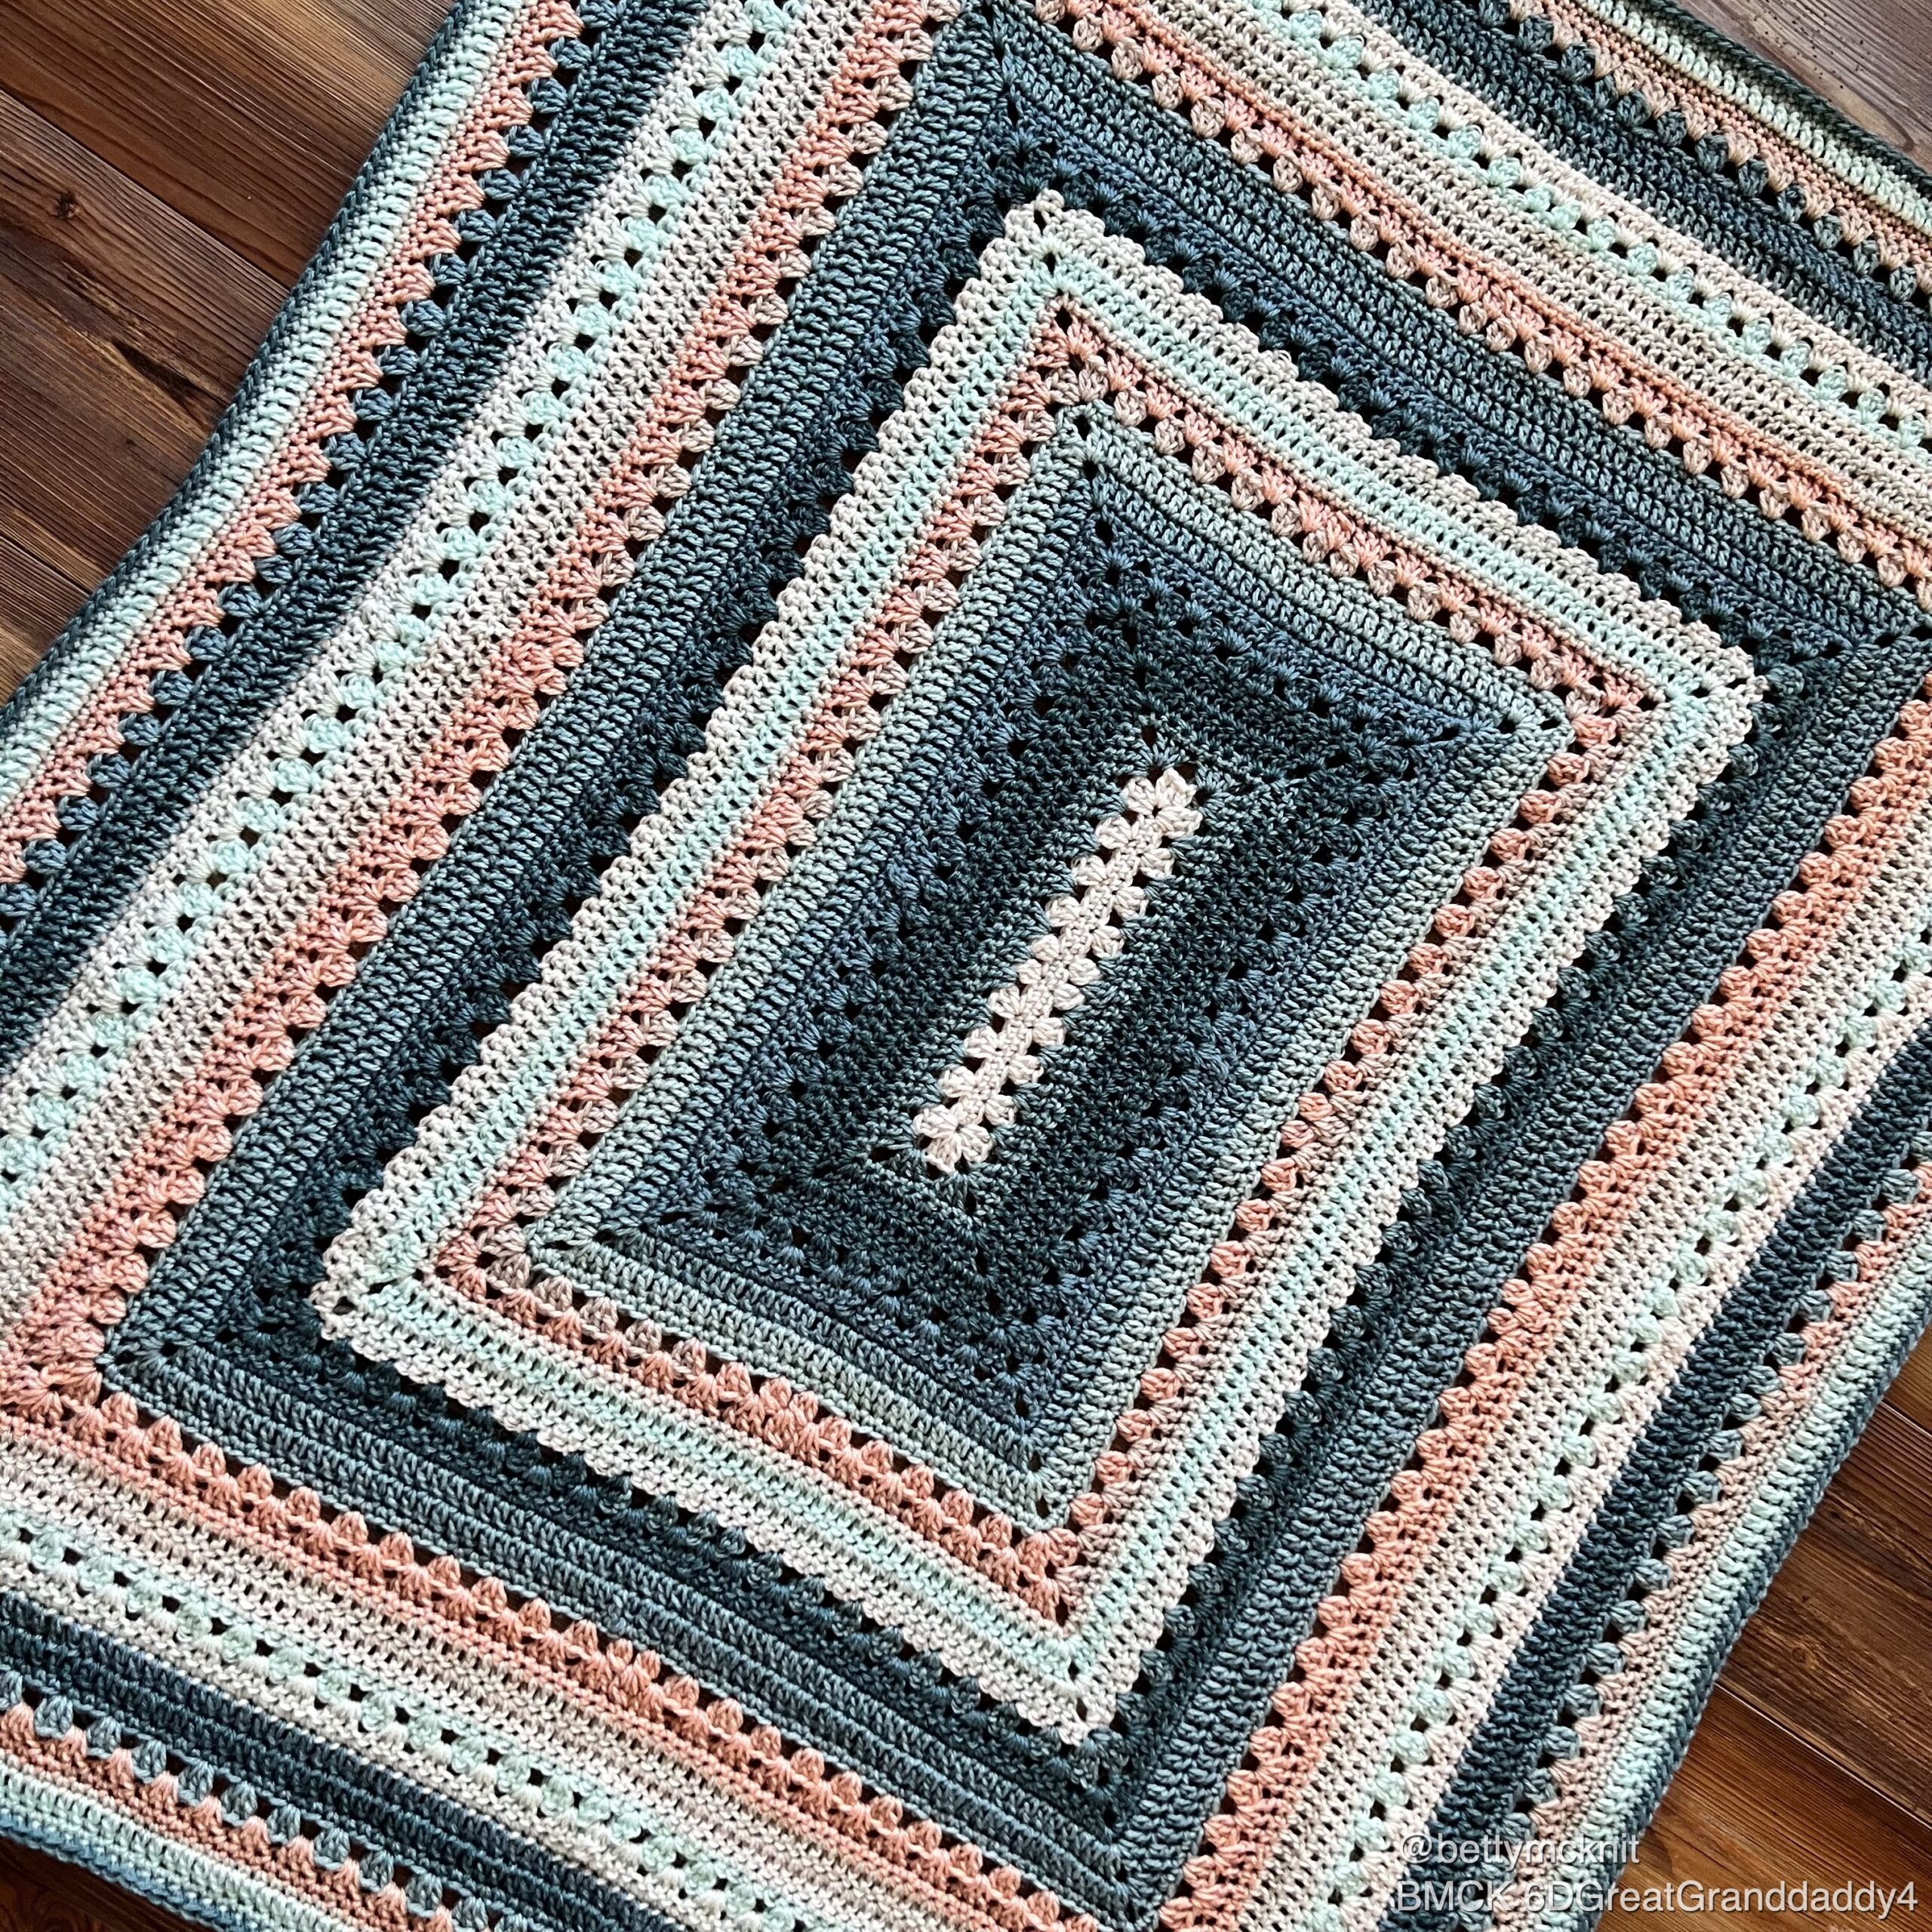
Yarn: Noro Tsubame

Yarn: Loops and Threads Facets
Take care that you do not create extra stitches at the joining of rounds by working into your sl st as if it is a stitch. Mark the first and last stitches of each round to avoid making this mistake. If your counts do not match the pattern, you have made a mistake. Improvising will throw off the pattern from that point forward.
Setup Round 5: ch 2, dc2tog cluster in same st, *[sk 2, 3 dc in next st] twice, sk 2, (3 dc, ch 3, 3 dc) in center sc of peak, [sk 2, 3 dc in next st] twice, sk 2, ** dc3tog next st, repeat from * ending last repeat at **. Join with sl st to top of starting dc2tog.
<30 (42) sets of 3 dc, 5 (7) ch-3 sps, 5 (7) dc3tog>
Setup Round 6: sl st in next sp, ch 2, dc2tog in same sp, *3 dc in each of next 2 sps, (3 dc, ch 3, 3 dc) in ch-3 sp, 3 dc in each of next 2 sps, ** dc3tog in each of next 2 sps (before and after the dc3tog in the row below) repeat from * around ending last repeat at **, dc3tog in last sp, join with sl st to first dc2tog.
<30 (42) sets of 3 dc, 5 (7) ch-3 sps, 10 (14) dc3tog>
Setup Round 7: ch 1, sc in same st, sc in each st around, working 3 sc in ch-3 sp. Join with sl st to first sc.
<115 (161)>
Setup Round 8: sl st in next st, ch 3, dc in next 9 sts, * 5 dc in next st, which should be the center sc from round below, ** dc in next 10 sts, sk 2, dc in next 10 sts, repeat from * ending last repeat at **, dc in next 10 sts, sk 2, join with sl st to top of ch 3.
<125 (175)>
Setup Round 9: sl st in next st, ch 3, dc in next 10 sts, * 5 dc in next st, which should be the center sc from round below, ** dc in next 11 sts, sk 2, dc in next 11 sts, repeat from * ending last repeat at **, dc in next 11 sts, sk 2, join with sl st to top of ch 3.
<135 (189)>
Setup Round 10: ch 1, sc in same st and each st around, making 4 sc in each center of 5 dc from the row below. Join with sl st to first sc.
<150 (210)>
Setup Rounds complete. Proceed to Round 2.
Round 2: ch 2, dc2tog cluster in same st, *[sk 2, 3 dc in next st] 4 (6, 8, 10, 12) times, sk 2, (3 dc, ch 3, 3 dc) in third of 4 sc in the peak, [sk 2, 3 dc in next st], 4 (6, 8, 10, 12) times, sk 2, ** dc3tog next st, repeat from * around ending last repeat at **. Join with sl st to top of starting dc2tog.
<10 (14, 18, 22, 26, 30) sets of 3-dc clusters between each peak, 5 (7) ch-3 sps, 5 (7) dc3tog>
Round 3: sl st in next sp, ch 2, dc2tog in same sp, *3 dc in each of next 4 (6, 8, 10,12) sps, (3 dc, ch 3, 3 dc) in ch-3 sp, 3 dc in each of next 4 (6, 8, 10, 12) sps, ** dc3tog in each of next 2 sps (before and after the dc3tog in the row below) repeat from * around ending last repeat at **, dc3tog in last sp, join with sl st to first dc2tog.
<10 (14, 18, 22, 26, 30) sets of 3-dc clusters between each peak, 5 (7) ch-3 sps, 10 (14) dc3tog>

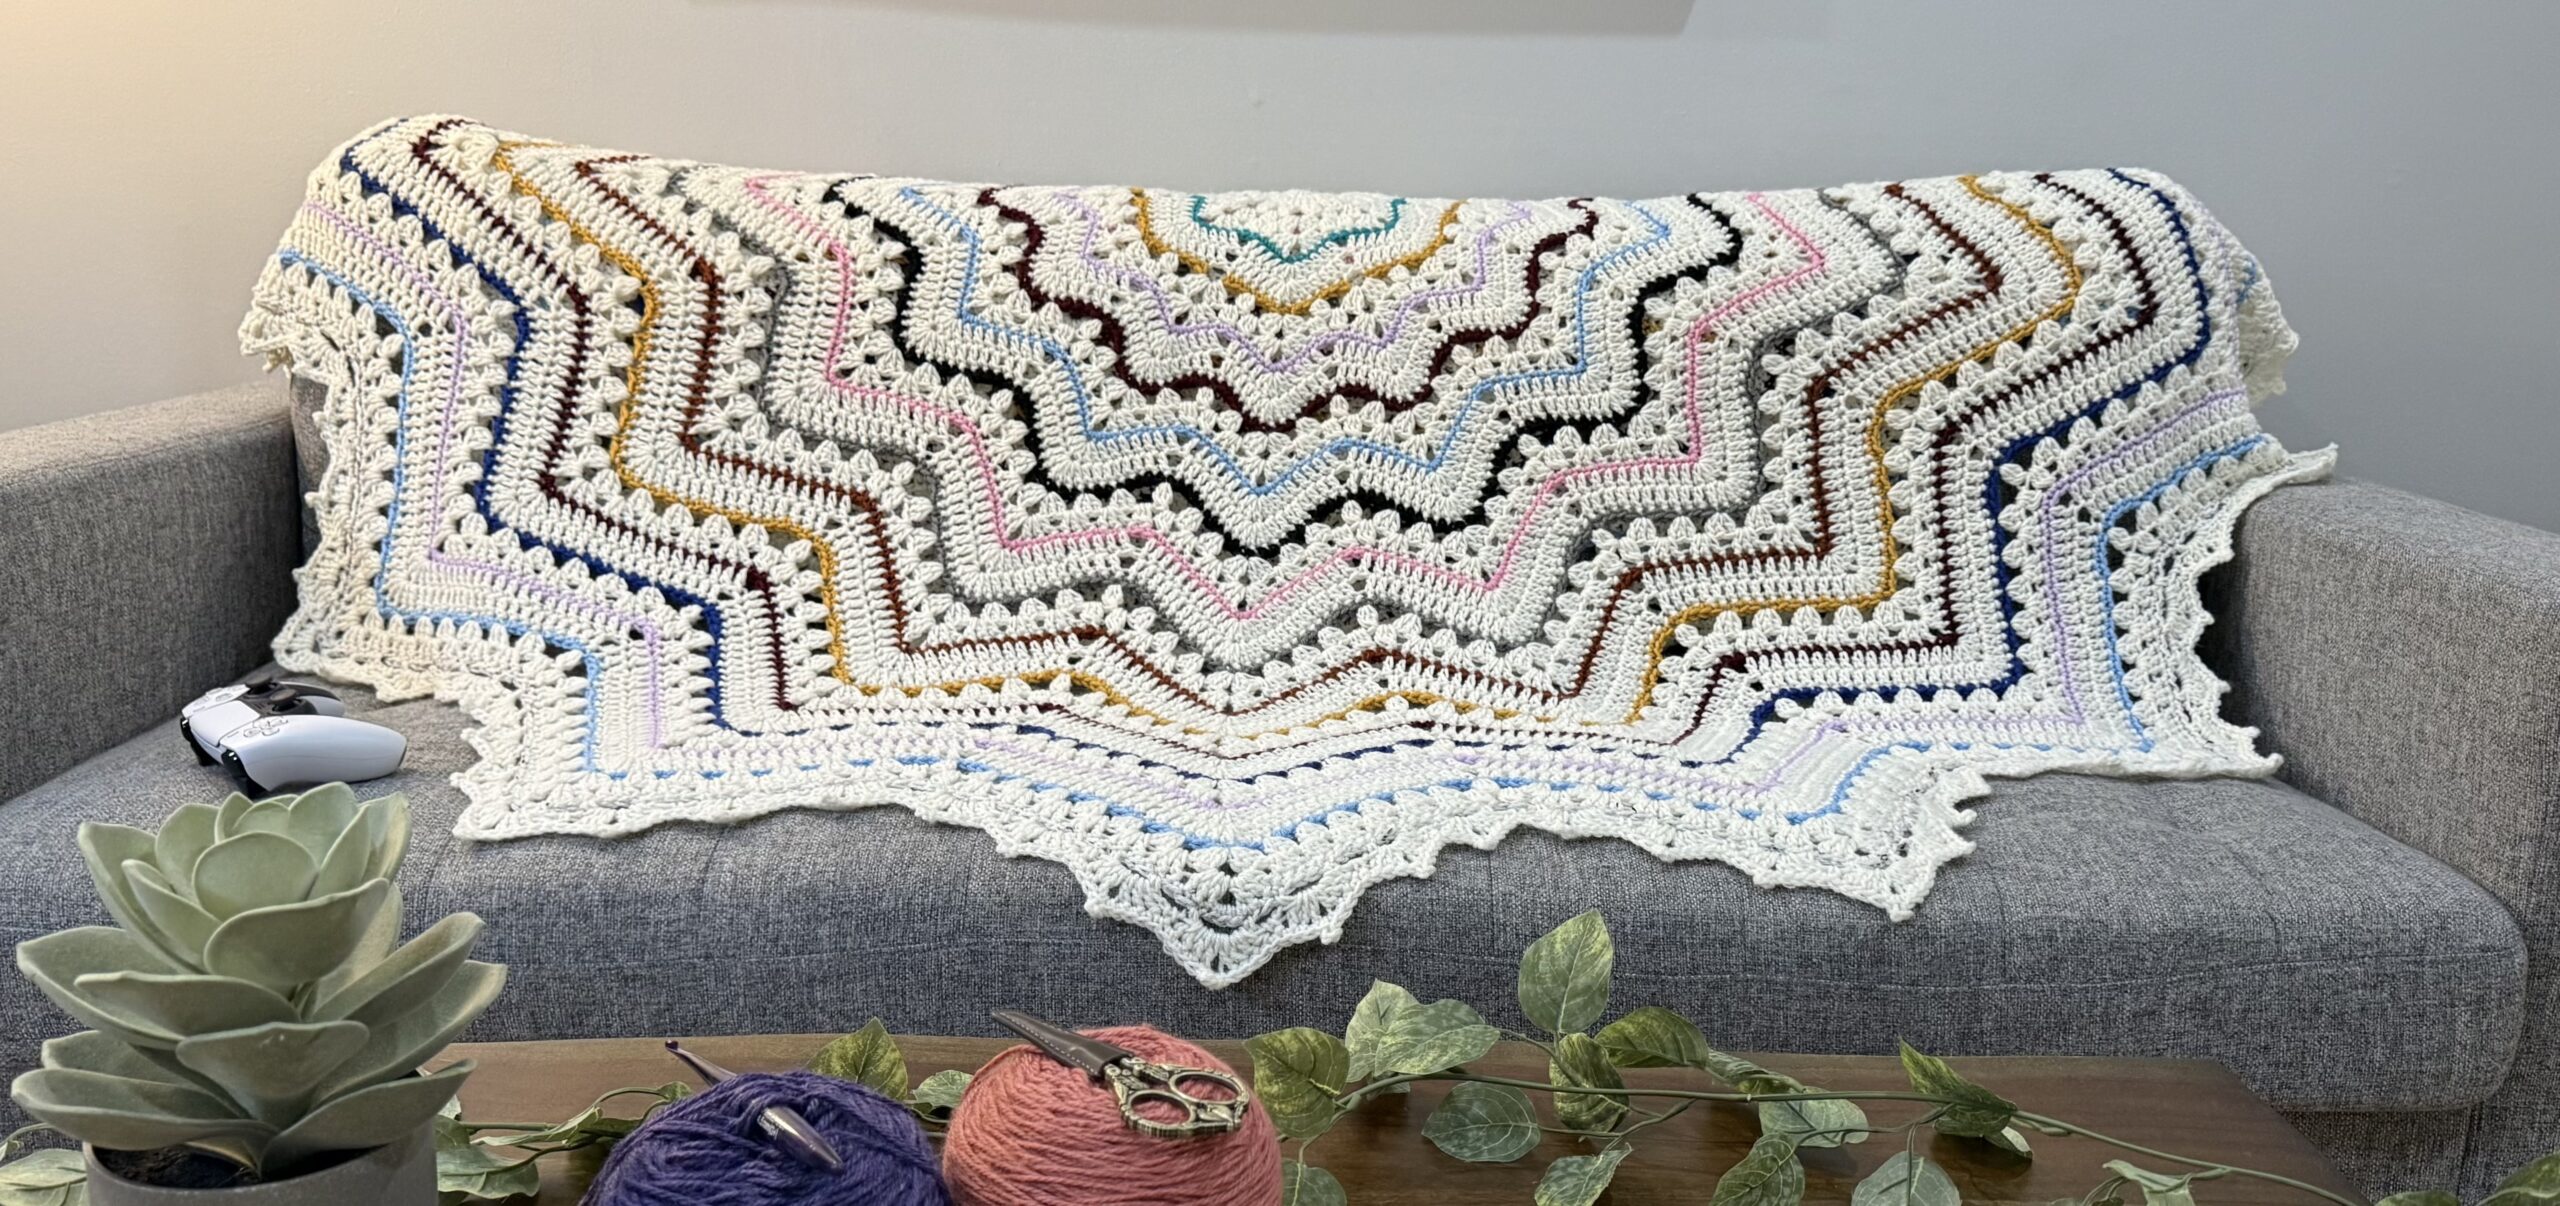
Yarn: Noro Akari
Round 4: ch 1, sc in same st, sc in each st around, working 3 sc in ch 3 sps. Join with sl st to first sc.
<32, (44, 56, 68, 80, 92) sc between each peak and 3 sc in each ch-3 sp>
On subsequent sc rounds, the number of scs between the peaks will increase by 12.
Round 5: sl st in next st, ch 3, dc in next 15 (21, 27, 33, 39) sts, * 5 dc in next st, which should be the center sc from round below, ** dc in next 16 ( 22, 28, 34, 40) sts, sk 2, dc in next 16 (22, 28, 34, 40) sts, epeat from * ending last repeat at **, dc in next 16 (22, 28, 34, 40) sts, sk 2, join with sl st to top of ch 3.
<32 (44, 56, 68, 80) dc between each peak, 5 dc in each peak>
Round 6: sl st in next st, ch 3, dc in next 16 (22, 28, 34, 40) sts, * 5 dc in next st, which should be the center sc from round below, ** dc in next 17 (23, 29, 35, 41) sts, sk 2, dc in next 17 (23, 29, 35, 41) sts, repeat from * to last peak, (5 dc) in next st, dc in next 17 (23, 29, 35, 41) sts, join with sl st to top of ch 3.
<34 (46, 58, 70, 82) dc between each peak, 5 dc in each peak>
On subsequent rounds 5 and 6, the number of dcs between each peak will increase by 12. The numbers in parenthesis show the number of dcs on each subsequent repeat of the pattern.
Round 7: ch 1, sc in same st and each st around, making 4 sc in each center of 5 dc from the row below. Join with sl st to first sc.
<19, (25, 31, 37, 43) sc on each side of the peak and 4 sc in each center dc st>
Repeat Rounds 2-7 three (four) more times or until your poncho is the length you desire.
You may end on Round 7, or repeat Rounds 2-4 and end on Round 4.
Proceed to Edge.

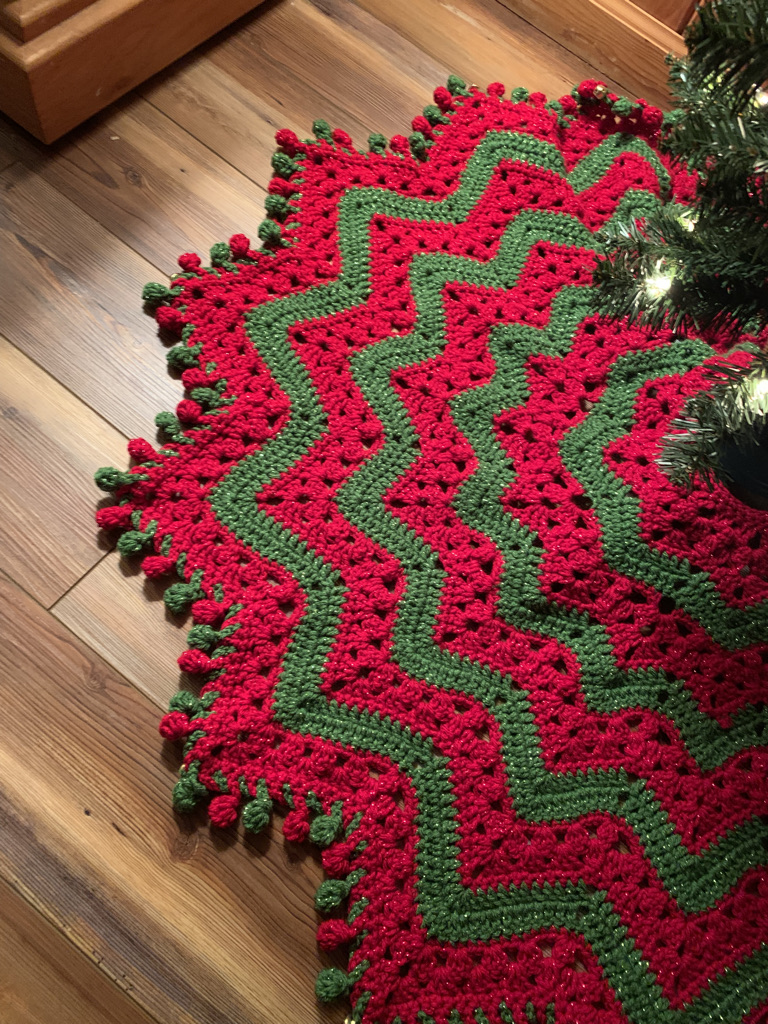
Caron Simply Soft
Edge
Edge Round 1: ch 1, (sc ch 3, sc) in same st, *sk 1, (sc, ch 3, sc) in next st, repeat from * around, sk 1, join with sl st to first sc. Fasten off.
Proceed to either Collar Rounds, or Hood Rows.
Collar
The collar is worked in the same stitch as edge round along the unworked side of the foundation chain at the neckline.
Collar Round 1: Join with sl st in any stitch near back of neckline. ch 2, hdc around. Join with sl st to first ch 2.
Collar Round 2: (ch 3, sc) in same st, *sk 1, (sc, ch 3, sc) in next st, repeat from * around, sk 1, join with sl st to first sc. Fasten off. Weave in all ends.
Hood
The hood is worked in rows along the unworked side of the foundation chain at the neckline.
Hood Row 1: mark the center front of your poncho at the neckline. The center front can be lined up with any of the points, it should not be where you started (which was a valley.) Join with sl st to first st to left of marked center stitch. Working into the foundation chain, sc in each stitch to marker, decreasing if necessary to both tighten up the neck opening (if you feel it’s needed) and to bring your stitch count to a multiple of 3+2. Turn.
Take note of your stitch count.
Hood Row 2: stsc (counts as dc, here and throughout), dc in next st, [sk 2, 3 dc in next st] to last 3 sts, sk 2, 2 dc in last st. Turn.
<Stitch count = count from Hood Row 1-1>
Hood Row 3: stsc, sk 1, 3 dc in next and in each sp across, sk 1, dc in last st. Turn .
<Stitch count = Hood Row 1>
Hood Row 4: ch 1, sc in same st, sc in each st across, sc in top of ch 3. Turn.
<Stitch count = Hood Row 1>
Hood Row 5: stsc, dc in next and each st across. Turn.
<Stitch count = Hood Row 1>

Arin DiClaire

Arin DiClaire
Hood Row 6: stsc, dc in next and each st across. Turn.
<Stitch count = Hood Row 1>
Hood Row 7: ch 1,sc in same st, sc in each st across, sc in last st. Turn.
<Stitch count = Hood Row 1>
Repeat HoodRows 2-7 until your hood is nearly the desired length.
Repeat HoodRows 2-4
Optional: on last repeat of Hood Rows 2-4 round the point of the hood, mark off center 6 stitches of hood. Replace [sk 2, 3 dc in next st] with [dec dc2tog] 3x between the markers on hood rows 2 and 3.
Fold top of hood in half and seam top edges together. Fasten off.
Optional: join at neckline and work a row of sc along front edge of hood, working into the sides of the stitches.
Fasten off. Weave in all ends.
Pattern Tested by Sandy Beddia, Kathy Bertram, Amy Bryson, Kaitlyn ‘Deafly Lit Stitch’ Ciampa, Arin DiCaire, Tere E. Hubler, Diane Kagay, Haley Lopez, Anne Patterson, Pat Ojanen, Debbie Shoemaker, and Susan Trace.

Items created with this pattern may be used for commercial sale with credit to Betty McKnit in your listing. Mass production is not permitted.
The 6-Day Crochet stitch pattern was inspired by “Vivid Chevrons” #110 from 200 Ripple Stitch Patterns by Jan Eaton.
This page contains affiliate links. If you click these links and buy something on the page they take you to, I may, at no additional cost to you, earn a commission. I only affiliate with products and companies I feel good about. Thank you for your support!
Beth McKee Elliott
aka Betty McKnit
Beth McKee Elliott, also known as Betty McKnit, is a crochet and knitting designer, instructor, community leader, and Master Somatic Movement Therapist and Educator. Her signature style, 6-Day Crochet, is showcased in the viral crochet patterns the 6-Day Kid Blanket and 6-Day Star Blanket.
She specializes in Somatic Crochet and Knitting, a mindfulness practice that combines crochet/knitting with body awareness techniques to prevent injury and promote well-being and creativity in crafting.
In addition to being a crochet designer, Beth is a choreographer. She is the creator and director of Small Plates Choreography Festival, Haven Movement Company, and the Dance Maker Podcast.
This pattern is the intellectual property of Beth McKee Elliott aka Betty McKnit®. This pattern, The 6-Day Kid Blanket, 6-Day Crochet™, 6-Day Star Blanket™, and all derivative works are protected by copyright. Publishing translations, corrections, variations, or tutorials of this pattern, online or elsewhere without written permission from the owner is a violation of copyright.
An international community of yarnful makers and friends.
- New pattern pre-releases
- Exclusive patterns never released to the public
- Have access to Betty’s ad-free .pdf library of patterns (3-4 patterns/month)
- Access to Betty’s Design Workshop
- Uplevel your knitting and crochet skills
- Enjoy regular crochet alongs, knit alongs, and classes
- Make like-minded friendships during our weekly social and educational events
- Bonus content every month
©Beth McKee Elliott/Betty McKnit®
www.bettymcknit.com
SEO-6-Day Star Poncho pattern, crochet poncho pattern, 6-Day Star Blanket variation, top-down crochet poncho, crochet poncho worked in the round, made-to-measure crochet pattern, adjustable crochet poncho, beginner-friendly crochet poncho, easy crochet poncho pattern, cozy crochet poncho, star stitch crochet poncho, crochet poncho for women
– crochet poncho tutorial
– crochet wearable pattern
– customizable crochet poncho length