
The 6-Day Boom Blanket
6-Day Boom Blanket
A variation of the classic 6-Day Kid Blanket by Betty McKnit
Color Concept by Erin Boom Iske
The original Classic 6-Day Kid Blanket (6DKB), was written for a toddler-sized blanket made with chunky weight yarn, and can easily be made in six days.
This variation on the 6DKB uses the very same stitches, but is much larger and will take most crocheters longer than six days to make. Give yourself about two weeks of working every day to complete this pattern variation.
INTRODUCTION
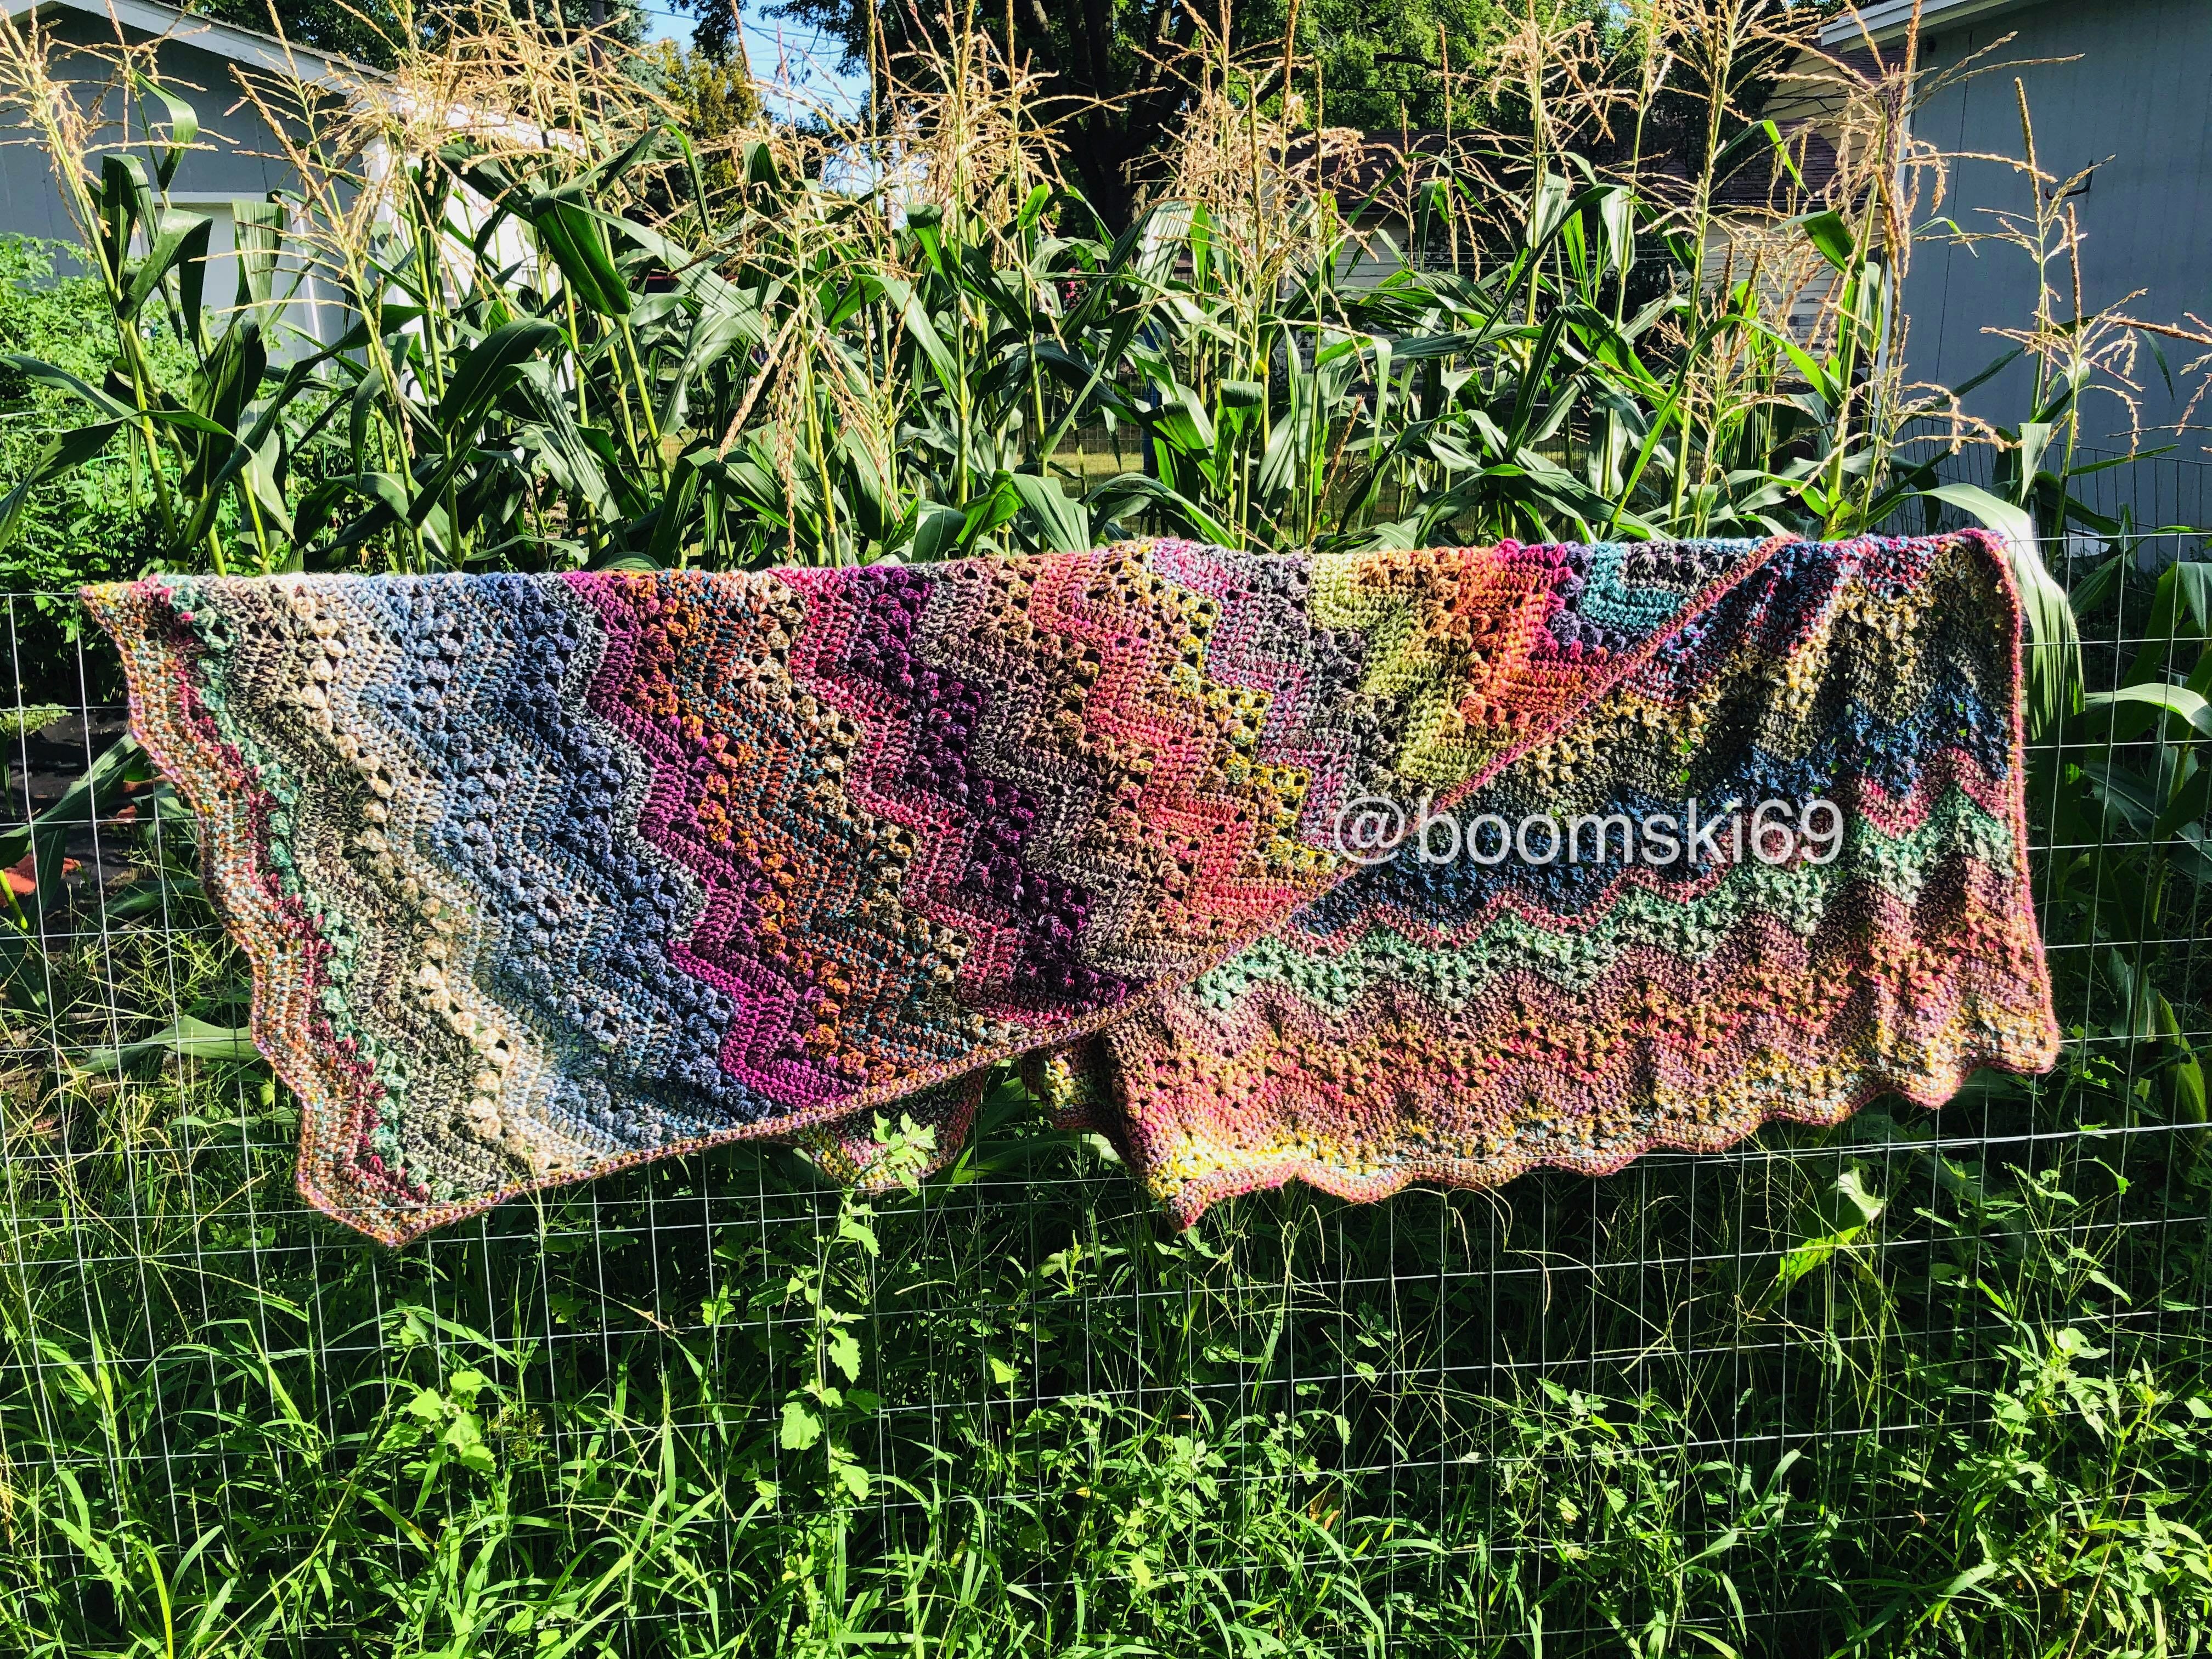
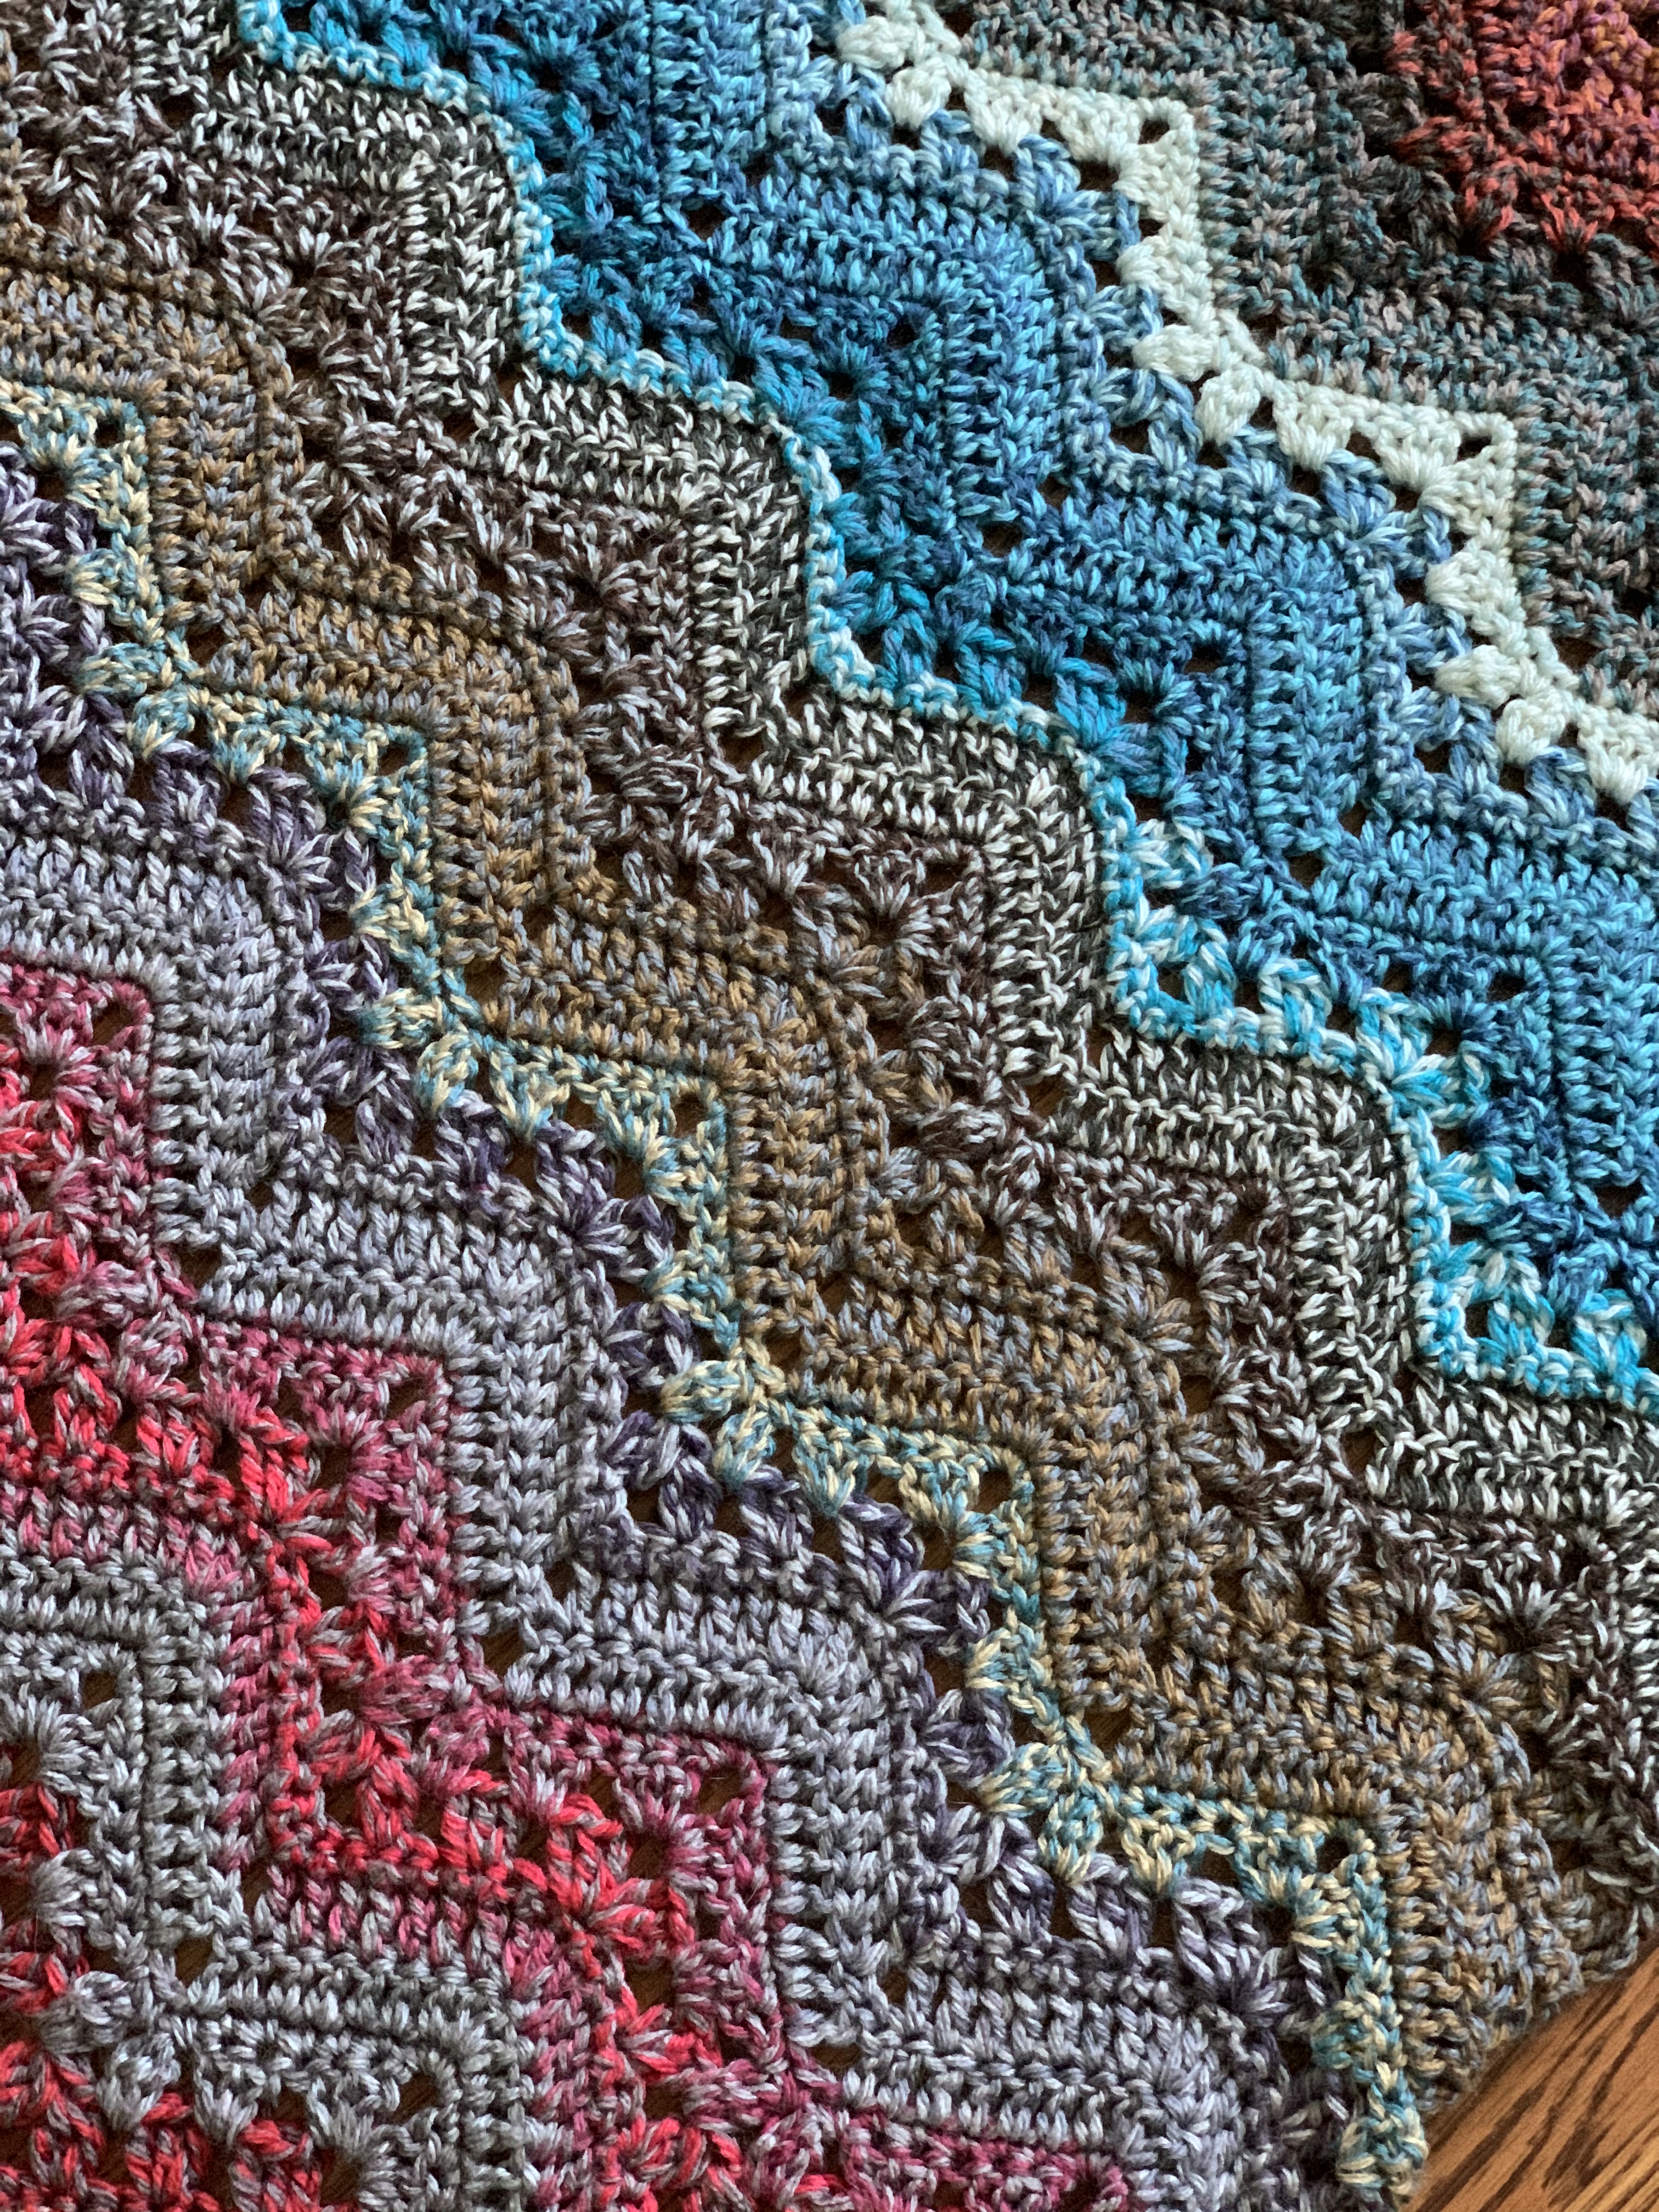
Erin created her “Dazed and Confused” 6-Day Kid Blanket for a Comfort Blanket challenge n April 2020. She was inspired by Lion Brand Mandala Tweed Stripes. These vibrant color combinations are so cheerful and positive they will keep your mind off of COVID-19 or any of your other worries.
Erin combined five colorways of Lion Brand Mandala Tweed Stripes, and Betty used Erin’s template for combining the colors with her own color choices. You can make Erin’s or Betty’s, or you can create your own version with @4000 yards of your favorite tweed yarn in 5 colors (9 cakes of Mandala Tweed Stripes).
How to Resize
This pattern creates an adult sized blanket.
If you would like to resize or make a different blanket with options, chain a multiple of 17+3. For more help resizing, please see the original 6-Day Kid Blanket pattern.
First timers
If this is your first time making a 6-Day Kid Blanket, before you begin, I suggest you make a swatch on 37 stitches along with my video tutorials on my YouTube Channel to learn the stitches.
Details:
Finished Size:
Skill Level: Intermediate
Yarn: Lion Brand Mandala Tweed Stripes, or your favorite tweed stripe cake yarn in the following amounts: Color A: 4 cakes/1700 yards, Color B: 2 cakes/852 yards, Colors C, D, and E: 1 cake/426 yards of each.
Hook: I/5.5mm
 Boom’s
Color A 217 White Elephant (4 cakes)
Color B 218 Wishing Well (2 cakes)
One cake each of the following:
Color C 216 Buddha
Color D 209 Wish Bone
Color E 220 Dragon Fly
Betty’s
Color A 206 Horseshoe (4 cakes)
Color B 214 Shooting Star (2 cakes)
One cake each of the following:
Color C 216 Buddha
Color D 219 Cat’s Eye
Color E 220 Dragon Fly
Abbreviations:
ch: chain
dc: double crochet
dc3tog: (NOT TO BE CONFUSED WITH dec dc3tog).
Work dc3tog into one stitch – not over three stitches
[yarn over, pull up a loop, pull through two loops] 3 times. Yarn over, and pull through all 4 loops on the hook. (Be sure to pull up a loop in the same stitch every time.) dc3tog complete.
rep: repeat
sc: single crochet
sk: skip
sp(s): space(s)
Side edges:
Some crocheters have had issues with the side edges of their blankets curling. Here are some steps you can take to help alleviate this:
- ch 4 at the beginning of the row where the instructions say to ch 3. This is something you should try in your swatch, as some crocheters with tighter tension find that they really do not need that extra stitch. Others do fine without it.
- When working the last stitch of the row, insert the hook into the row below from back to front, instead of from front to back.
- Working an edge as described at the end of this pattern.
- Wash your blanket once it is complete, and lay it out flat to dry, gently stretching and shaping the edges.
Pattern:
With Color A, ch 207
Row 1: (RS) 1 sc into 2nd ch from hook, 1 sc into each ch to end.
Turn
 Row 2: ch 3, sk first 3 sc (the sc on the end of the row, the one below your turning chain counts as 1)
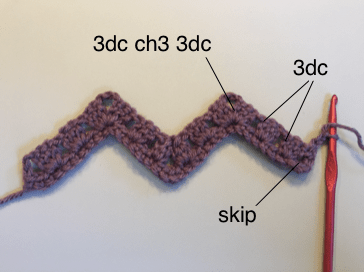
[3dc in next sc, sk next 2 sc] twice, [3 dc, ch 3, 3 dc] into next sc
*sk next 2 sc, 3dc into next sc, sk next 2 sc, dc3tog
sk next 4 sc, dc3tog, sk next 2 sc, 3 dc in next sc, sk next 2 sc
[ 3 dc, ch3, 3 dc] into next sc; rep from * to last 9 sc
sk next 2 sc [3 dc into next sc, sk next 2 sc] twice, 1 dc into last sc.
Turn
Row 3: ch 3, sk sp between turning ch and next 3-dc group, 3 dc into each of next 2 sp
[3dc, ch3, 3dc] into next ch-3 sp
*3 dc into next sp, dc3tog into next sp
sk next sp, dc3tog into next sp, 3 dc into next sp, [3dc, ch3, 3dc] into next ch- 3 sp
rep from * to last 3 sps, 3 dc into each of next 2 sps
1 dc into sp between last 3 dc group and turning ch.
Turn
Row 4: ch 1, sc into first dc of the row (the one right below your turning chain)
sk next dc, 1 sc into each of next 8 dc
*3 sc into next ch 3 sp, 1 sc into each of next 14 sts
repeat from * to last ch-3 sp, 3 sc into last ch-3 sp
1 sc into each of next 8 dc, sk next dc, 1 sc into 3rd st of ch 3.
Turn
 Row 5: Ch 3, sk first 2 sc of the row below (the sc your turning chain is coming out of counts as the first one). 1 dc into each of next 8 sc
*3 dc into next sc (you should be working these into the center stitch of the 3 sc. If not, you may have skipped incorrectly in the beginning of the row.) 1 dc into each of next 7 sc
sk next 2 sc, 1 dc into each of next 7 sc
rep from * to last 11 sc, 3 dc into next sc, 1 dc into each of next 8 sc
sk next 2 sc, 1 dc into the turning chain from the row below.
Turn
Row 6: Ch 3, sk first 2 dc in the row below (the dc below your turning chain counts as 1)
1 dc into each of next 8 dc
*3 dc into next dc (you should be working into center stitch of 3 dc)
1 dc into each of next 7 dc, sk next 2 dc, 1 dc into each of next 7 dc
rep from * to last 10 dc
3 dc into next dc, 1 dc into each of next 8 dc, sk last dc, 1 dc into 3rd st of ch 3, turn.
Row 7: Ch 1, sc into first dc (the same one the turning chain is coming out of), sk 1 dc
1 sc into each dc along row to last dc
sk last dc, 1 sc into 3rd ch of ch 3, turn.
Repeat rows 2-7 as follows, Work through the entire cake (426 yards) of Color A before joining the next cake. Continue adding each color in the order suggested below. After adding the last cake finish the pattern repeat up to row 4, and use the rest of the last color to work the edge.
Erin’s Sequence: A, B, C, A, A, D, B, E, A
Betty’s Sequence: A, B, A, C, A, D, A, B, E
When changing colors, pull the new color through the last two loops of the last stitch of the previous color. Break the yarn for the old color.
Repeat rows 2-4 one time more time. The blanket ends on Row 4.
Finishing
 Edging Row 1: Work a row of sc around the blanket, working 3 sc into each corner and into the point along and top and bottom of the blanket.
When working sc into the sides of the blanket, use the turning chains and the dc stitches as foundation chains, working under 2 threads of each stitch and leaving one thread below. This creates a beautiful even edge to the work.
Edging Row 2: hdc around the edge, working 3 stitches into each point and skipping 2 stitches in each valley around.
Weave in all ends.
This pattern is the intellectual property of Betty McKnit/Beth Elliott, and it is protected by copyright. Publishing corrections, translations, written or video tutorials, or variations of this pattern, online or elsewhere, without written permission from the owner is a violation of copyright.
Join us in the 6-Day Kid Blanket Facebook Group
Video tutorials available at
http://tinyurl.com/6DayKidBlanket

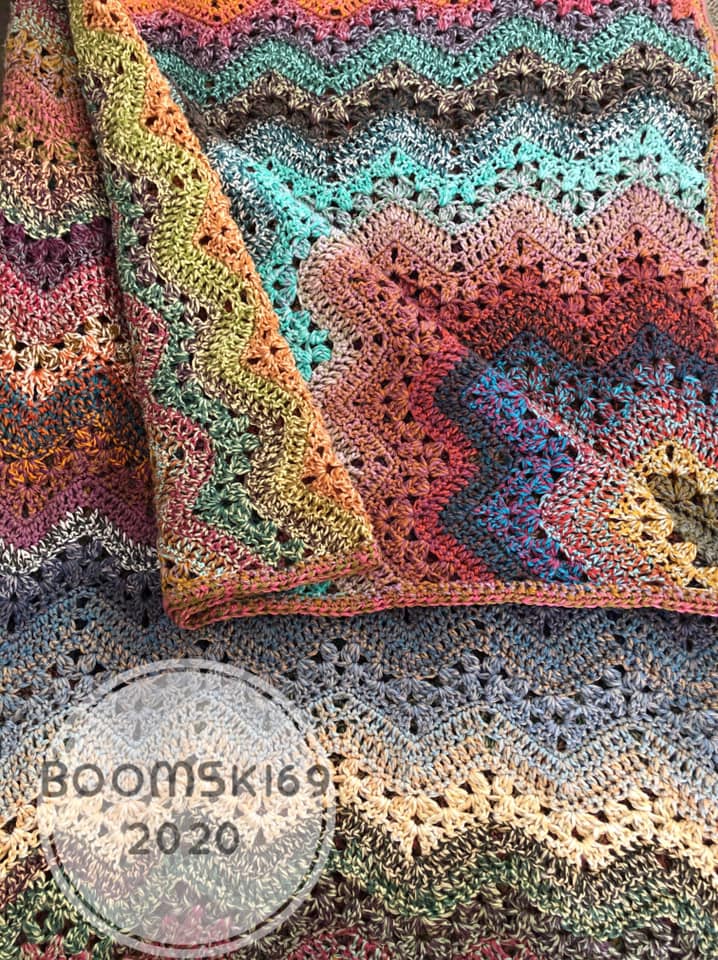
The stitch pattern is “Vivid Chevrons” #110 from 200 Ripple Stitch Patterns by Jan Eaton.
Reprinted with permission from Quarto Publishing.
Thank you to Erin Boom Iske, who came up with this colorful 6DKB Comfort Blanket Variation.
Thank you to Marian Faries D’Ambrosio for her tip about working the edge stitches from the back to the front to alleviate rolling.
Thank you to the many amazing crocheters of the 6-Day Kid Blanket Facebook Group. May your blankets be loved and cherished for years to come.
*Disclaimer* This pattern contains affiliate links.
Support Betty on Patreon! Patrons receive behind-the-scenes content, access to ad-free .pdf’s of Betty’s pattern library, new pattern pre-releases, community zoom calls, private coaching with Betty and more! Sign up on Patreon, and make a pledge to join the fun!
© Betty McKnit, aka Beth Elliott 2008 – 2020