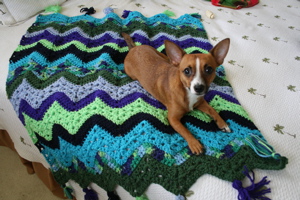
Respect the Swatch
Stay in touch! Sign up for Betty’s Newsletter.
This page contains affiliate links. If you click these links and buy something on the page they take you to, I may, at no additional cost to you, earn a commission. I only affiliate with products and companies I feel good about. Thank you for your support!
SWATCH.
(just do it.)
The first and most important piece of advice we have for you about any 6-Day Blanket is that first timers should MAKE A SWATCH.
No one ever wants to swatch (including me), but in the case of the 6-Day Blanket, a swatch can really save you a lot of headache and frogging later. This is especially true if you plan to resize or use a different weight than what is called for in the pattern.
There are many reasons to swatch, here are a few:
1) Crochet like a pro. Nothing screams “newbie” louder than the words “I never swatch!” That might work for some beginner projects, but it won’t help you with this one. Swatching is not something to be ashamed of, nor does it show inexperience or lack of crochet knowledge. In fact, the opposite is true.
2) Learn the stitches. There are a couple tricky parts. Learn first on fewer stitches. It’s much less heartbreaking to frog a row of 37 than a row of 207.
3) Determine hook size/gauge. I usually start with the recommended hook on the label and go up or down depending on what drape I want to achieve. This is your decision, no one can tell you what is right or wrong for your yarn, hands, and tension. Remember with heavier yarn, and a larger blanket, you may want to tighten up your gauge to account for stretching.
4) Resize accurately. The original pattern includes a chart with some common sizes and weights of yarn, but if you want to check your gauge against it, or make a size that’s not included, take your swatch and measure it and do some math. I have a video to help you do this on my YouTube channel at https://tinyurl.com/6dkbresize
Resizing will be even more important if you’re making one of the 6-Day Garments, such as the 6-Day Shrug or Shrug Wrap. Under no circumstances should you ever crochet or knit a garment without swatching for size.
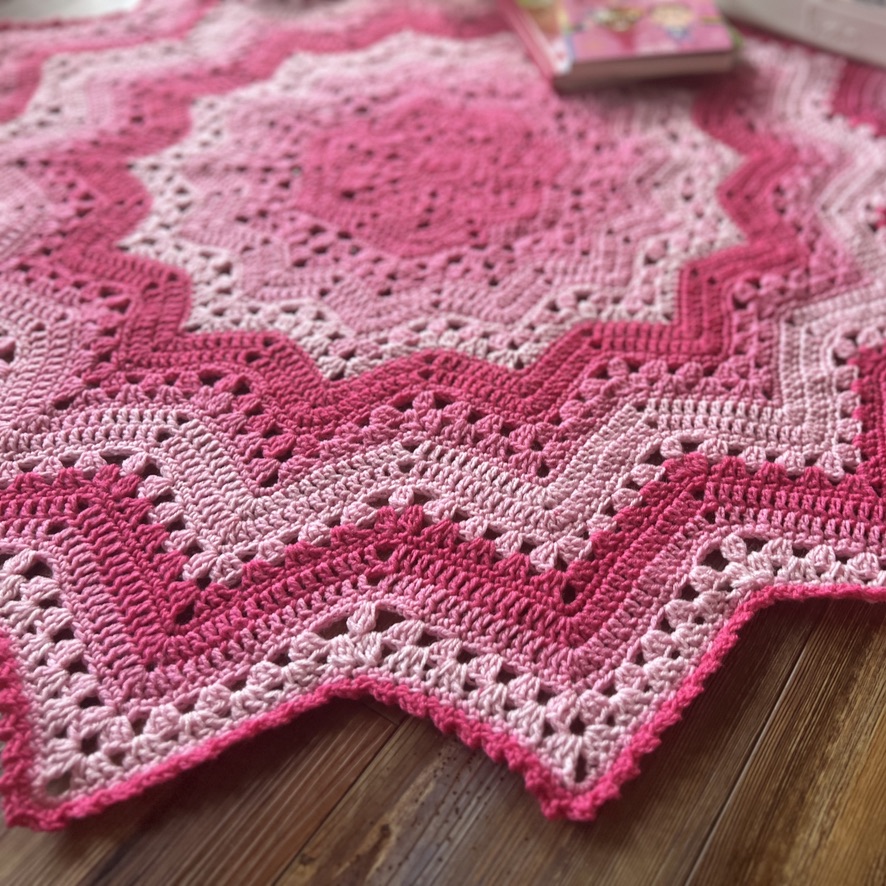
5) Decide on stripes. This is one of the most interesting features of this pattern. There is an infinite variety of looks that you can achieve by changing colors on different rows. As written, the pattern will make defined chevron stripes like the ones on the original blanket. Some creative people have opted to change on different rows in order to make the granny stitches “pop” and create a “snowflake” look.
Some popular striping effects have nicknames. The original pattern was “Vivid Chevrons” and makes defined zig zag stripes. The “Snowflake Effect” shows more texture, the “Half Snowflake” changes colors with the pattern repeats (but creates complications if you want the top and bottom of the blanket to be symmetrical) and the “Popsicle Effect” is a bit like Snowflake but with more color changes. Australian Confetti is a back and forth color change that creates a confetti look. Check my blog posts for more detailed information.
6) Determine yardage. I have provided yardage for different options in the original 6-Day Blanket Pattern. You can make a more accurate estimate using your swatch with your chosen yarn by either unraveling and measuring it, or weighing it to determine how much yarn you will need.
7) Nip off frogging in the bud. If you skip swatching and come to the 6DKB group, or email me with your questions, the first response is always going to be “Did you swatch?” or “Did you swatch along with the video?” The reason for that is not that I want to shame you, I frankly hate being the person that always says “YoU hAvE tO sWaTcH!”
The reason I insist people who join my group swatch is because it truly is the path of least resistance to a 6-Day Blanket. Take the time to swatch first. It only takes about 30 minutes, and trust me, when you’re frogging your third row for the fifth time you will wish you had.
8) Figure out the straight start and work out your stripe symmetry. The straight start and end to the 6-Day Blanket were developed by request, and also to correct a stripe symmetry issue with the 6-Day Viral Stripe. If you would like to swatch with the straight start, the pattern is included below.
Pattern: 6-Day Kid Blanket Swatch – Chevron Start
The 6-Day Kid Blanket pattern is written in such a way that you can chain any multiple of 17 stitches +3 and follow the pattern as written and it will work. But here is a cheat sheet for your swatch.
Works with any type of yarn and appropriate hook.
Abbreviations:
ch: chain
dc: double crochet
dc3tog: Work dc3tog into one stitch (like a cluster)- not over three stitches (as you would a decrease)
[yarn over, pull up a loop, pull through two loops] 3 times in the same st/sp. Yarn over, and pull through all 4 loops on the hook. (Be sure to pull up your loop in the same st/sp every time.) dc3tog complete.
rep: repeat
sc: single crochet
sk: skip
sp(s): space(s)
st(s): stitch(es)
Foundation chain: 37
Row 1: sc into 2nd ch from hook, 1 sc into each chain until end.
Turn
Row 2: ch 3, sk first 3 sc [3dc in next sc, sk 2 sc] twice, [3dc, ch3, 3dc] into next sc
Sk next 2 sc, 3 dc into next sc, sk next 2 sc, dc3tog, skip next four sc, dc3tog, sk next 2 sc, 3 dc in next sc, sk next 2 sc [3dc, ch 3, 3 dc] into next sc;, sk next 2 sc [3 dc into next sc, sk 2] twice, 1 dc into last sc.
Turn (For Snowflake Effect change colors here)
Row 3: ch 3, sk sp between turning chain and next 3dc group, 3 dc into each of next two spaces [3dc, ch3, 3dc] into next ch 3 space, 3 dc into next sp, dc3tog into next sp, skip next space, dc3tog into next sp, 3dc into next sp, [3dc, ch3, 3 dc] into next ch3 sp, 3dc into each of next 2 spaces, 1 dc into sp between last 3dc group and turning chain.
Turn
Row 4, ch 1, sc into first dc of the row, skip next dc, 1 sc into each of next 8 dc, 3 sc into next ch 3 space, 1 sc into each of next 14 stitches, 3 sc into next ch3 space, 1 sc into each of next 8 dc, sk next dc, 1 sc into 3rd st of ch3.
Turn (for Vivid Chevrons, change colors here).
Row 5: Ch 3, sk first 2 sc of row below, 1 dc into next 8 sc, 3dc into next sc (you should be in center stitch) 1 dc into next 7 sc, sk next 2 sc, 1 dc into each of next 7 sc, 3 dc into next sc (center stitch) 1 dc into next 8 sc, skip next 2 sc, 1 dc into turning ch of row below.
Turn
Row 6: Ch 3, sk first 2 dc of row below, 1 dc into next 8 dc, 3 dc into next dc (center stitch), 1 dc into next 7 dc, sk next 2 dc, 1 dc into next 7 dc, 3 dc into next dc, 1 dc into each of the next 8 dc, sk last dc, 1 dc into third st of ch 3.
Turn (for Vivid Chevrons, change colors here).
Row 7: ch 1, sc into first dc, sk 1 dc, 1 sc into each dc along row to last dc, sk last dc, 1 sc into 3rd ch of ch3.
Turn (for Viral Stripes, change colors here, but do not end on this row!)
Repeat rows 2-4, changing colors appropriately. The blanket ends on Row 4.
Stay in touch! Sign up for Betty’s Newsletter.

An international community of yarnful makers and friends.
- New pattern pre-releases
- Exclusive patterns never released to the public
- Have access to Betty’s ad-free .pdf library of patterns (3-4 patterns/month)
- Access to Betty’s Design Workshop
- Uplevel your knitting and crochet skills
- Enjoy regular crochet alongs, knit alongs, and classes
- Make like-minded friendships during our weekly social and educational events
- Bonus content every month
Pattern: 6-Day Kid Blanket Swatch – Straight Start
Did you know that you can start and end your 6-Day project with a straight edge? You can swatch by chaining any multiple of 13 + 4. Here is a pattern for swatching for the 6-Day pattern using the straight start and square off top.
HERE is an article about the difference between Straight and Chevron starts to the 6DKB.
Works with any type of yarn and appropriate hook.
Abbreviations:
ch: chain
dc: double crochet
dc3tog: Work dc3tog into one stitch (like a cluster)- not over three stitches (as you would a decrease)
[yarn over, pull up a loop, pull through two loops] 3 times in the same st/sp. Yarn over, and pull through all 4 loops on the hook. (Be sure to pull up your loop in the same st/sp every time.) dc3tog complete.
hdc: half double crochet
rep: repeat
sc: single crochet
sk: skip
sl st: slip stitch
sp(s): space(s)
st(s): stitch(es)
Foundation chain: 30
Straight Start Row 1: starting in second ch from hook, sc across.
Turn
Straight Start Row 2: ch 1, 5 sc, 6 hdc, *7 sc, 6 hdc, repeat from * to last 5 sts, 5 sc.
Turn
Straight Start Row 3: ch 1, 3 sc, *3 hdc, 2 dc, ch 2, 2 dc, 3 hdc, sc, sl st, sc, repeat from * to last 13 sts , 3 hdc, 2 dc, ch 2, 2 dc, 3 hdc, 3 sc.
Turn
Straight Start Row 4: ch 1, 3 sc, *3 hdc, 2 dc, [dc, ch 1, dc] in ch 2 sp, 2 dc, 3 hdc, sc, sl st, sc, repeat from * to last 13 sts, 3 hdc, 2 dc, [dc, ch 1, dc] in ch 2 sp, 2 dc, 3 hdc, 3 sc.
Turn
Straight Start Row 5: ch 1, sc, sk 1, 7 sc, *3 sc in ch sp, 7 sc, sk 1, 7 sc, repeat from * to last peak, 3 sc in ch sp, 7 sc, sk 1, sc.
Turn
You should now be set up to start at row 2 of the 6DKB.
Row 2: ch 3, sk first 3 sc [3dc in next sc, sk 2 sc] twice, [3dc, ch3, 3dc] into next sc
Sk next 2 sc, 3 dc into next sc, sk next 2 sc, dc3tog, skip next four sc, dc3tog, sk next 2 sc, 3 dc in next sc, sk next 2 sc [3dc, ch 3, 3 dc] into next sc;, sk next 2 sc [3 dc into next sc, sk 2] twice, 1 dc into last sc.
Turn (For Snowflake Effect change colors here)
Row 3: ch 3, sk sp between turning chain and next 3dc group, 3 dc into each of next two spaces [3dc, ch3, 3dc] into next ch 3 space, 3 dc into next sp, dc3tog into next sp, skip next space, dc3tog into next sp, 3dc into next sp, [3dc, ch3, 3 dc] into next ch3 sp, 3dc into each of next 2 spaces, 1 dc into sp between last 3dc group and turning chain.
Turn
Row 4, ch 1, sc into first dc of the row, skip next dc, 1 sc into each of next 8 dc, 3 sc into next ch 3 space, 1 sc into each of next 14 stitches, 3 sc into next ch3 space, 1 sc into each of next 8 dc, sk next dc, 1 sc into 3rd st of ch3.
Turn (for Vivid Chevrons, change colors here).
Row 5: Ch 3, sk first 2 sc of row below, 1 dc into next 8 sc, 3dc into next sc (you should be in center stitch) 1 dc into next 7 sc, sk next 2 sc, 1 dc into each of next 7 sc, 3 dc into next sc (center stitch) 1 dc into next 8 sc, skip next 2 sc, 1 dc into turning ch of row below.
Turn
Row 6: Ch 3, sk first 2 dc of row below, 1 dc into next 8 dc, 3 dc into next dc (center stitch), 1 dc into next 7 dc, sk next 2 dc, 1 dc into next 7 dc, 3 dc into next dc, 1 dc into each of the next 8 dc, sk last dc, 1 dc into third st of ch 3.
Turn (for Vivid Chevrons, change colors here).
Row 7: ch 1, sc into first dc, sk 1 dc, 1 sc into each dc along row to last dc, sk last dc, 1 sc into 3rd ch of ch3.
Turn (for Viral Stripes, change colors here, but do not end on this row!)
Repeat rows 2-4, changing colors appropriately. Continue to Square-off Rows.
The Square-Off rows only work after Row 4. Ending the 6-Day Kid Blanket on Row 7 will leave you with a top edge that is wider than the starting edge of the pattern. Keep this in mind when planning your stripes. You can read more about stripe symmetry in the 6-Day Viral Blanket pattern.
Square Off Row 1: After completing row 4, turn.
Ch 3. Counting the stitch under the turning chain, sk 2, 3 dc, 3 hdc, 2 sc, sl st, 2 sc *3 hdc 2 dc sk 2 2 dc, 3 hdc, 2 sc sl st, 2 sc. Repeat from * to last 8 sts, 3 hdc, 3 dc, sk 1, dc in last sc.
Turn
Square Off Row 2:
Ch 3. Counting the stitch under the turning chain, sk 2, 3 dc, 3 hdc, sc, sl st, sc, *3 hdc, 2 dc, sk 2, 2 dc, 3 hdc, sc, sl st, sc. Repeat from * until 8 sc remain, 3 hdc, 3 dc, sk 1, dc in last sc.
Turn
Square Off Row 3:
Ch 3, sk 2 (counting the stitch below the turning chain), 3 hdc, 7 sc, 6 hdc, 7 sc until 5 st remain, 3 hdc, sk 1, hdc in last stitch.
Turn
Square Off Row 4: Ch 1, sc across.
Fasten Off. Weave in all ends.


