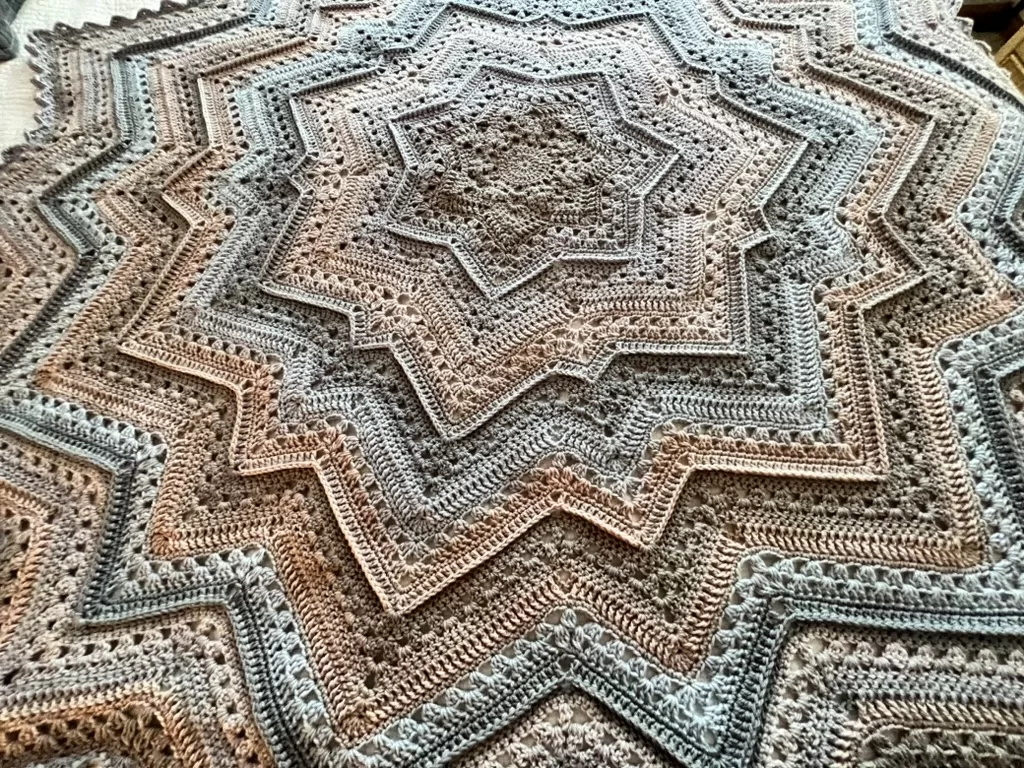
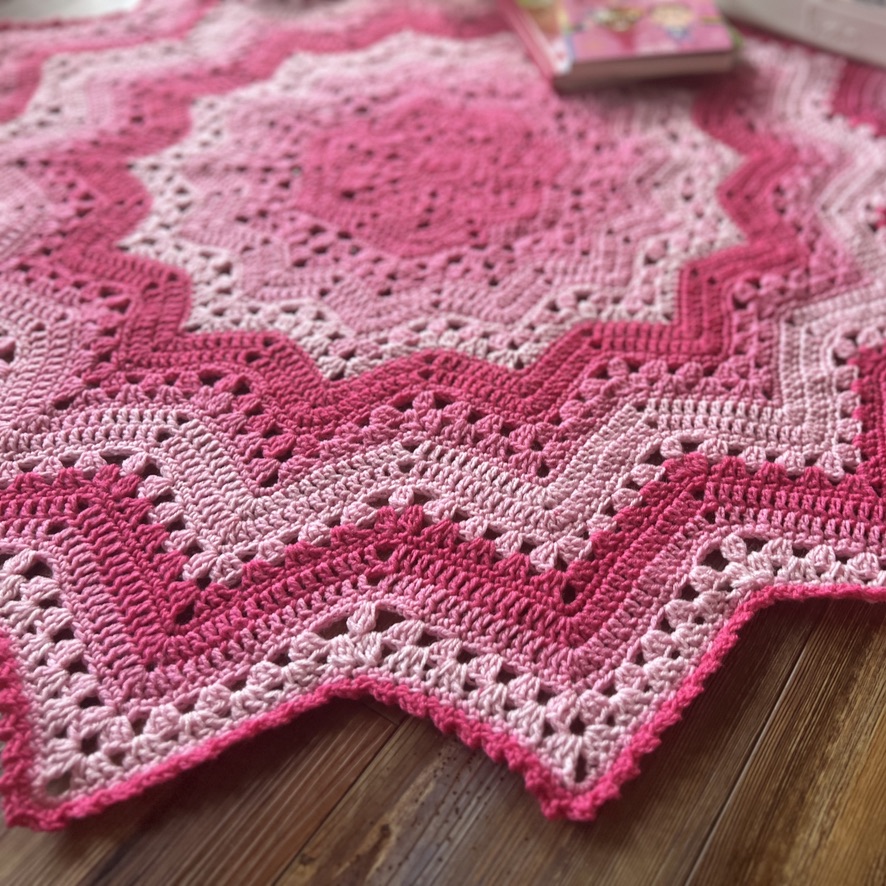
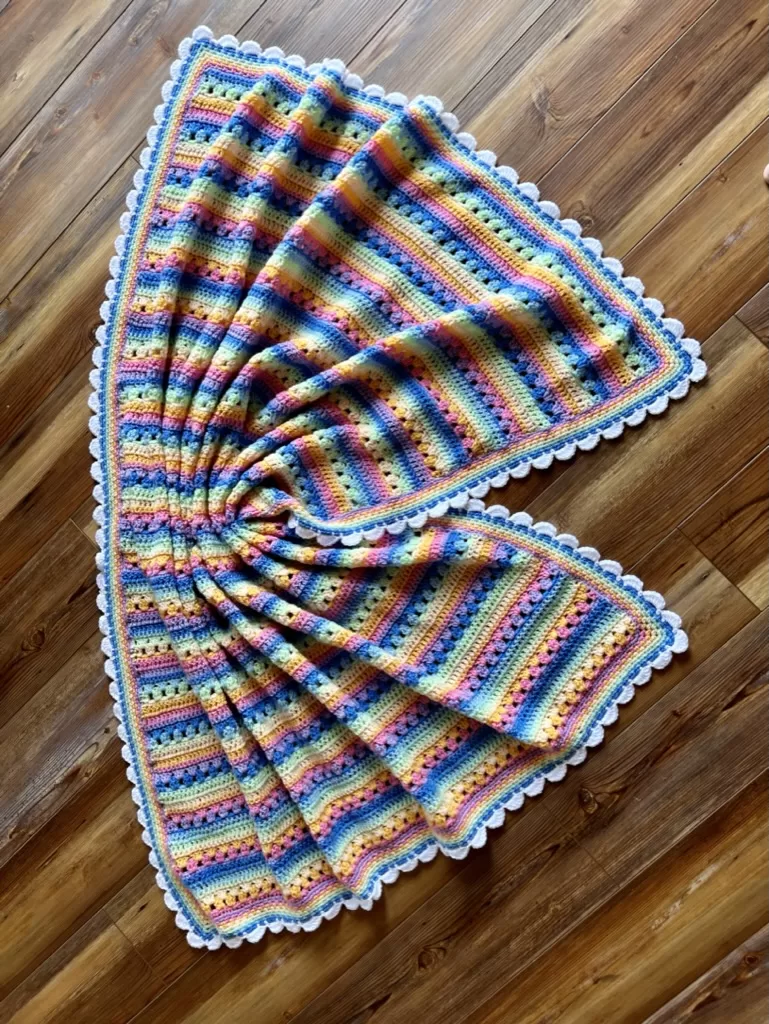
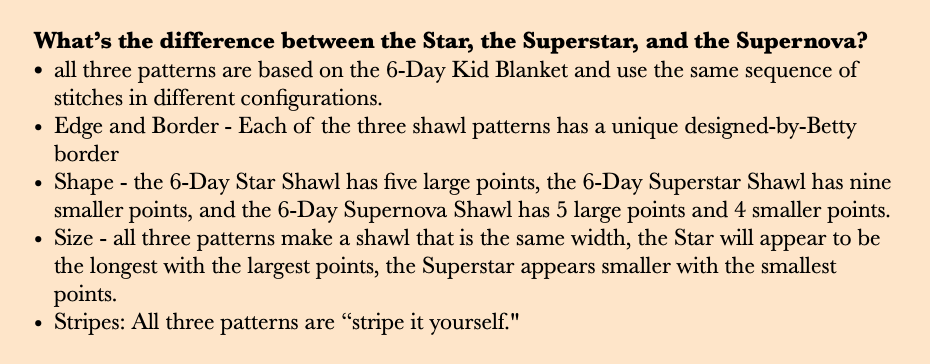
6-Day Star Shawl
6-Day Star Shawl
A variation of the classic crochet pattern the
6-Day Kid Blanket by Betty McKnit
Introduction
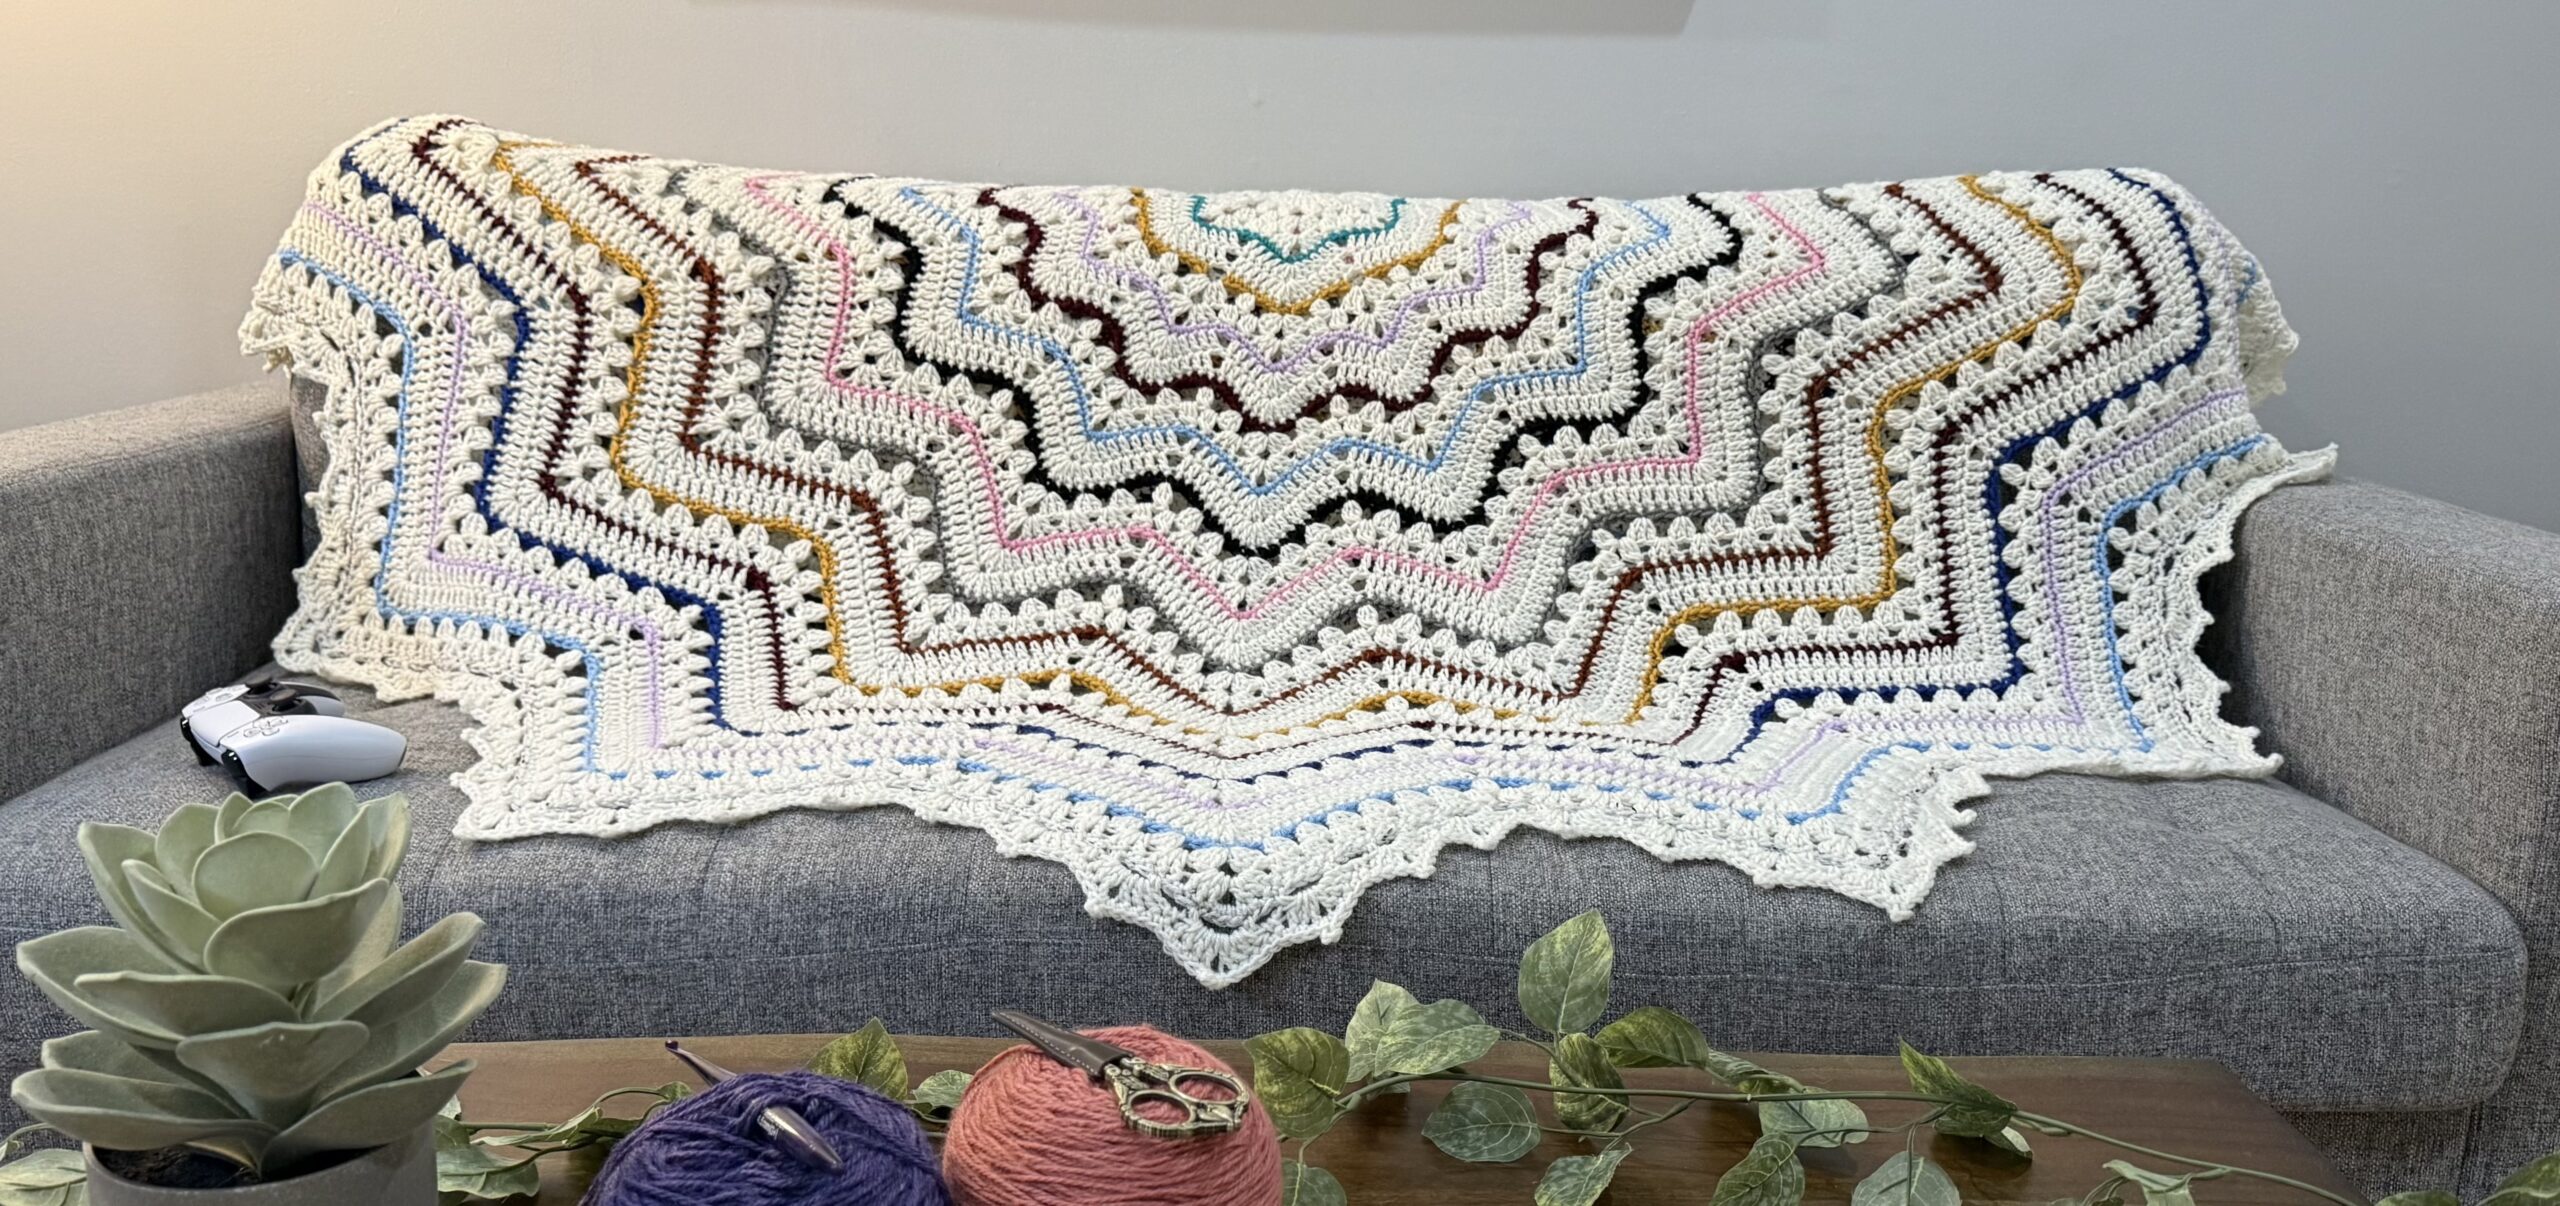
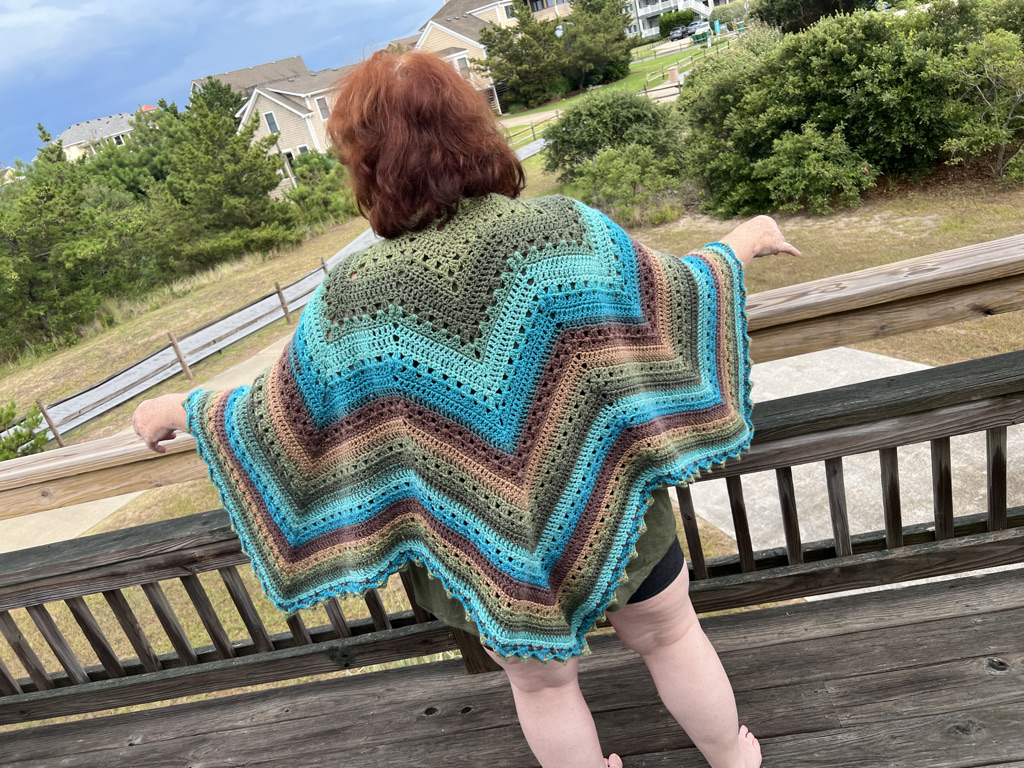
This pattern is an adaptation of the 6-Day Star Blanket by Betty McKnit. It creates a slightly more than half-circular star-shaped shawl with five large points and a custom border. There are also shawl adaptations the 6-Day Superstar and the 6-Day Supernova blanket patterns.
Details:
US Terminology
Skill Level: Easy
Finished Size: The shawls shown are approx. 70”wide, 39” long. This pattern is simple to resize; you start in the middle and continue until it is the size you desire.
Materials:
Yarn: 1700 yards of #3 Weight Yarn
or 1500 yards of #4 Weight Yarn
Shown in Lion Brand Mandala in the color Dragon
Hook: Furls Odyssey Size I (5.5 mm) for #3 Weight or Size J (6 mm) for 4 Weight
Gauge: 16 sc x 20 over 4”
Abbreviations
bet: between
camel st: hdc in the third loop
ch: chain
dc: double crochet
dc3tog: double crochet 3 together cluster (see below)
fphdc: front post half double crochet
hdc: half double crochet
picot: (sc, ch 2, sc in side of sc just made)
sc: single crochet
sl st: slip stitch
sp(s): space(s)
st(s): stitch(es)
Special Stitches:
dc3tog (cluster) – this stitch is a cluster, not a decrease. It is worked as follows: yo, pull up a loop, pull through two loops, *yo, pull up a loop IN THE SAME STITCH/SPACE, pull through two loops, repeat from *, yo and pull through all loops on the hook. dc3tog complete.
About the row numbers:
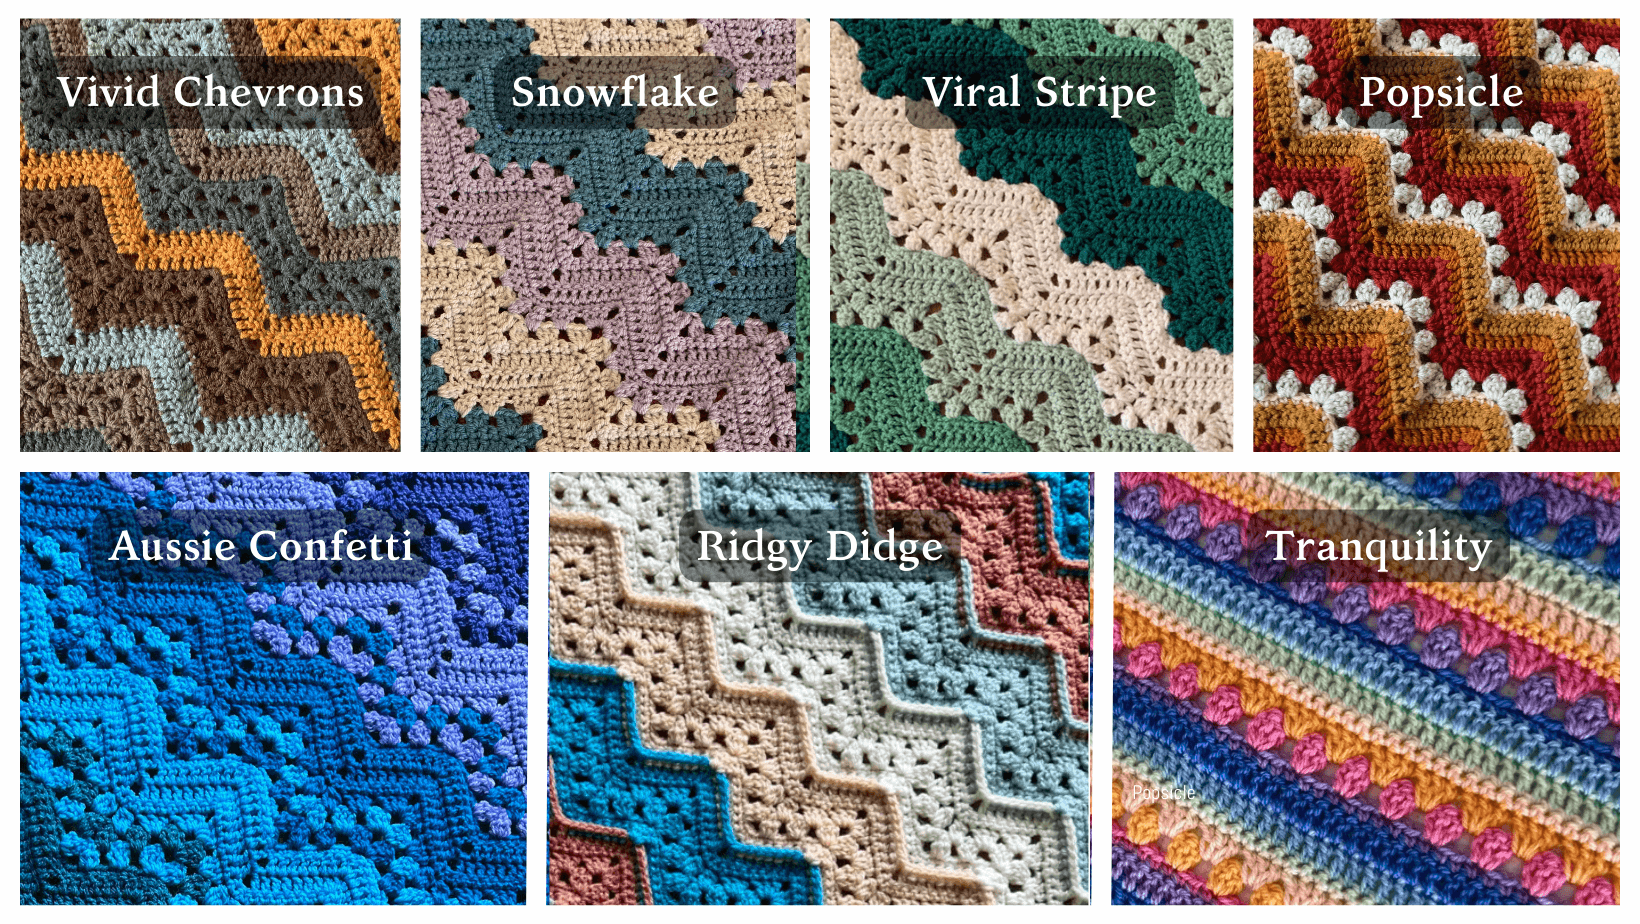
In order to provide consistency across all of the 6DKB pattern variations, I’ve numbered the rows to correspond to the original 6-Day Kid Blanket pattern. The cluster rows are always Row or Rows 2 and 3, the dc rows are always Rows 5 and 6, and the sc rows are always Rows 4 and 7. This makes it easy to adapt any pattern to the Snowflake Effect, Viral Stripes, Popsicle, or the original Vivid Chevrons, which are all different ways to stripe your 6-Day Kid Blanket.
There are no color changes given for this pattern since I used self-striping cake yarn. Check this article about changing colors on the 6-Day Kid Blanket for ideas for different ways to stripe this project.
Work into st below the turning chain unless directed otherwise.
Begin Pattern
Ch 4, join with sl st to form a ring.
Set-up Row 1: ch 2 (does not count), 9 dc into ring. (9 dc total)
Turn
Set-up Row 2: ch 2 (does not count), 2 dc in same st. 2 dc in each st cross. (18 dc total)
Turn
Set-up Row 3: ch 2, dc, *ch 3, 2 dc, ch 1, 2 dc, repeat from * to last dc, ch 3, dc in last dc. (5 ch 3 sps and 4 ch 1 sp. Note: 2 dc are NOT made in the same st.)
Turn
Set-up Row 4: ch 3, [3 dc, ch 3, 3 dc] in ch 3 sp. *dc3tog in ch 1 sp, [3 dc, ch 3, 3 dc] in ch 3 sp, repeat from * across, dc in top of turning chain.
Turn
Set-up Row 5: ch 3, *[3 dc, ch 3, 3 dc] in ch 3 sp, dc3tog in next 2 sps, repeat from * to last peak, [3 dc, ch 3, 3 dc] in last ch 3 sp, dc in turning ch.
Turn
Set-Up Row 6: ch 1, sc in same st, sc in each st across, working 3 sc in ch 3 sps, finish by sc in turning ch. (55 sc).
Turn
Set Up Row 7: ch 3, counting the st under your ch sk 2, 3 dc, *[5 dc in center sc from row below], 4 dc, sk 2, 4 dc, repeat from * to last peak, [5 dc in center sc from row below], 3 dc, sk 1, dc in last sc.
Turn
Set Up Row 8: ch 3, counting the st under your ch sk 2, 4 dc, *[5 dc in center dc from row below], 5 dc, sk 2, 5 dc, repeat from * to last peak, [5 dc in center sc from row below], 4 dc, sk 1, dc in turning ch.
Turn
Set Up Row 9: ch 1, sc in same st, 6 sc, *4 sc in center dc, 14 sc, repeat from * to last peak, 4 sc in center dc, 6 sc, sc in turning ch.Turn
Proceed to Row 2
You will be guided to work the rows in the proper order; don’t let the numbers throw you off or overthink a change in the sequence. You’ll proceed from Setup Row 9 to Row 2. Trust the pattern, it works!
Row 2: ch 3, counting the st under your chain, sk 3, 3 dc in next sc, *[sk 2, 3 dc in next st], repeat from * to top of the mountain, [3 dc, ch 3, 3 dc] in third of 4 sc, **[sk 2, 3 dc in next st], repeat from ** making last 3 dc in the third sc from the center valley st, sk 2, dc3tog in the center valley st, repeat from * to last 2 sts, sk 1, dc in last st.
Turn
Row 3: ch 3, sk sp between turning ch and 3 dc, *3 dc in next sp, repeat from * to top of the mountain, [3 dc, ch 3, 3 dc] in ch 3 sp, **3 dc in next sp, repeat from ** to the valley, dc3tog in sps before and after the dc3tog in the row below, repeat from * to end, dc in last turning ch sp.
Turn

Row 4: ch 1, sc in same sp, 9 (15, 21, 27, etc) sc, * 3 sc in ch 3 sp, 20 (32, 44, 56, etc.) sc, repeat from * to last ch 3 sp, 3 sc in ch 3 sp, 9 (15, 21, 27, etc) sc, sc in turning ch.
Turn
On subsequent sc rounds, the number of scs on either side of the mountain will increase by 6. The numbers in parentheses show the number of scs on each subsequent repeat of the pattern.
Row 5: ch 3, counting the st beneath your ch sk 2, 9 (15, 21, 27…) dc, *[5 dc in center sc from row below], 10 (16, 22, 28…) dc, sk 2, 10 (16, 22, 28…) dc, repeat from *, 9 (15, 21, 27…) dc, sk 1, dc in last st.
Turn
Row 6: Ch 3, counting the st beneath your ch sk 2, 10 (16, 22, 28…) dc, *[5 dc in center dc from row below], 11 (17, 23, 29…) dc, sk 2, 11, (17, 23, 29…) dc, repeat from *, 10 (16, 22, 28…) dc, sk 1, dc in last st.
Turn
Row 7: ch 1, sc in same st and each st across, making 4 sc in each center of 5 dc from the row below. (You should have 13 (19, 25, 31, etc.) sc on each side of the peak and 4 sc in each center dc st).
Repeat Rows 2-7 to desired length. You can end on row 4 or 7. Do not fasten off or turn. Proceed to Top Edge Row 1.
An international community of yarnful makers and friends.
- New pattern pre-releases
- Exclusive patterns never released to the public
- Have access to Betty’s ad-free .pdf library of patterns (3-4 patterns/month)
- Access to Betty’s Design Workshop
- Uplevel your knitting and crochet skills
- Enjoy regular crochet alongs, knit alongs, and classes
- Make like-minded friendships during our weekly social and educational events
- Bonus content every month
Top Edge
Top Edge Row 1: On your final row, make 3 sc in the last st of the row (row 4 or 7) and continue down the sides the rows/across the top edge of the shawl. Treating the turning chains and the sc and dc stitches like foundation chains, work sc across the top edge working under 2 threads of each stitch and leaving one thread below. This creates a beautiful even edge to the work. The number of sc you will put in each stitch will vary depending on your tension. Lay your work down often to check that your edge is laying flat and adjust the number of stitches accordingly.
Turn.
Top Edge Row 2: ch 2, hdc in each st across.
Turn
Top Edge Row 3: ch 1, (sc, ch 1, sc) in same sp, *sk 1, (sc, ch 1, sc) in next st. Repeat from * across, end with sc in last st. Do not turn or fasten off. Proceed to Border Row 1.
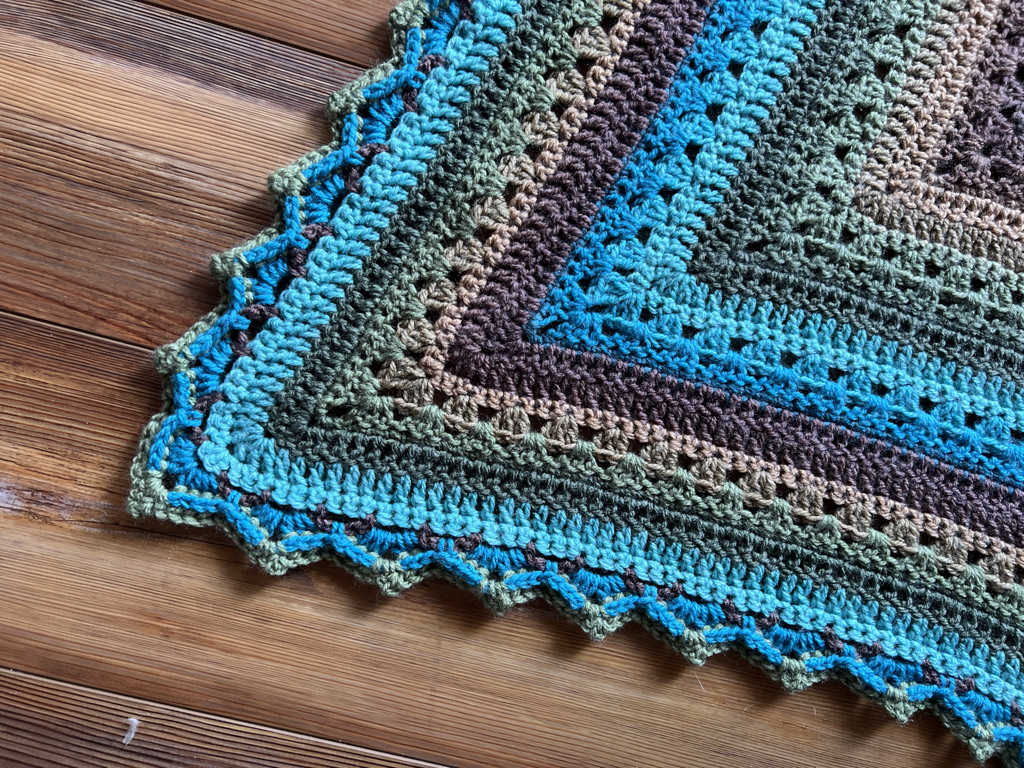
Border
Border Row 1: Continuing from Top Edge Row 3, ch 3, sc in the first sc of the last shawl row. *sk 2, ch 3, sc in next st, repeat from * across. Fudge your skips so that the ch sps fall across the peaks and valleys, and so that you have an even number of ch sps between each peak, and an odd number on each end. (I had 17 sps on each end, one over each peak, one over each valley, and 16 in between peaks).
Turn
Border Row 2: ch 1, sc in same st, ch 3, sc in ch 3 sp, *(3 dc, ch 2, 3 dc) in ch 3 sp, sc in next ch 3 sp, repeat from * to peak, (4 dc, ch 3, 4 dc) in ch 3 sp in peak, repeat from * to valley, sc in valley sp. Continue in this pattern across, end with sc in last ch 3 sp, ch 3, sc in last sc.
Turn
Border Row 3: ch 3, sc in ch 3 sp. *3 fphdc, (sc, picot, sc) in ch sp, 3 fphdc, sk 1, repeat from * to peak, 4 fphdc, (sc, picot, sc) in ch sp, 4 fphdc, in peak, sk 1, repeat from * across. End with sc in last ch 3 sp, ch 3, sc in last sc.
Fasten off. Weave in all ends.
Optional: Add frog closure to top edge to close in front.
Pattern Tested by KD Wright, Peta Gehrmann, Laura Cromwell, Lecisha Eacholes and Dee Louise.
Special thanks to KD Wright, Peta Gehrmann, and to the citizens of the Betty McKnitiverse. for their work on the development of this pattern.
Join us in the 6-Day Kid Blanket Facebook Group for help with this pattern. Video tutorials for the 6-Day Star Blankets, which you may find helpful in working this pattern, are available on my YouTube Channel.
This pattern contains affiliate links. If you click these links and buy something on the page they take you to, I may, at no additional cost to you, earn a commission. I only affiliate with products and companies I feel good about. Thank you for your support!
Betty McKnit (Beth McKee Elliott) is a knitting and crochet designer and teacher. She has been crocheting and knitting since she was a little girl and enjoys making and designing simple, versatile “go-to” projects that can be adapted for different yarns and sizes. Her most well-known design is the viral crochet pattern the 6-Day Kid Blanket. She promotes creativity as a joyful process and daily knitting/crochet as a mindfulness practice.
This pattern is 100% original and the intellectual property of Betty McKnit/Beth Elliott. This pattern, The 6-Day Kid Blanket, “6DKB,” 6-Day Star Blanket, and derivative works are protected by copyright. Publishing translations, corrections, variations, or tutorials of this pattern, online or elsewhere without written permission from the owner is a violation of copyright.
The stitch pattern is “Vivid Chevrons” #110 from 200 Ripple Stitch Patterns by Jan Eaton inspired this design.Reprinted with permission from Quarto Publishing.
Items created with this pattern may be used for commercial sale with credit to Betty McKnit in your listing.
Be sure to tag @bettymcknit in your social media posts so I can enjoy your beautiful creations.
Border is inspired by Around the Corner Crochet Borders and Every Which Way Crochet Borders by Edie Eckman.