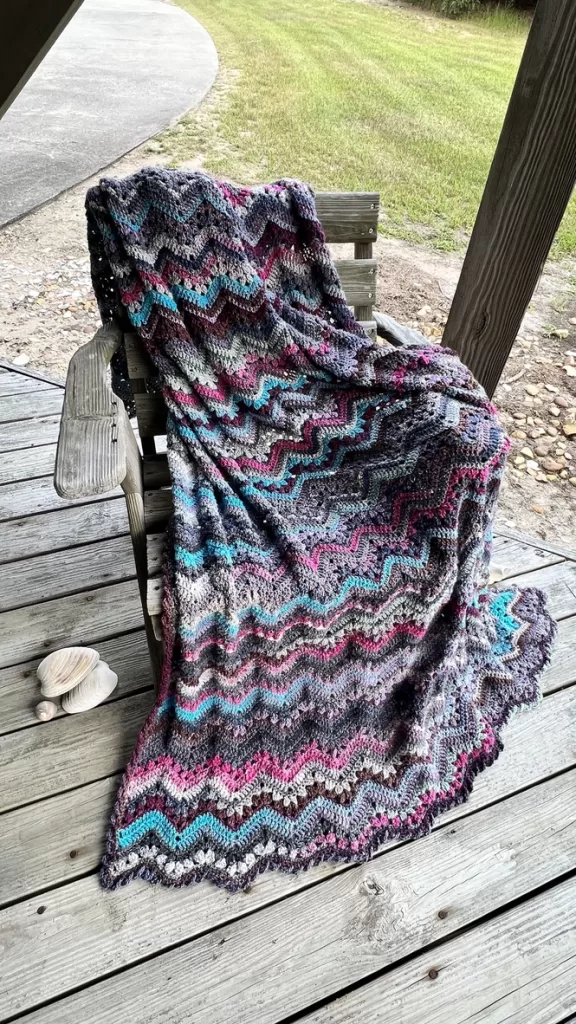
6-Day Beach House Blanket featuring Noro Yarn
This page contains affiliate links. If you click these links and buy something on the page they take you to, I may, at no additional cost to you, earn a commission. I only affiliate with products and companies I feel good about. Thank you for your support!
Pattern kits in six colorways are available for this project at Knitting Fever

Introduction:
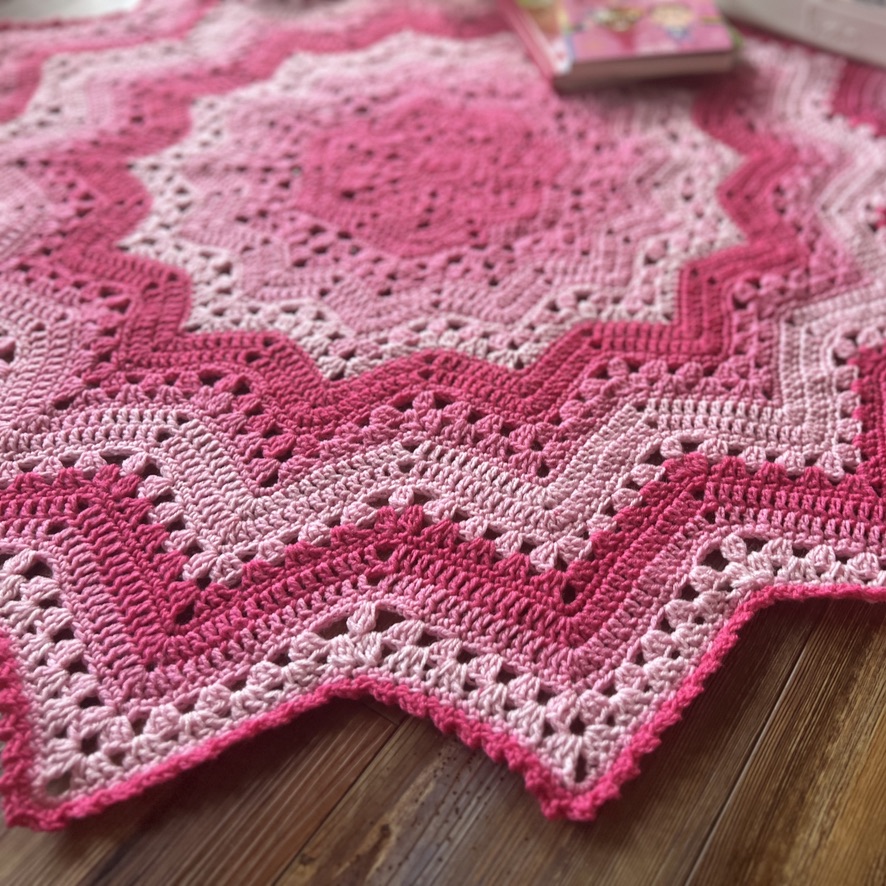
The 6 Day Beach House Blanket is the ultimate 6-Day Blanket version made with the most perfect yarn. This pattern makes a large blanket with the unmistakably unique colors and textures of Noro Yarn. This is an heirloom project that you won’t want ever to stop crocheting. If you have one dream project to splurge on, make this the one.
Two years ago, in an act of radical self-care, I moved to the Outer Banks of North Carolina to be near the ocean and experience the healing power of the beach on a daily basis. The salty air and waves and walking in the wet sand of the surf have always brought me so much happiness.
This blanket pattern is a symbol of how far the humble little 6-Day Kid Blanket and I have come. I never thought I would be designing on Noro yarn and it is a dream come true, just like my beach house life. May your Beach House Blanket be part of your healing journey. I hope it brings you comfort and joy.
Details:
US Terminology
Finished Size: 60”x 84”
Skill level: Easy
Gauge: 7 sc – 8 rows = 4″ (10 cm)
Materials
3936 yards (6 balls) of Noro Tsubame Yarn (Shown in Color #12)
#4 Worsted Weight
50% silk, 25% wool, 25% polyamide
Hook: Furls Odyssey Hook Size I (5.5 mm)
Optional: Scented Stitches Aromatherapy Balm
What’s the difference between this pattern and the original 6-Day Blanket?
- Yarn: This version is sized specifically for Noro Yarns.
- Size – the original blanket was toddler size, this is a full-sized blanket.
- Yarn Weight – The original blanket used chunky weight yarn, this pattern uses worsted.
- Edge and Border – this pattern has instructions for an edge and a custom border, the original only gave instructions for tassels.
- Stitches: this pattern uses the same stitches as the original 6-Day Kid Blanket
| US terms abbreviation | UK terms abbreviation |
| single crochet sc | double crochet dc |
| half double crochet hdc | half treble crochet htr |
| double crochet dc | treble crochet tr |
Abbreviations
ch: chain
dc: double crochet
dc3tog: double crochet 3 together cluster
hdc: half double crochet
sc: single crochet
sp(s): space or spaces
st(s): stitch(es)
yo: yarn over

Special Stitches:
dc3tog (cluster) – this stitch is a cluster, not a decrease. It is worked as follows: yo, pull up a loop, yo, pull through two loops, *yo, pull up a loop IN THE SAME STITCH/SPACE, yo and pull through two loops, repeat from *, yo and pull through all loops on the hook. dc3tog complete.
Some things to consider before you start
Does it really only take 6 days to make?
No. The original 6-Day Blanket was toddler sized made with chunky weight yarn. This blanket is much larger and uses a lighter weight yarn. While it is a very quick make, the average speed crocheter should be able to complete this project in about two weeks. I call all of my projects that use these stitches “6-Day” projects. Most of them can be made in six days (or less).
Make a swatch!
If this is your first time making a 6-Day Blanket, before you begin, I suggest you make a swatch on 37 chains while following along with my video tutorials on my YouTube Channel. I know you probably never swatch, or you’ve been crocheting for so long that you will be tempted to bypass this advice, but take my word for it. The first few rows are a little tricky and you’ll sidestep common mistakes and avoid the frustration of frogging hours of hard work by swatching along with my tutorials before starting your blanket.
I also have a Facebook Group and a Membership Community to help you if you get stuck.

How to Resize
This pattern creates a 60”x 84” throw sized blanket. I do not give resize options. I designed this version specifically to use as much of the six balls of Noro Tsubame as possible. If you would like a resizable version of this pattern, you can use the 6-Day Kid Blanket on my website.
Side edges
Some crocheters have had issues with the side edges of their blankets curling. Here are some steps you can take to help alleviate this:
- When working the last stitch of the row, insert the hook from back to front, instead of from front to back.
- Work your edge into the turning chains and sc/dc stitches on the sides of the work as described at the end of this pattern, rather than into the spaces.
- Wash your blanket once it is complete, and lay it out flat to dry, gently stretching and shaping the edges.
Creating a straight top and bottom edge:
This version creates a chevron top and bottom edge. If you would like a straight top and bottom edge, you will have to make alterations not given in this pattern. Please see my website articles “How to start your 6-Day Kid Blanket with a Straight Edge” and “6DKB Straight Start Questions Answered.” Be sure to account for extra yardage.
Color Pooling
Noro is a self-striping yarn variegated yarn with amazing color combinations. The yarn is meant to mimic how colors appear in nature, therefore there is an artistic inconsistency to the distribution of color throughout the yarn. Sometimes colors do not flow in the same order each time, nor are the lengths of color consistent within or between different balls of yarn. There is no way to predict exactly how the colors are going to flow, so be prepared to be amazed and delighted.
In order to create balance and alleviate any color pooling, I alternated two balls of yarn throughout the project. I changed colors after every row 4 and 6 and carried the yarns carefully up the sides of the work. This is completely optional. This project is yours to work up to your satisfaction.
Changing Yarns
I treated alternating the yarns like any other color change, pulling the new yarn through the last two loops of the last stitch of the row. There is no need to fasten off; carefully carry the other yarn up the side of the work taking care to keep the tension like Goldilocks – not too tight, not too loose, but just right. You will work your first border round over the floats of yarn.
End with Row 4
This pattern has an extra half-repeat at the end, which balances its shape with the beginning of the blanket.
Border
No beach-inspired blanket is complete without some waves, so I gave the edges a gentle rolling waves border. Be sure to read all the way to the end of the pattern for the border instructions.
At the beginning of the rows, count the st below the turning chain unless directed otherwise.

Begin Pattern
Ch 224 (multiple of 17 + 3)
Row 1: (RS) 1 sc into 2nd ch from hook, 1 sc into each ch to end.
Turn
Row 2: ch 3, sk 3, (the sc on the end of the row, the one below your turning chain counts as 1) [3 dc in next sc, sk 2] twice, [3 dc, ch 3, 3 dc] into next sc, *sk 2, 3 dc into next sc, sk 2, dc3tog, sk 4, dc3tog, sk 2, 3 dc in next sc, sk 2, [3 dc, ch 3, 3 dc] into next sc; rep from * to last 9 sts, sk 2, [3 dc into next sc, sk 2] twice, dc into last sc.
Turn

Row 3: ch 3, sk sp between turning ch and next 3 dc group, 3 dc into each of next 2 sp, [3 dc, ch 3, 3 dc] into ch 3 sp, *3 dc into next sp, dc3tog into next sp, sk next sp, dc3tog into next sp, 3 dc into next sp, [3 dc, ch 3, 3 dc] into next ch 3 sp, rep from * to last 3 sps, 3 dc into each of next 2 sps, 1 dc into sp between last 3 dc group and turning ch.
Turn
Row 4: ch 1, sc into first dc of the row (the one right below your turning chain), sk next dc, 1 sc into each of next 8 dc, *3 sc into ch 3 sp, 1 sc into each of next 14 sts, repeat from * to last ch 3 sp, 3 sc into last ch 3 sp, 1 sc into each of next 8 dc, sk next dc, 1 sc into top of turning ch.
Turn
(Optional: Change to second ball of yarn)
Row 5: ch 3, sk first 2 sc of the row below (the sc your turning chain is coming out of counts as the first one). 1 dc into each of next 8 sc, *3 dc into next sc (you should be working these into the center stitch of the 3 sc. If not, you may have skipped incorrectly in the beginning of the row, or missed the sk at the end of Row 4.) 1 dc into each of next 7 sc, sk next 2 sc, 1 dc into each of next 7 sc, rep from * to last 11 sc, 3 dc into next sc, 1 dc into each of next 8 sc, sk 1, dc into last st.
Turn

An international community of yarnful makers and friends.
- New pattern pre-releases
- Exclusive patterns never released to the public
- Have access to Betty’s ad-free .pdf library of patterns (3-4 patterns/month)
- Access to Betty’s Design Workshop
- Uplevel your knitting and crochet skills
- Enjoy regular crochet alongs, knit alongs, and classes
- Make like-minded friendships during our weekly social and educational events
- Bonus content every month
Row 6: Ch 3, sk first 2 dc in the row below (the dc below your turning chain counts as 1), 1 dc into each of next 8 dc, *3 dc into next dc (you should be working into center stitch of 3 dc), 1 dc into each of next 7 dc, sk next 2 dc, 1 dc into each of next 7 dc, rep from * to last 10 dc, 3 dc into next dc, 1 dc into each of next 8 dc, sk last dc, 1 dc into top of turning ch, turn.
(Optional: Change back to first ball of yarn)
Row 7: Ch 1, sc into first dc (the same one the turning chain is coming out of), sk 1 dc, 1 sc into each dc along row to last dc, sk last dc, 1 sc into top of turning ch.
Turn
Repeat rows 2-7, alternating balls of yarn after rows 4 and 7. Continue until your fifth ball of yarn runs out, which for me was after 23 repeats.
Repeat rows 2-4 one time more time. Be sure to end on Row 4.
Do not fasten off. Proceed to Edge Rounds.

Edge Round 1: Add 2 sc in the same st as the last sc of your last Row 4. Rotate the work and continue to sc down the side of the blanket. Work into the sides of the sts on the ends of the rows, treating the turning chains, the sc and dc stitches as foundation chains, working under 2 threads of each stitch and leaving one thread below.
There is no set rule for how many stitches you should put into the side of each stitch, but generally I make 2 sc into the sides of each dc and turning ch, and 1 sc into the sides of the sc rows. Lay your work down often and check to make sure that your edge does not ruffle (too many stitches) or pull (too few).
Bottom: When you reach the bottom corner, work 3 sc in the corner st. Working into the bottom side of the foundation chain, 9 sc, sk 1, *8 sc, ch 1, 8 sc, sk 1, repeat from * to last dip, 8 sc, 3 sc in corner.
Rotate the work and complete the other side as the first side.
Top: 3 sc in corner st, 10 sc, *3 sc in peak, 7 sc, sk 2, 7 sc, repeat from * to last peak, 3 sc in last peak, 10 sc, 3 sc in last st. Do not fasten
off. Rotate and proceed to Edge Round 2.
Edge Round 2: sk 1, sc, ch 3, turn, working behind the stitches, sc in skipped sc, ch 1, turn. 3 hdc in ch 3 sp just made, sk 2, sc in next st. *ch 3, turn, working behind the stitches, sc in second of 2 skipped sc, ch 1, turn. 3 hdc in ch 3 sp just made, sk 2, sc in next st. Repeat from * around.
Fasten off. Weave in all ends.
Resources
There are resources to help you make this pattern.
- 6-Day Kid Blanket Cheat Sheet and Coloring Page
- 6-Day Viral Kid Blanket Graph
- 6-Day Kid Blanket tutorials on YouTube
- 6-Day Kid Blanket Facebook Group
- The Betty McKnitiverse
Beth McKee Elliott
aka Betty McKnit
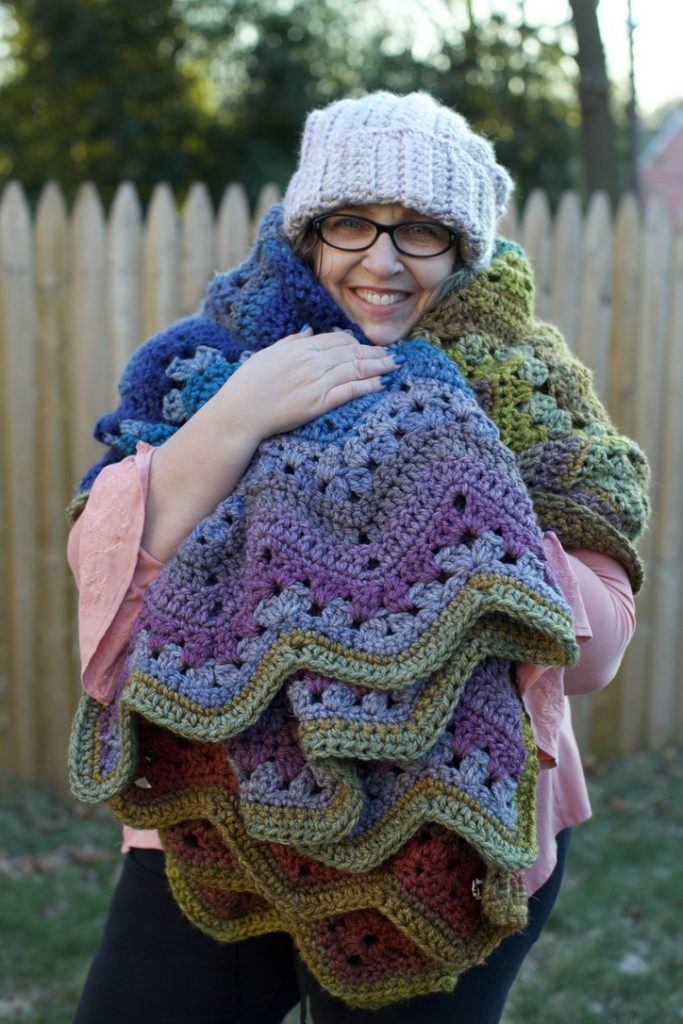
Beth McKee Elliott, also known as Betty McKnit, is a crochet and knitting designer, instructor, community leader, and Master Somatic Movement Therapist and Educator. Her signature style, 6-Day Crochet, is showcased in the viral crochet patterns the 6-Day Kid Blanket and 6-Day Star Blanket.
She specializes in Somatic Crochet and Knitting, a mindfulness practice that combines crochet/knitting with body awareness techniques to prevent injury and promote well-being and creativity in crafting.
In addition to being a crochet designer, Beth is a choreographer. She is the creator and director of Small Plates Choreography Festival, Haven Movement Company, and the Dance Maker Podcast.
This page contains affiliate links. If you click these links and buy something on the page they take you to, I may, at no additional cost to you, earn a commission. I only affiliate with products and companies I feel good about. Thank you for your support!
©Beth McKee Elliott/Betty McKnit®
www.bettymcknit.com

