6-Day Hexagon Cardigan
6-Day Hexagon Cardigan
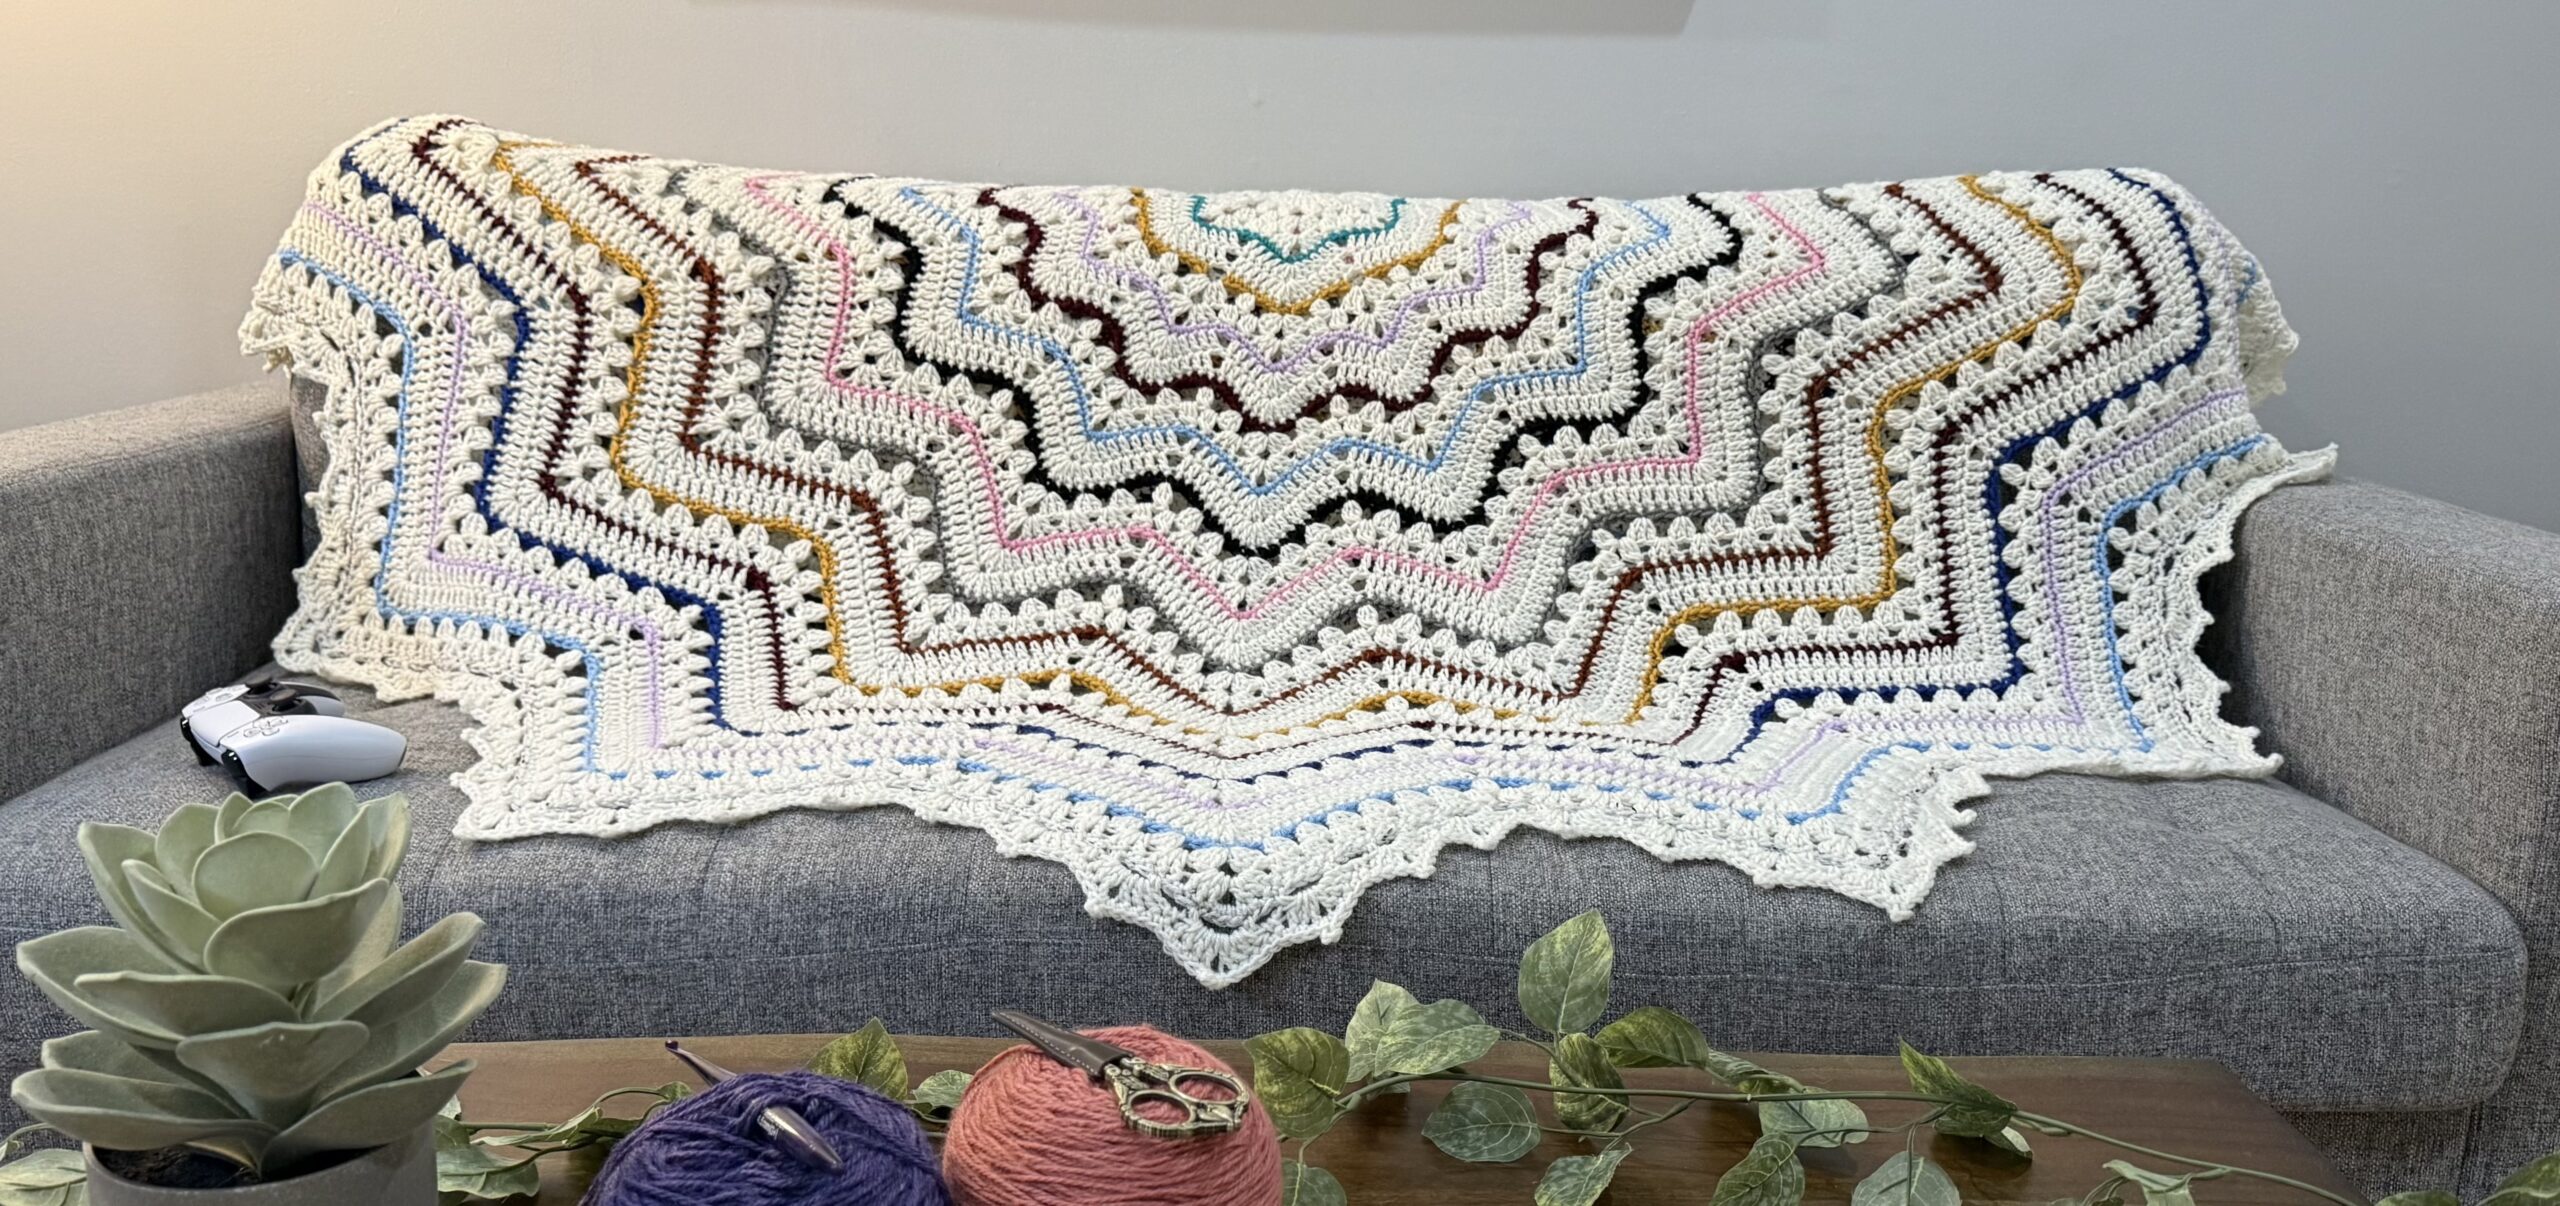
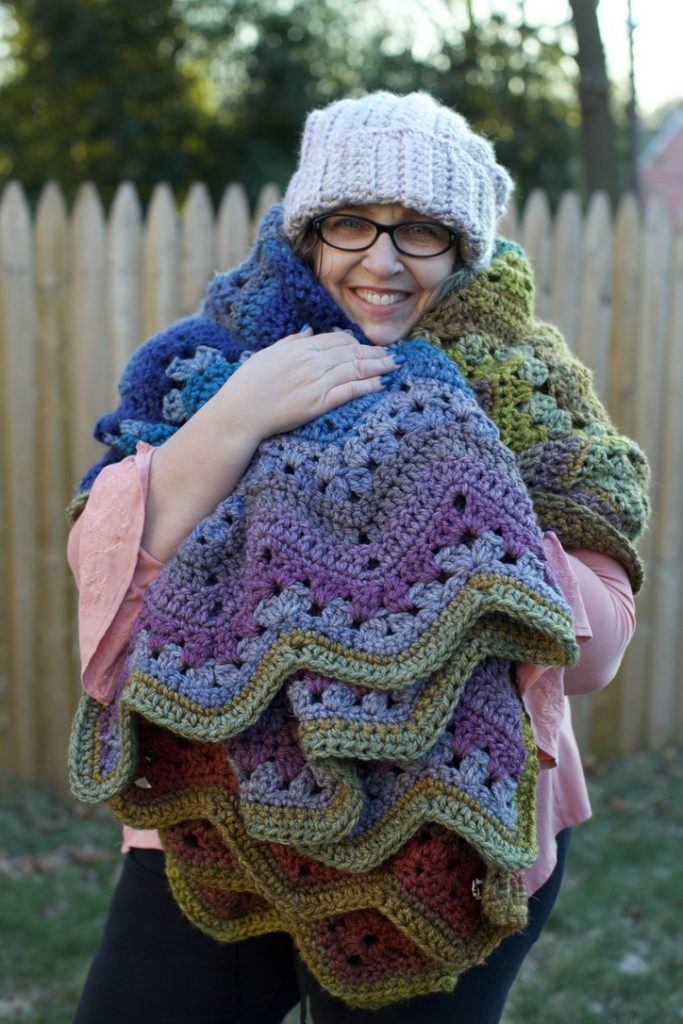
A variation of the classic crochet pattern the
6-Day Kid Blanket by Betty McKnit
Introduction
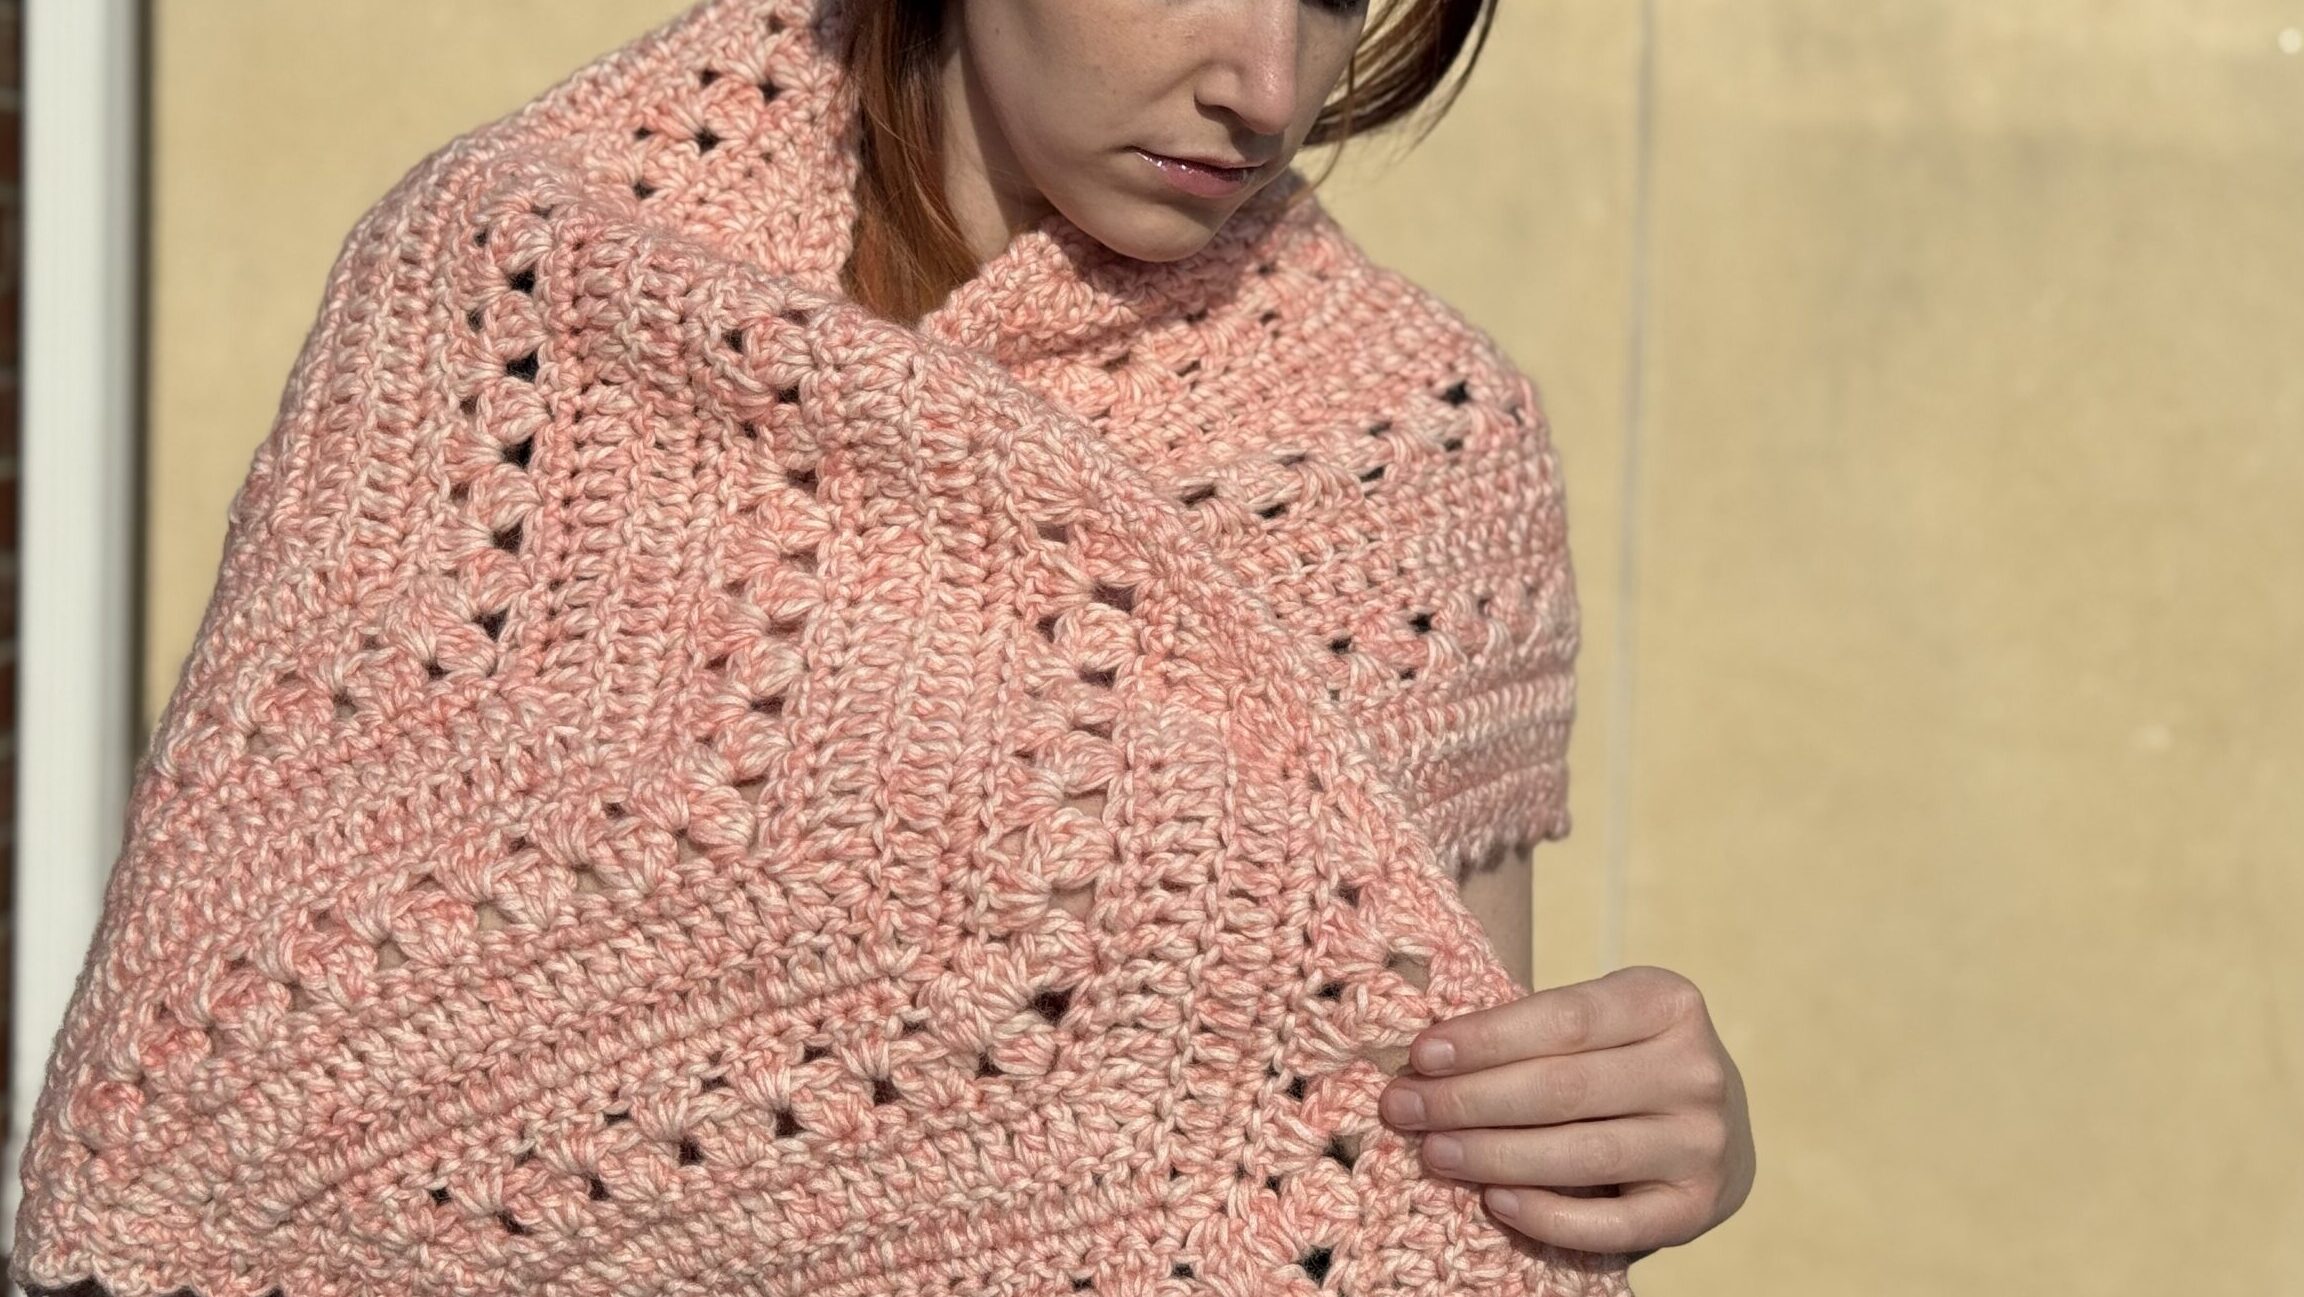
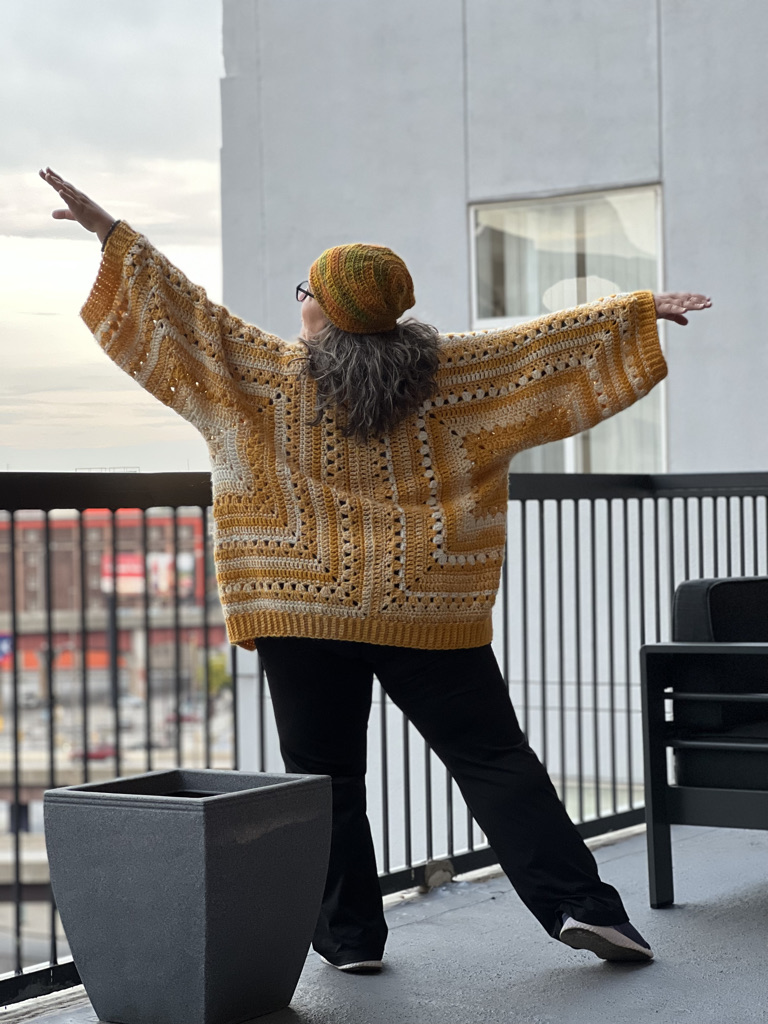
6-Day Hexagon Cardigan Crochet Pattern by Betty McKnit is a cardigan made with the 6-Day Kid Blanket stitches. It is created with two three-dimensional hexagons that are folded in half and sewn together.
This pattern is adaptable, and intended for you to design your own unique garment. It is more of a recipe than a pattern and your willingness to get creative is the key ingredient. It is possible to make this cardigan in a variety of sizes with any yarn you like. I give options to add width, length, cuffs, ribbing, button band, hood, collar, and pockets.
This page contains affiliate links. If you click these links and buy something on the page they take you to, I may, at no additional cost to you, earn a commission. I only affiliate with products and companies I feel good about. Thank you for your support!
Details
US Terminology
Skill Level: Easy
Finished Size: Multiple Size Options
Materials
Yardage Estimates for other weights of yarn for a hip length XL cardigan. You should add yardage for a longer or larger cardigan.
4 Weight (Worsted) 1500 yards
3 Weight (DK) 1800 yards
Since this project has so many options, the yardage required will vary from approximately 700 yards for a baby sweater up to 3000 yards for an adult sweater with additional length and a hood.
Shown in Lion Brand Scarfie in Cream/Mustard
Gauge: (4 in x 4 in) 10 sc x 10 rows
Yardage: 1250 Yards (4 balls)
Hook: Furls Odyssey J (6 mm)
Also shown in Caron O’go Big Donut Blue Velvet, and Choco Blueberry (discontinued).
Hook: Furls Odyssey I (5.5 mm)
Stitch Markers or Safety Pins
Tapestry needle
About the row numbers:
In order to provide consistency across all of the 6DKB pattern variations, I’ve numbered the rounds to correspond to the original 6-Day Kid Blanket pattern. The cluster rows are always Row or Round 2 and 3, the dc rows are always Row or Round 5 and 6, and the sc rows are always Row or Round 4 and 7. This makes it easy to adapt any pattern to the Snowflake Effect, Viral Stripes, Popsicle Effect, or the original Vivid Chevrons.
You will be repeating rows 2-7 in varying configurations. You may have to stop or pick up in the middle of the sequence. Always work the rows in order, 2-7.
Changing Colors
Change colors by pulling the new color through the last two loops of the last stitch in the old color. Work over ends for one or two stitches and leave them until the project is complete and weave them in. I don’t recommend knots or only working over ends because neither of those methods is secure.
This pattern does not tell you when to change colors. Follow one of the striping patterns mentioned above (more information on my website) or get creative and make up your own.

Abbreviations
blo: back loop only
ch: chain
dc: double crochet
dc2tog: double crochet 2 together cluster
dec dc2tog: double crochet 2 together decrease
dc3tog: double crochet 3 together cluster
hdc: half double crochet
sc: single crochet
sc2tog
sdc: standing double crochet
sl st: slip stitch
sp(s): space or spaces
ssc: standing single crochet
st(s): stitch(es)
Join one of my online communities to knit and crochet along with friends, get help with pattern questions, show off your makes, and access tons of free resources for making 6-Day Crochet and other Betty McKnit designs.
Special Stitches:
dc2tog (cluster) – this stitch is a cluster, not a decrease. It is worked as follows: yo, pull up a loop, pull through two loops, yo, pull up a loop IN THE SAME STITCH/SPACE, pull through two loops, yo and pull through all loops on the hook. dc2tog complete.
dec dc2tog – this stitch is a decrease. It is worked as follows: yo, pull up a loop, pull through two loops, yo, pull up a loop IN THE NEXT STITCH/SPACE, pull through two loops, yo and pull through all loops on the hook. dec dc2tog complete.
dc3tog (cluster) – this stitch is a cluster, not a decrease. It is worked as follows: yo, pull up a loop, pull through two loops, *yo, pull up a loop IN THE SAME STITCH/SPACE, pull through two loops, repeat from *, yo and pull through all loops on the hook. dc3tog complete.
standing stitches (sdc and dc) are worked with new yarn directly into the indicated stitch. You do not need to join new yarn with a slip stitch and then chain up to begin a new round with a new color. You can begin with a slip knot on your hook, or just start your new yarn without using a knot. Use your fingers to hold the yarn over against the hook while you work the stitch.
Other Notes:
- Read through this entire pattern before you begin.
- Hexagon is three-dimensional will not lie flat until it is folded.
- Baste shoulder and center back seam and complete seaming when you weave in your ends, just in case you change your mind or need to change something.
- If you plan to add length, you may want to turn your hexagons after each row so that you don’t have all stitches on the right side for the hexagon portion of the cardigan and right/wrong sides on the lengthened portion.
- Stitch counts in parentheses indicate stitch counts on subsequent repeats of the pattern.
- If you are changing colors on every round after the setup rounds, you can begin and end your rounds anywhere, but you must put all the stitches in their proper places and have the correct number of stitches on each side of the hexagon.
- Ch 3 (counts as dc) can be used in place of sdc.
- Mark the slip stitch join at the ends of your rounds. The last stitch of round 4, 5, 6, and 7 can be worked either into the slip stitch or over it into the stitch below.
- Take care not to miss the first stitch after the corner chains.
- When working over the garment seams, especially when chain spaces meet, work a decrease putting 1/2 of each decrease stitch on each side of the seam.
- When working back and forth, take note of how many dc stitches and 3 dc groups you already have on the work and maintain those stitch counts as you extend the work.
- When working back and forth and around corners, I eliminated the dc3tog stitches on rows 2 and 3. You may keep them if you like but you’ll have to determine their placement. If you do not keep them, your stitch count may be one or two stitches off on row 2.
BEGIN
These are the steps to create your 6-Day Hexagon Cardigan. Since this pattern is meant to give you unlimited options, you may not do every step. The steps are given in the order you should do them (with some exceptions) regardless of which options you choose. Work these steps in order unless otherwise indicated.
There are some steps that can be combined. If you combine certain steps, you may work some steps out of order. There is more information in each section, and I expect there will be creative crocheters who have ideas I never would have thought of which may change the order of the steps. This pattern is meant to be adaptable, so adapt away.

Step 1: Read through the entire pattern.
Step 2: Measure
Step 3: Make two Hexagons
Step 4: Seam the shoulders
Step 5: Measure again
Step 6: Add width to the back
Step 7: Seam the back
Step 8: Add length to the bottom
Step 9: Add length to the sleeves
Step 10: Add ribbing
Step 11: Add a Hood or Collar
Step 12: Trim
Step 13: Add pockets
Measure
If you are making a cardigan for yourself, the best thing to do is to measure your own body.
You’ll need to know your arm circumference and length, and your chest circumference. Check the measurements worksheet for information about how to measure.
You will also have to decide how much ease you would like your sleeves and the body of your cardigan to have. Ease is extra space that determines if your cardigan fits closely or loosely. I suggest adding at minimum 2″ of ease to the chest circumference and arm circumference measurements. You do not need to add ease to your sleeve length measurement or cardigan length.
For more information about ease see the Craft Yarn Council page about garment measurements.
If you would like to make a long cardigan that goes over the hips, it will be helpful to have a hip circumference measurement. If you want your long cardigan to close in the front, like with buttons, it will need to be wide enough to go around the hips. It would be helpful to have a back waist measurement to estimate the length of your garment if you don’t have the intended recipient available for trying on.
The size charts on the Craft Yarn Council page will help you make a garment for someone else if you do not know their measurements. If you are able to measure them, that would be ideal. Not every body fits exactly into these so-called standard measurements, and sometimes one body part is standard size while another body measurement may not be. Do not assume that because you wear a certain size in store-bought clothes that your body measurements match this chart. Measure and check. If you take measurements and plan, your garment is more likely to fit the way you want it to.

Make two hexagons.
Once you have measured, you can begin your hexagons. These hexagons begin at the armpit and each creates one sleeve and half of the front and back of the cardigan. The kind of sleeve you want should determine how large you should make your hexagons.
You should stop growing the hexagon when the outside edge (any edge – they are all the same) equals or is close to the sleeve width you desire (arm circumference + ease). Don’t worry if the hexagons are not large enough to meet your (chest circumference + ease) or if the sleeves or body are not long enough. You can add a back panel to add width and also add length to your sleeves. But if you grow your hexagon to your (chest circumference + ease) you may have a larger sleeve than you want.
If you want a large sleeve or don’t mind how big it gets, you can continue your hexagon until the length from its center to the edge is 1/4 of the desired size (chest circumference + ease). Be aware that the larger you make your hexagon, the wider and longer your sleeve will be.

Begin Hexagon
Ch 4, join with sl st to form a ring (magic loop not recommended).
Setup Round 1: working into starting ring, sdc (or ch 3 counts as 1 dc), ch 3, (3 dc, ch 3) 5x, 2 dc, join to sdc (or top of ch 3). (6 sets of 3 dc, 6 ch 3 sps)
Setup Round 2: sl st in ch 3 sp, sdc (or ch 3 counts as 1 dc), ch 3, 3 dc in same ch 3 sp, (3 dc, ch 3, 3 dc) in each of next 5 sps, 2 dc in ch 3 sp. Join with sl st to starting sdc (or top of ch 3). (6 corners of 3 dc, ch 3, 3 dc)
Don’t let the change in sequence throw you off! Round 4 is next.
Round 4: sc in ch 3 sp, ch 2, sc in same sp, sc in each st around, work (sc, ch 2, sc) in each corner sp. Join with sl st to the first sc. 8 (27, 45…) sc per side.
Round 5: sl st into ch 2 sp, sdc, (ch 3, 2 dc) in same sp, dc in each st around, working (2 dc, ch 3, 2 dc) in corner ch 2 sps, dc in ch 2 sp, join with sl st to sdc. 12 (31, 49, 67…) dc in each side.
Round 6: sl st into ch 3 sp, sdc, [ch 3, 2 dc] in same sp, dc in each st around, working [2 dc, ch 3, 2 dc] in corner ch 2 sps, dc in ch 2 sp, join with sl st to sdc. 16 (35, 53, 71…) dc in each side. (increases by 18)
Round 7: sc in ch 3 sp, (ch 2, sc) in same sp, sc in each st around, work [sc, ch 2, sc] in each corner sp. Join with sl st to the first sc. 18 (37, 55, 73 … ) sc each side.
Round 2: sl st in ch 2 sp, sdc, ch 3, 3 dc in same ch sp, *(sk 2, 3 dc in next st) 2 (5, 8, 11 …) x, sk 2, dc3tog, sk 1, dc3tog, (sk 2, 3 dc in next st) to corner, (3 dc, ch 3, 3 dc) in corner ch 3 sp, repeat from * to last corner, sk 1, 2 dc in last corner ch 2 sp. Join to sdc.
Round 3: sl st into ch 3 sp, sdc, (ch 3, 3 dc) in same ch 3 sp, *3 dc in each of next 3 (6, 9, 12…) sp, dc3tog between 2 dc3tog, 3 dc in each sp to corner, (3 dc, ch 3, 3 dc) in corner ch 3 sp, repeat from * to last corner, 2 dc in last corner ch 3 sp. Join to sdc.
Repeat these six rounds — 4, 5, 6, 7, 2, 3 — until your work is the size you desire. End AFTER Round 2 or 5.

An international community of yarnful makers and friends.
- New pattern pre-releases
- Exclusive patterns never released to the public
- Have access to Betty’s ad-free .pdf library of patterns (3-4 patterns/month)
- Access to Betty’s Design Workshop
- Uplevel your knitting and crochet skills
- Enjoy regular crochet alongs, knit alongs, and classes
- Make like-minded friendships during our weekly social and educational events
- Bonus content every month
Fold the Hexagons and Baste the Shoulder Seams
Fold each hexagon in half by bringing opposite corners together with the right side out. Arrange the two folded hexagons next to each other and decide which is the front and back, and left and right. Each folded hexagon should be L shaped, and the two sides lying next to one another should look like a T with the sleeve seams at the top of the work. The center of the hexagon is the armpit of the garment.

Before folding, I like to check over my work for any awkward color changes (I use cake yarn a lot) and adjust my folds so that any awkward parts fall on the underside of the sleeve, on the side, or the bottom edge. If my cardigan has nothing to hide, I fold it so that the ends of the yarn are at the top back so that I can continue down the back to add width without breaking my yarn (no one hates weaving ends more than I do!).
Neck Opening
You can seam your entire sleeve, creating a straight, close neckline that is continuous with the front sides of the cardigan, or you can create a boatneck opening by leaving part of the sleeve open on the neck side.
If you are adding width to the back of your cardigan and you are planning to trim around the front and neck with a buttonhole band or edge, you can seam the shoulders completely.
If you plan to or add a hood or collar you should leave a neck opening at the tops of your sleeves. Measure for the opening after you’ve determined how much additional width you need (below), and seam or baste your shoulders accordingly, leaving 1/2 of your neck opening measurement open on each sleeve. If you plan to add width to the back, subtract the additional width from your neck measurement before dividing it in half.
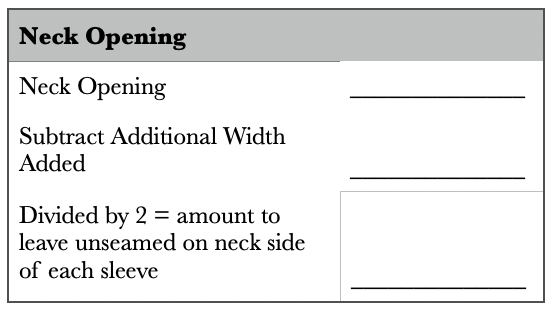
Remember that this is not a regular plug-and-play pattern. You are designing your own unique garment.
Once you are satisfied with the layout of your cardigan, and have decided on how you want to handle the neck opening, baste the shoulder seams. I use the invisible stitch to seam, but I don’t actually complete my seams until I weave in my ends, just in case I change my mind or need to make adjustments.
If your last round on your hexagon is round 2, you can seam as you complete the last round by slip stitching between the groups of 3 sts. Mark the remaining hexagon sides for back, front, and bottom. It is easy to get confused.

Measure Again
Before moving on, take some measurements and make some decisions.
Measure your hexagon from the center to the edge, and multiply by 4. If the resulting measurement is less than your chest circumference + ease, you will need to add some width to the back seam before you connect the two sides of the cardigan together.
This is a good time to check your sleeve length as well to make sure that you did not make your hexagon too big and that your sleeve is not going to be too long. See the diagram to measure your sleeve, and compare to your armpit-wrist measurement.
If at all possible, check your measurements by trying on the two halves of the cardigan, bringing the center of the hexagon near your armpit. Remember to take ease into account.
If your measurements are adequate for your chest circumference + ease, and you are happy with your sleeve circumference and length, ALL FURTHER STEPS ARE OPTIONAL. You can, if you like, put your two halves of your cardigan together, seam up the back and wear your hexagon cardigan just like this, with no further additions.
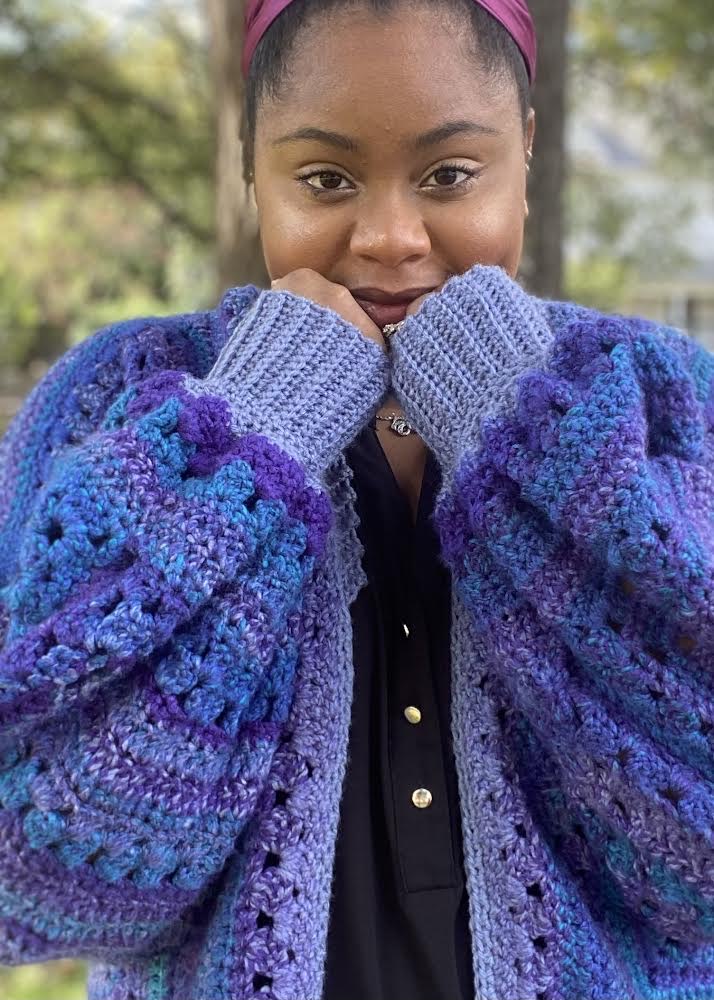
Add Width to the Back
Lay out your two folded hexagons next to one another as shown. Measuring from one armpit across to the other (the center of the hexagon is the armpit), separate the two halves of the garment until the distance between the armpits equals half of your chest circumference + ease.
The distance between the two pieces is the amount you will need to add on. Add1/2 of the required amount to each side. Measure your stitches and figure out how many rows of the pattern you’ll need. Remember that you’ll have to end on row 2 or 5 to keep the work in pattern, so you may not be able to hit an exact measurement. In that case, decide if you would like a little more or less ease.
In my example, the desired chest circumference is 36” and my ease is 2” so the total chest circumference is 38”. The distance from armpit to armpit was 19” and the distance between the two halves was 3”. Dividing that in half, I needed to add 1&1/2 inches to each side of my back edges.


About the Front
If you add width to the back of your cardigan, you will be creating a neck opening, and also your front sides will have a gap between them. If you want them to meet, you will have to add the same number of rows to the front sides. For a buttonhole band, you will want to leave a gap between the front panels that is the width of the band. It is not necessary to have the front of the cardigan meet but if you want it to, and you’re adding additional width to the back, you’ll have to decide how to handle the front – either by adding rows to the front or completing later with a trim or band. In my example, I added a row of dc trim to the front edges and hood together before adding the buttonhole band.
Working Back and Forth
Use these stitches any time you need to add rows to one side of your work. To keep the stitch pattern in sequence, pick up on the row after you left off.
Depending on where you start and end, you may have chain spaces at the start and ends of your row. In general I put 2 stitches in the chain spaces when needed.
Join yarn at either side of the back hexagon edge and begin working on the row after the last row worked (I ended on row 5, so my next row would be row 6). Repeat in the order given for as many rows as you need.
Row 2: ch 3 (does not count) dc in same sp, *(sk 2, 3 dc in next sp), repeat from * across, 2 dc in last sp. (your stitch count may not be exact).
Turn
Row 3: ch 3 (does not count) 3 dc in each sp across, dc in last st (or sp).
Turn
Row 4: ch 1, sc in same st, sc in each st across, ending with sc in last st (or ch sp).
Turn
Row 5: ch 2 (does not count), dc in same st, dc in each st across. (2 dcs in ch sps at ends of rows if needed).
Turn
Row 6: ch 2 (does not count) dc in same st, dc in each st across. (2 dcs in ch sps at ends of rows if needed).
Turn
Row 7: ch 1, sc in same st, sc in each st across, ending with sc in last st (or ch sp).
Turn
Repeat these six rows in order ending either on row 2 or 5. Repeat on the other hexagon.
If you end on row 2, and you would like your granny stitches to alternate rather than line up, you can work one side to row 7 and the other side to row 3 and then join them. Your seam will be slightly off-center, but your stitches will be perfectly in pattern.
You can, if you like, also add length to your cardigan while adding width. To do so, you would work around two sides of each hexagon.
Yet another option is to add to the back, bottom and front all at once. To do so, you would work around three sides of each hexagon.
Baste the Back Seam
I use the invisible seam, but at this point I suggest just basting the two sides together loosely with whip stitch and having a try on. If you end on row 2, you can seam the back as you go by sl st into the sps between the 3 dc groups (this is not my preferred method, so you’ll have to look it up online).
Add Length
After seaming the two halves of your cardigan together, you can add length to your cardigan by working back and forth along the bottom edge using the same stitches you used for adding the width. Remember to start on the row after you left off and keeping the six row repeat in sequence.
Take care not to increase at the back seam where two corners have come together, especially when two sets of ch 3 sps meet. Work (dc, dec dc2tog, dc) or (sc, sc2tog, sc) over the sps, putting 1/2 of each together stitch on either side of the seam.
You can also combine steps 5 and 7, adding width and length at the same time using the stitches “Working Back and Forth with Corners” stitches below. If you choose to combine these steps, you work across two sides of your hexagon at once and will seam the back after you have added the rows you want.
If you know that you also want to add rows to the front of your work, you can combine all three steps. If you choose to combine these three steps, you will be working on three sides of your hexagon at once and will seam the back once you’ve added the rows you want to both hexagons.
It is not necessary to combine steps. You can do what I did and complete each of these steps individually. I wanted to give you all the options. If you choose to build one side at a time, use the Working Back and Forth stitches above. To work more than one side at a time, use the Working Back and Forth with Corners stitches below.

Working Back and Forth with Corners
Use these stitches if you want to add rows to more than one side of your hexagon at a time.
Row 2: ch 2 (does not count) 2 dc in same sp, *(sk 2, 3 dc in next sp), repeat from * to corner, (3 dc, ch 3, 3 dc) in corner, repeat from * to end, 2 dc in last sp.
Turn
Row 3: ch 2 (does not count) dc in same st, 3 dc in each sp to corner (3 dc, ch 3, 3 dc) in corner, repeat from * to end, dc in last st (or sp).
Turn
Row 4: ch 1, sc in same sp, sc in each st to corner, (sc, ch 2, sc) in corner, sc in each st across ending with sc in last st (or sp).
Turn
Row 5: ch 2 (does not count) dc in same st, dc in each st to corner, (2 dc, ch 3, 2 dc) in corner, dc in each st to end. (2 dcs in ch sps at ends of rows if needed).
Turn
Row 6: ch 2 (does not count) dc in same st, dc in each st to corner, (2 dc, ch 3, 2 dc) in corner, dc in each st to end. (2 dcs in ch sps at ends of rows if needed).
Turn
Row 7: ch 1, sc in same sp, sc in each st to corner, (sc, ch 2, sc) in corner, sc in each st across ending with sc in last ch sp.
Repeat these six rows in order ending either on row 2 or 5. Repeat on the other hexagon.
Lengthen the Sleeves
You have three options for adding length to your sleeves: straight sleeves, tapered sleeves, and flared sleeves.

Remember to account for the length of the ribbing when calculating how much length to add to your sleeves.
Take care not to increase at the sleeve seam where two corners have come together, especially when two sets of ch 3 sps meet. Work (dc, dec dc2tog, dc) or (sc, sc2tog, sc) over the sps, putting 1/2 of each together stitch on either side of the seam.
For all sleeve options, begin by joining with a standing stitch at bottom edge of the sleeve, opposite the seam. Begin on the row after the last row of your hexagon edge, keeping the stitch repeat in sequence. Work as many rounds as you need to reach the length you would like your sleeves to be. If possible, end on either round 4 or 7.

Straight Sleeve
Take note of how many dc stitches and 3 dc groups you already have around the circumference of your sleeve and maintain existing stitch counts.
Join on the right side at the bottom of the sleeve edge and work in rounds.
Round 2: sl st, (or join on st to the left of center) ch 2, dc2tog in same st. *(sk 2, 3 dc in next st), repeat from * around, sk 1 or 2, dc3tog in last st. Join w sl st to top of dc2tog.
Round 3: sl st in next sp, ch 3, 2 dc in same sp. 3 dc in each sp around making dc3tog in last sp, between dc3tog and 2 dc from Row 2. Join w sl st to top of ch 3.
Round 4: ch 1, sc in same st and each st around. Join w sl st to first sc (take care not to join to the ch 1 or the sl st from where you joined).
Round 5: ch 3, dc around, join with sl st to top of ch 3.
Round 6: ch 3, dc around, join with sl st to top of ch 3.
Round 7: ch 1, sc in same st and each st around. Join w sl st to first sc (take care not to join to the ch 1 or the sl st from where you joined).
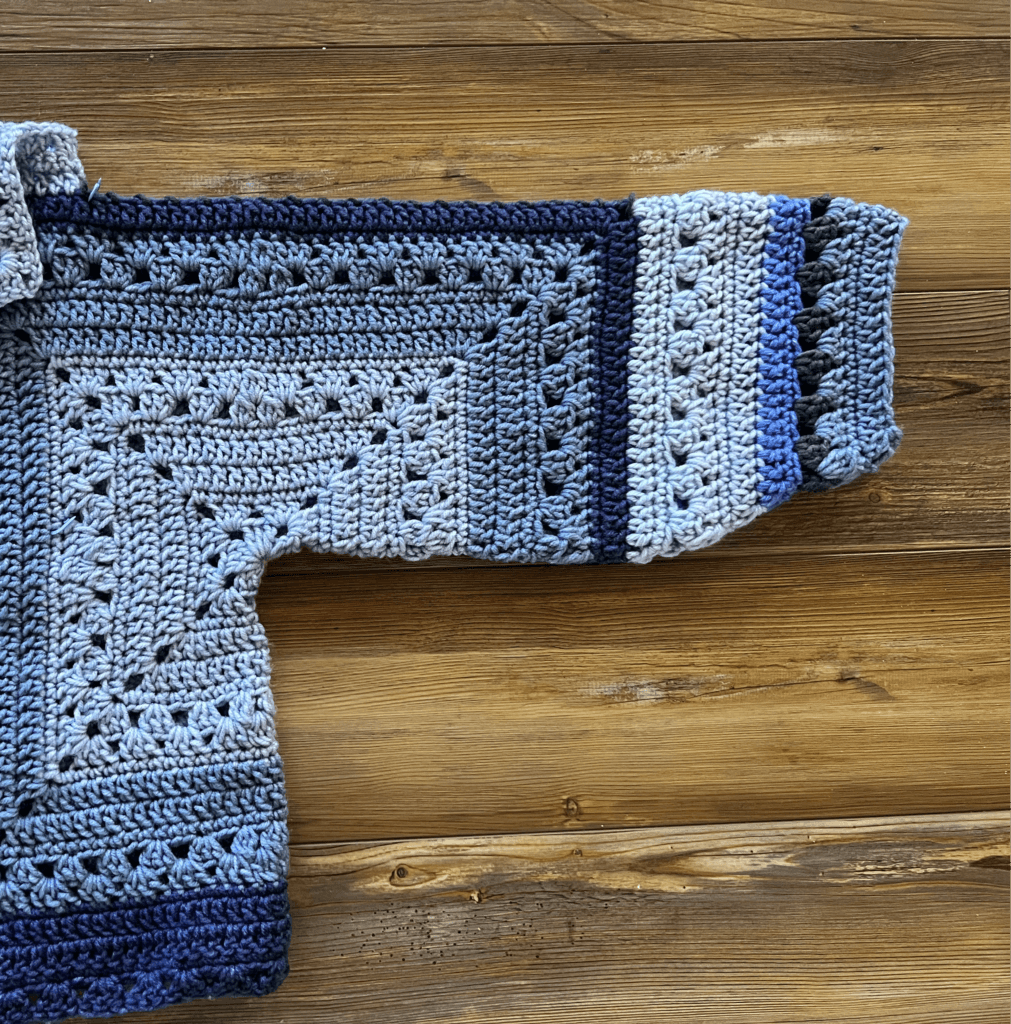
Tapered Sleeve
Use the six rounds below for the last six rounds for a tapered sleeve. If you need to add more than six rounds, start with the straight sleeve rows above and change to the tapered sleeve for the last six rounds.
Join on the right side at the bottom of the sleeve edge and work in rounds.
Round 2: ch 2, dc2tog in same st. (sk 2, 3 dc in next st) around. Join w sl st to top of dc2tog.
Round 3: sl st in next sp, ch 2, dc2tog in same sp. 3 dc in each sp around making dc3tog in last sp. Join w sl st to top of dc2tog.
Round 4: ch 1, sc in same st and each st around. Join w sl st to first sc (take care not to join to the ch 1 or the sl st from where you joined).
Round 5: ch 3, dec dc2tog, dc to last 2 sts, dec dc2tog, join with sl st to top of ch 3.
Round 6: ch 3, dec dc2tog, dc to last 2 sts, dec dc2tog, join with sl st to top of ch 3.
Round 7: ch 1, sc in same st and each st around. Join w sl st to first sc (take care not to join to the ch 1 or the sl st from where you joined).
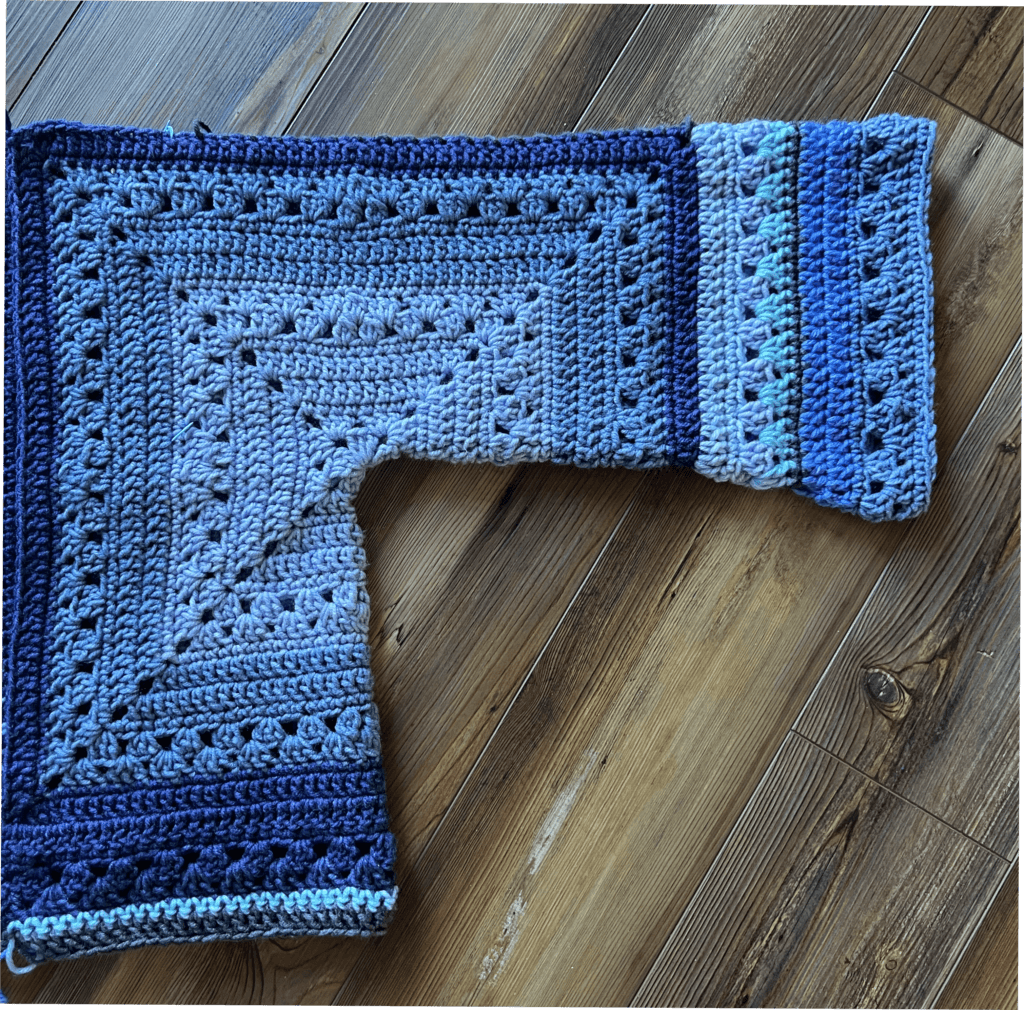
Flared Sleeve
Use the six rounds below for the last nine rounds for a flared sleeve. If you need to add more than nine rounds, start with the straight sleeve rows above and change to the flared sleeve for the last nine rounds.
Join on the right side at the bottom of the sleeve edge and work in rounds.
Round 2: ch 3, 2 dc in same st. (sk 2, 3 dc in next st) around. Join w sl st to top of ch 3.
Round 3: sl st in next 2 sts and next sp, ch 3, 2 dc in same sp. 3 dc in each sp around. Join w sl st to top of ch 3.
Round 4: ch 1, sc in same st and each st around. Join w sl st to first sc (take care not to join to the ch 1 or the sl st from where you joined).
Round 5: ch 3, 2 dc in next st, dc to last st, 2 dc in last st. Join with sl st to top of ch 3.
Round 6: ch 3, 2 dc in next st, dc to last st, 2 dc in last st. Join with sl st to top of ch 3.
Round 7: ch 1, sc in same st and each st around. Join w sl st to first sc (take care not to join to the ch 1 or the sl st from where you joined).

An international community of yarnful makers and friends.
- New pattern pre-releases
- Exclusive patterns never released to the public
- Have access to Betty’s ad-free .pdf library of patterns (3-4 patterns/month)
- Access to Betty’s Design Workshop
- Uplevel your knitting and crochet skills
- Enjoy regular crochet alongs, knit alongs, and classes
- Make like-minded friendships during our weekly social and educational events
- Bonus content every month
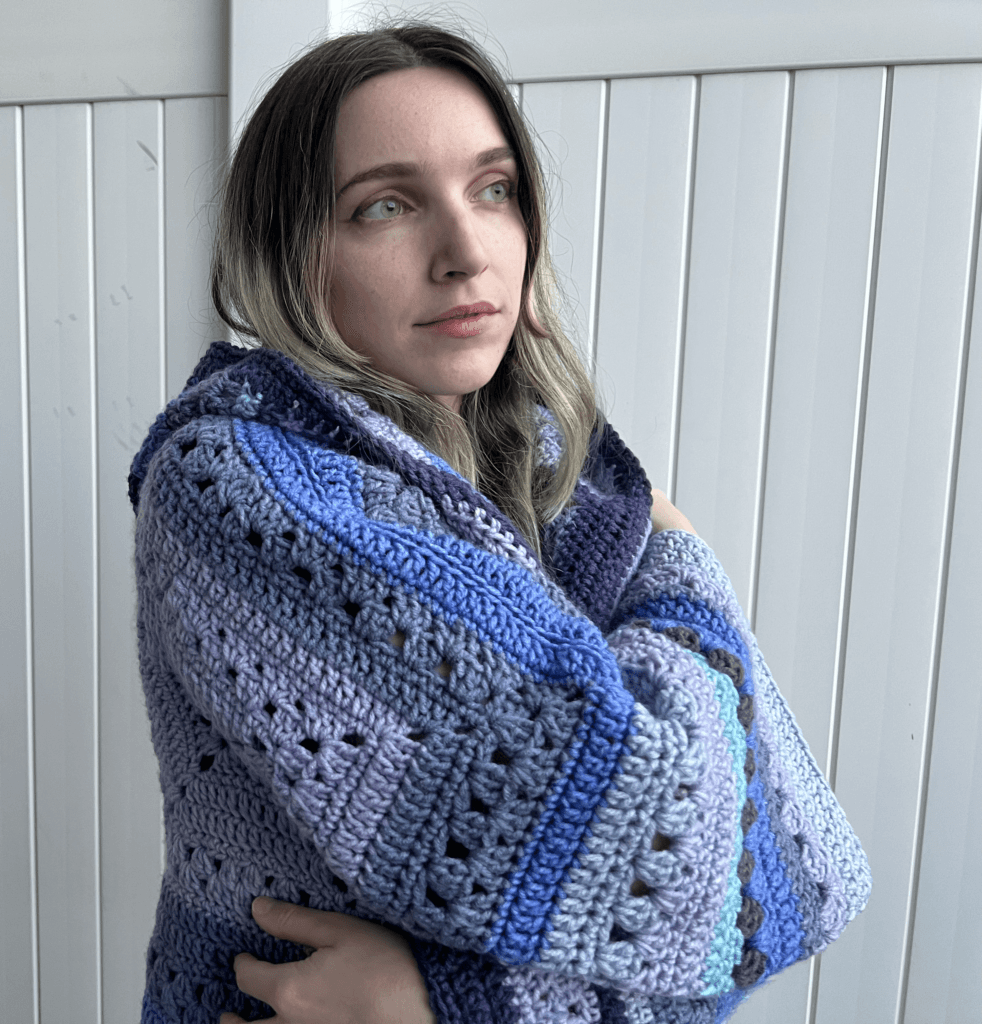
Ribbing
You can finish your sleeves, bottom edge, front edge, or make a collar with this ribbing.
Ribbing is intended to gather the work slightly, and you may have to adjust the amount of gathering to suit you. To make the work gather more, you can skip stitches between sl sts. If you want no gathering at all, for instance, if you want to use this edge on the front opening of your cardigan, you should only slip one stitch instead of two and chain one to turn. If you want your sleeves or bottom edge to meet a specific measurement, you can work this ribbing separately until it reaches the length you desire, and then sew it to your cardigan. I prefer to crochet my ribbing right onto the work, laying it down often and adjusting as I go.
Ribbing on the bottom cardigan edge should be added after you have extended the front sides to where you want them, and before you add the buttonhole band or final front trim.
Work ribbing as follows:
If you did not end on a sc row, first work a row of sc on the edge you would like to attach ribbing to. When working along the sides of the stitches, work approximately 2 sc in each dc and one sc into each turning ch and sc. Lay your work down to make sure it is lying flat.

Once your single crochet base is complete, join with a sl st to the edge of the work where you would like to attach ribbing. Ch 5 or more depending on how wide you would like your ribbing (I chained 6 in the photo above).
Turn and work in towards the garment edge.
Row 1: sk 1, sc across. Working into the sc sts of the garment edge, sl st in the next two sts (or sl 1, ch 1 if you do not want the work to gather at all).
Turn
Row 2: sk 2 sl sts, sc across, working into the blo.
Turn
Row 3: work as Row 2 working into the blo.
Turn
Repeat Row 2 and 3 until the edge reaches the last sc on the edge. Cut a long tail and seam the ribbing edges together for sleeves, or simply fasten off.

Hood
To add a hood to your cardigan, you will need to leave a neck opening when you seam your sleeves. Before adding your hood, you should complete the front edges of the cardigan with any additional rows you would like.
Beginning at the top front corner of the neck on the right side, work a row of sc along the edge of the neck opening. To work along the sides of the stitches, work approximately 2 sc in each dc and one sc into each turning ch and sc. It will be helpful to work a multiple of 3 + 1.
Once your sc row is complete, work back and forth across the entire neck opening using the “Working Back and Forth” stitches above.
Continue for approximately 8-14” or desired length and end on row 2 or 5. Fold the hood in half and seam the top.
Collar
To add a collar to your cardigan, work the same as the hood for 2-6” or desired length, ending on row 2 or 5.

Buttonhole Band
This buttonhole band can be worked on the front opening only or as trim around the whole front opening if you have seamed your shoulders all the way or added a hood. If you have left your shoulder seams unworked for a collar then this band should stop at the neck.
This or any front band should be added after bottom ribbing or trim.

Decide how many buttons you would like and mark one side of the front opening. Traditionally, women’s garments have the buttons on the left side and the buttonholes on the right, and men’s garments are the opposite. You do not have to follow tradition however, you can do whatever you like.
For the side of the garment without buttonholes eliminate the skipped stitches.
You can work more rows than what I’ve given here, just place the buttonholes in the center of the band.
Row 1: Work a row of sc along the edge where the band will go. To work along the sides of the stitches, work approximately 2 sc in each dc and one sc into each turning ch and sc. Lay your work down to make sure it is lying flat and not ruffling.
Turn
Row 2: (right side): ch 2, hdc in each st to end.
Turn
Row 3: (buttonhole row): ch 2 (does not count) working in blo (not third loop) hdc across, working (ch 1 sk 1) at each marked st for buttonholes.
Turn
Row 4: ch 2 (does not count), working in blo, hdc across. Work hdc into the ch 1 sps for the buttonholes.
Turn
Row 5: ch 2 (does not count), hdc across.
Turn
Row 6: ch 1, sc across. Fasten off.
Trim
One option to complete your cardigan is to work a row of trim around the entire front, hood, collar, and bottom, or any number of the above. If you don’t want ribbing, a hood, collar, or buttonhole band, you may opt to work a row of sc or rsc around the entire edge.
Make a pocket or two for your cardigan as follows:
Ch 4, join with sl st to form a ring (magic loop not recommended).
Setup Round 1: working into starting ring, sdc (or ch 3 counts as 1 dc), ch 3, (3 dc, ch 3) 3x, 2 dc, join to sdc (or top of ch 3). (4 sets of 3 dc, 4 ch 3 sps)
Setup Round 2: sl st in ch 3 sp, sdc (or ch 3 counts as 1 dc), ch 3, 3 dc in ch 3 sp, (3 dc, ch 3, 3 dc) in each of next 3 sps, 2 dc in ch 3 sp. Join with sl st to starting sdc (or top of ch 3). (4 corners of 3 dc, ch 3, 3 dc)
Don’t let the change in sequence throw you off! Round 4 is next.
Round 4: sc in ch 3 sp, ch 2, sc in same sp, sc in each st around, work (sc, ch 2 sc) in each corner sp, join with sl st in first sc. (8 sc per side including the first and last sc of the round)
Round 5: sl st into ch 2 sp, sdc, (ch 3, 2 dc) in same sp, dc in each st around, working (2 dc, ch 3, 2 dc) in corner ch 2 sps, dc in ch 2 sp, join with sl st to sdc. (12 dc in each side)
Round 6: sl st into ch 3 sp, sdc, [ch 3, 2 dc] in same sp, dc in each st around, working [2 dc, ch 3, 2 dc] in corner ch 2 sps, dc in ch 2 sp, join with sl st to sdc. (16 dc in each side)
Round 7: sc in ch 3 sp, (ch 2, sc) in same sp, sc in each st around, work [sc, ch 2 sc] in each corner sp, joint with sl st in first sc. (18 sc each side, including first and last st of the round)
Round 2: sl st in ch 2 sp, sdc, ch 3, 3 dc in same ch sp, *(sk 2, 3 dc in next st) 2x, sk 2, dc3tog, sk 1, dc3tog, (sk 2, 3 dc in next st) to corner, (3 dc, ch 3, 3 dc) in corner ch 3 sp, repeat from * to last corner, 2 dc in last corner ch 3 sp. Join to sdc.
Round 3: sl st into ch 3 sp, sdc, (ch 3, 3 dc) in ch 3 sp, *3 dc in next 3 sp, dc3tog between 2 dc3tog, 3 dc in each sp to corner, (3 dc, ch 3, 3 dc) in corner ch 3 sp, repeat from * to last corner, 2 dc in last corner ch 3 sp. Join to sdc.
Repeat Round 4.
Fasten off. Sew pocket(s) to cardigan. Weave in all ends.


Beth McKee Elliott
aka Betty McKnit
Beth McKee Elliott, also known as Betty McKnit, is a crochet and knitting designer, instructor, community leader, and Master Somatic Movement Therapist and Educator. Her signature style, 6-Day Crochet, is showcased in the viral crochet patterns the 6-Day Kid Blanket and 6-Day Star Blanket.
She specializes in Somatic Crochet and Knitting, a mindfulness practice that combines crochet/knitting with body awareness techniques to prevent injury and promote well-being and creativity in crafting.
In addition to being a crochet designer, Beth is a choreographer. She is the creator and director of Small Plates Choreography Festival, Haven Movement Company, and the Dance Maker Podcast.
Join us in the 6-Day Kid Blanket Facebook Group for help with this pattern and to show off your finished creations. Be sure to tag @bettymcknit in your social media posts.
Video tutorials available on my YouTube Channel.
This pattern was developed with the assistance of Julie Allen, Kathy Bertram, Pat Ojanen, Courtney “Gothfaeries Creations” Shepherd, Deborah Shoemaker.
Pattern tested by Andrea Carlson, Kate Daniel, Lecisha Ellison, Belinda Kovos, Carla Malagon, Skye Monckton, AnnaMarie Mozolik, Angela Patterson, Chloe Quintance, Janet Roberts, Megan Sampson, Kate Spencer, Jacki Warnock, Debbi Wilcock
Many thanks to Jess Coppom of the Make and Do Crew for her inspiring pattern the Campfire Cardigan, who inspired the Hexagon Cardigan trend.
This pattern contains affiliate links. If you click these links and buy something on the page they take you to, I may, at no additional cost to you, earn a commission. I only affiliate with products and companies I feel good about. Thank you for your support!
This pattern is the intellectual property of Beth McKee Elliott aka Betty McKnit®. This pattern, The 6-Day Kid Blanket, 6-Day Crochet™, 6-Day Star Blanket™, and all derivative works are protected by copyright. Publishing translations, corrections, variations, or tutorials of this pattern, online or elsewhere without written permission from the owner is a violation of copyright.
The 6-Day Crochet stitch pattern was inspired by “Vivid Chevrons” #110 from 200 Ripple Stitch Patterns by Jan Eaton.
Items created with this pattern may be used for commercial sale with credit to Betty McKnit in your listing.
https://www.craftyarncouncil.com/standards/body-sizing


