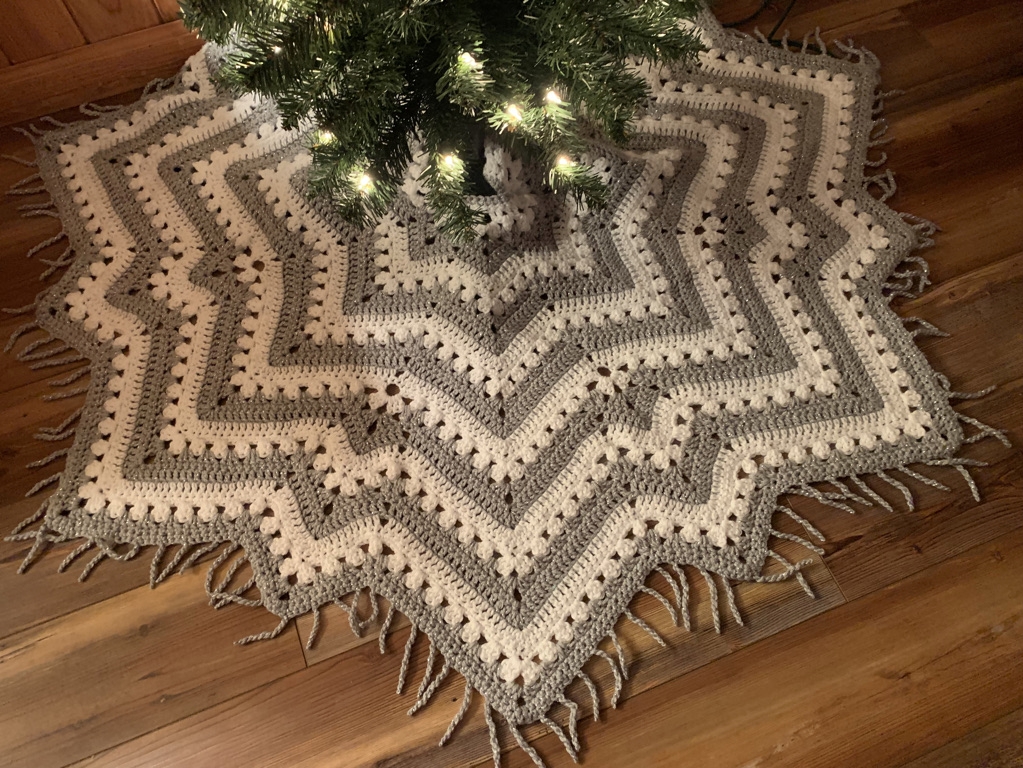
6-Day Superstar Holiday Tree Skirt
The 6-Day Superstar Holiday Tree Skirt
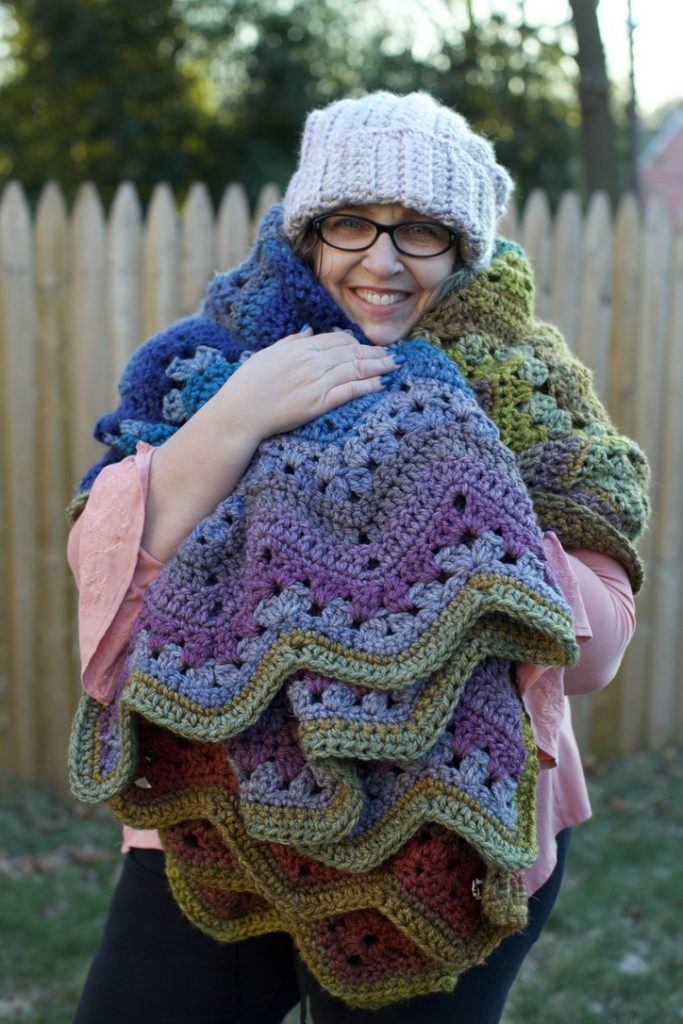
A variation of the classic crochet pattern the
6-Day Kid Blanket by Betty McKnit
This page contains affiliate links. If you click these links and buy something on the page they take you to, I may, at no additional cost to you, earn a commission. I only affiliate with products and companies I feel good about. Thank you for your support!
This pattern is provided free with advertisements on this page. If you would like an ad-free .pdf, you can purchase one at the bottom of the page. The .pdf is the same as this pattern, with the exception of the ads.
Introduction
This pattern is an adaptation of the 6-Day Superstar Blanket by Betty McKnit.
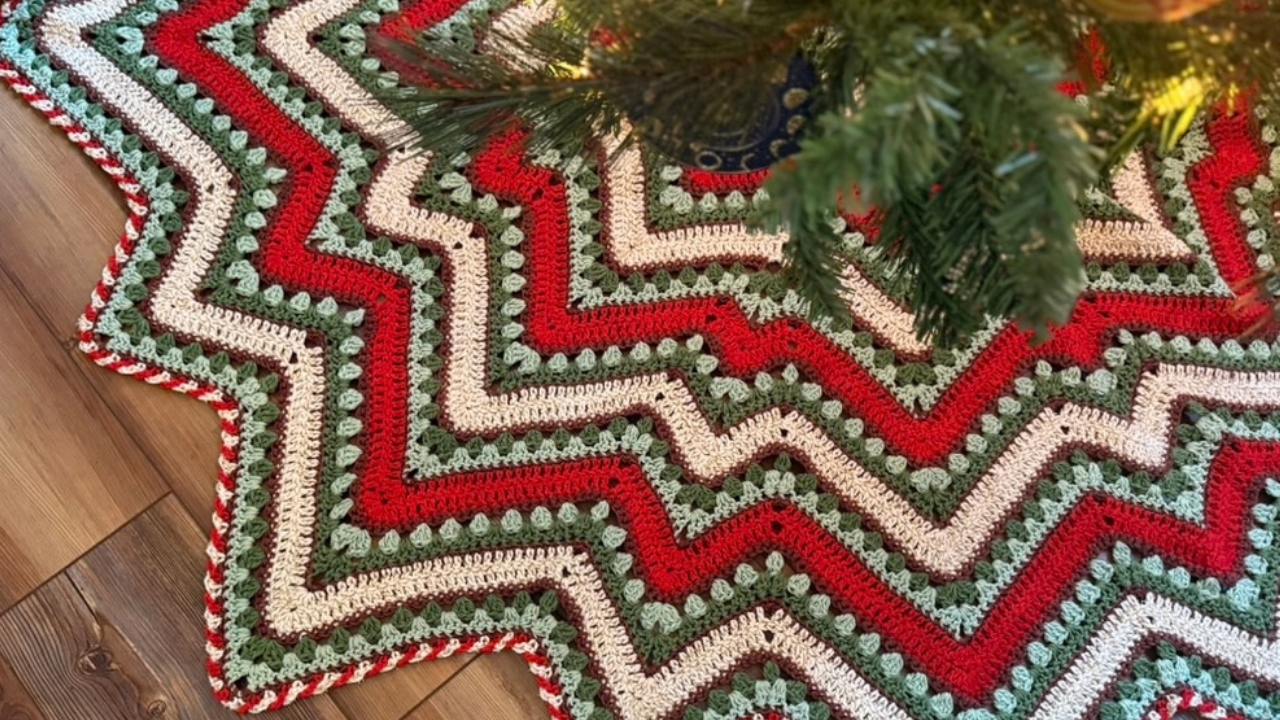
This pattern creates a slightly more than circular star-shaped skirt with an opening to wrap around your Christmas or Holiday tree. It has 17 points. If you would like to make a tree skirt without the long side opening with just a hole in the center to use on an artificial tree, you can use the original 6-Day Star, Superstar or Supernova patterns and make an simple hole opening in the center by chaining 28, working one round of sc, and then picking up the blanket pattern on Setup Round 3.
There are tree skirt adaptations with openings for the 6-Day Star and the 6-Day Supernova as well.
Finished Size: approx. 48” across, easy to resize.
What’s the difference between the 6-Day Star, Superstar, and Supernova Tree Skirts?
- The 6-Day Star Tree Skirt has nine points and is repetitive after the setup rounds, just like the 6-Day Star Blanket.
- The 6-Day Superstar Tree Skirt has 17 points of equal size and is also repetitive after the first 11 setup rounds.
- The 6-Day Supernova Tree Skirt also has 17 points but some of the points are larger and some are smaller.
- The 6-Day Star and Superstar Tree Skirts have a Vivid Chevron Stripe, the 6-Day Supernova has a Snowflake stripe. 6-Day Crochet is extremely versatile and there are infinite ways to stripe it. It also looks great with self-striping and variegated yarns.
- All three patterns can be made in any size, however the Supernova needs several repeats in order to show off the additional smaller points. Make the Supernova when you want a larger tree skirt. Make the Star when you want a smaller one. The Superstar can go either way.
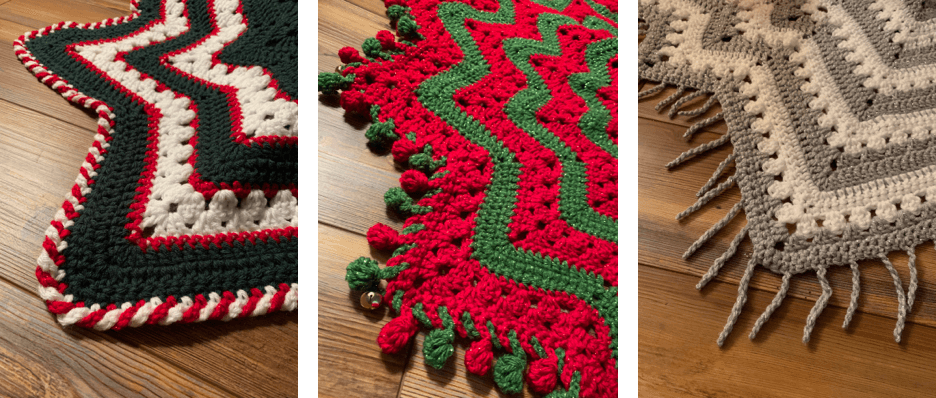
- Edge and Border – this pattern has a twisted candy cane edge, the 6-Day Superstar has a Pom Pom edge and the 6-Day Supernova has a twisted fringe edge.
Materials
Yarn:
2200 yards of #4 Worsted Weight Yarn in Holiday colors (or more of colors A and B for a larger tree skirt)
Shown in
Color A: Big Twist Twinkle Red
Color B: Big Twist Twinkle Green
(three skeins of each)
Optional: 16 mm jingle bells (16 or more if you want more jingle
Hook: Furls Streamline Size I (6 mm)
– have an additional hook .5 mm larger on hand in case of curling or tight tension.
Gauge: 13 sts and 14 rows in sc over 4”
Skill Level: Easy
Abbreviations
bet: between
ch: chain
dc: double crochet
dc3tog: double crochet 3 together cluster
dc5tog: double crochet 5 together cluster
rsc: reverse single crochet
sc: single crochet
sl st: slip stitch
sp(s): space or spaces
st(s): stitch(es)
Special Stitches
dc3tog (cluster) – this stitch is a cluster, not a decrease. It is worked as follows: yo, pull up a loop, pull through two loops, *yo, pull up a loop IN THE SAME STITCH/SPACE, pull through two loops, repeat from *, yo and pull through all loops on the hook. dc3tog complete.
dc5tog (cluster) – worked the same as above, pulling up a loop and pulling through two loops five times before pulling through all loops on the hook.
About the row numbers
In order to provide consistency across all of the 6DKB pattern variations, I’ve numbered the rows to correspond to the original 6-Day Kid Blanket pattern. The cluster rows are always Row or Round 2 and 3, the dc rows are always Row or Round 5 and 6, and the sc rows are always Row or Round 4 and 7. This makes it easy to adapt any pattern to the Snowflake Effect, Half Snowflake, Popsicle, or the original Vivid Chevrons.
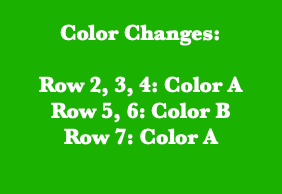
I will give color changes for the stripes pictured (Vivid Chevrons), but you can stripe your skirt any way you like.
Note
Work into st below the turning chain unless directed otherwise.

Begin Pattern
With Color A, ch 35
Turn
Setup Row 1: starting from second st from the hook, sc across.
Turn
Set-up Row 2: ch 2, dc in same st, *ch 3, 2 dc, ch 1, 2 dc, repeat from * to last sc, ch 3, dc in last sc. (9 ch 3 sps and 8 ch 1 sp Note: 2 dc are NOT made in the same st.)
Turn
Set-up Row 3: ch 3, [3 dc, ch 3, 3 dc] in ch 3 sp. *dc3tog in ch-1 sp, [3 dc, ch 3, 3 dc] in ch 3 sp, repeat from * across, dc in top of turning chain.
Set-up Row 4: ch 3, *[3 dc, ch 3, 3 dc] in ch 3 sp, dc3tog in next 2 sps, repeat from * to last peak, [3 dc, ch 3, 3 dc] in last ch 3 sp, dc in turning ch.
Turn
Set-Up Row 5: ch 1, sc in same st, sk 1, sc in each st across, working 3 sc in ch 3 sps, repeat to last 2 sts, sk 1, sc in turning ch.
Turn
Change to Color B
Set Up Row 6: ch 3, counting the st under your ch, sk 2, 2 dc, *[5 dc in center sc from row below], 4 dc, sk 2, 4 dc, repeat from * to last peak, [5 dc in center sc from row below] 2 dc, sk 1, dc in last sc.
Turn
Set Up Row 7: ch 3, counting the st under your ch, sk 2, 3 dc, *[5 dc in center dc from row below], 5 dc, sk 2, 5 dc, repeat from * to last peak, [5 dc in center dc from row below], 3 dc, sk 1, dc in turning ch.
Turn
Change to Color A
(If your tension is at all tight, increase hook size before the next row)
Set-up Row 8: ch 1, sc in same st, sk 1, 4 sc, *3 sc in center of 5 dc from the row below, 6 sc, ch 3, sk 2 sts, 6 sc, repeat from * to last peak, 3 sc in center dc, 4 sc, sk 1, sc in turning ch.
Turn
Set-up Row 9: ch 4, counting the st under your chain, sk 3, dc3tog cluste
r in next st, *sk 2, [3 dc, ch 3, 3 dc] in center sc from row below, sk 2, dc3tog, sk 4, [3 dc, ch 3, 3 dc] in ch 3 sp, sk 4, dc3tog in next st, repeat from * to last peak, [3dc, ch 3, 3 dc] in center sc, sk 2, dc3tog in next st, sk 2, edc in last st.
Turn
Set-up Row 10: ch 3, sk sp between last dc and dc3tog, *dc3tog in next sp, [3dc, ch 3, 3 dc] in ch 3 sp, dc3tog in next 2 sps, repeat from * to last peak, [3dc, ch 3, 3 dc] in ch 3 sp, dc3tog in next sp, dc in turning ch.
Turn
Proceed to Row 4
You will be guided to work the rows in the proper order; don’t overthink or be thrown off by the change in the numerical sequence. Trust the pattern, it works!
Row 4: ch 1, sc in same sp, 4, (7, 10, 13, etc) sc, * 3 sc in ch 3 sp, 8 (14, 20, 26, etc) sc, repeat from * to last ch 3 sp, 3 sc in ch 3 sp, 4, (7, 10, 13, etc) sc, sc, sc in turning ch.
Turn
On subsequent sc rounds, the number of scs between the peaks will increase by 6. The numbers in parentheses show the number of scs on each subsequent repeat of the pattern.
Change to Color B
Row 5: Ch 3, counting the st under your chain sk 2, 4 (7, 10, 13, etc.) dc, *[5 dc in center sc from row below], 4 (7, 10, 13, etc.) dc, sk 2, 4 (7, 10, 13, etc.) dc, repeat from * to last peak, 5 dc in center sc, 4 (7, 10, 13, etc.) dc, sk 1, dc in last st.
Turn
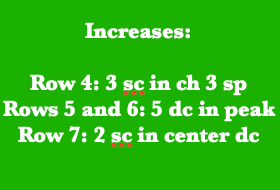
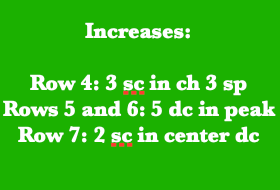
Row 6: Ch 3, counting the st under your chain sk 2, 5 (8, 11, 14, etc.) dc, *[5 dc in center dc from row below], 5 (8, 11, 14, etc.) dc, sk 2, 5 (8, 11, 14, etc.) dc, repeat from * to last peak,, 5 dc in center sc, 5 (8, 11, 14, etc.) dc, sk 1, dc in turning chain.
Turn
On subsequent rounds 5 and 6, the number of dcs on either side of the mountain will increase by 3. The numbers in parentheses show the number of dcs on each subsequent repeat of the pattern.
Change to Color A
Row 7: ch 1, sc in same st and each st across, making 2 sc in each center of 5 dc from the row below, sc in turning ch. (You should have 8 (11, 14, 17, etc. ) sc on each end, 2 sc in each peak, and 14 ( 20, 26, 32, etc) sc between the peaks.
Turn
Proceed to row 2
You will be guided to work the rows in the proper order; don’t let the numbers throw you off or overthink a change in the sequence. Trust the pattern, it works!
Row 2: ch 4, counting the st under your chain, sk 3, dc3tog in next st, * [sk 2, 3 dc in next st], repeat from * to peak [3dc, ch 3, 3 dc] in second of 2 sc from row below, **[sk 2, 3 dc in next st], repeat from ** to 5th stitch before the center valley st, making last 3 dc in the 5th stitch before the center valley st, sk 4, dc3tog in the center valley st, sk 4, 3 dc in next st, repeat from * to last peak, [3 dc, ch 3, 3 dc] in second of 2 sc from row below, repeat [sk 2, 3 dc in next st] to end, working the last dc3tog in the third sc from the end of the row, sk 1, edc in last st.
Turn
Join one of my online communities to knit and crochet along with friends, get help with pattern questions, show off your makes, and access tons of free resources for making 6-Day Crochet and other Betty McKnit designs.
NOTE: the first time you work this row, there will only be one group of 3 dc between the peak and the dc3tog in the center of the valley.
Row 3: ch 4, sk sp between turning ch and dc3tog, dc3tog in next sp, *3 dc in each sp to peak, [3dc, ch 3, 3 dc] in ch 3 sp, 3 dc in each sp, to the valley, dc3tog in sps before and after the dc3tog in row 2, repeat from * to end, make last dc3tog in sp before the last dc3tog in the row below, edc in turning ch sp.
Turn
Repeat Row (4, 5, 6, 7, 2, 3) in that order two more times or until the skirt reaches the desired size.
Repeat row 4. Do not fasten off.
Edge
And the end of your last row, make 3 sc in the last stitch. Begin working down the sides of your rows to finish off the opening of the skirt. Use the turning chains, the sc and dc stitches as foundation chains, working under 2 threads of each stitch and leaving one thread below.
There is no set rule for how many stitches you should put into the side of each stitch. Do what works for your tension. Lay your work down often and check to make sure that your edge does not ruffle (too many stitches) or pull (too few).
When you get to the corner where the side edge meets your starting ch, work 3 sc in first st, work across the bottom of your starting ch and put 3 sc in the last st. Continue working up the side of your rows working sc into the stitches as before. Fasten off.

Finishing
Candy Cane Pom Pom Border
Join Color A with standing sc to first stitch of the edge.
*Ch 6, dc5tog in 3rd ch from the hook, sl st into same ch. ch 3, sk 1, sc into next st. Drop Color A from your hook.
With Color B (join with standing sc to the skipped sc on first repeat) ch 3, working behind Color A sc in next sc.
Pick up Color A, ch 3, working behind Color B sc in next st. Drop Color A.
Pick up Color B, ch 6, dc5tog in 3rd ch from the hook, sl st into same ch. ch 3, working behind Color A, sc into next st.
Pick up Color A, ch 3, working behind Color B sc in next st. Drop Color A.
Pick up Color B, ch 3, working behind Color A sc in next st. Drop Color B.
Pick up Color A, repeat from * to end.
Hints for working the Candy Cane Pom Pom Border:
- Be prepared. It takes forever.
- Take time to lay your work down often and check for ruffling. If your edge ruffles, you should skip a stitch every 5 or even 3 stitches to keep your work flat.
- Your yarn will twist if you don’t take measures to untwist it. I suggest keeping the ball of Color A stationary, and move the ball of Color B under or over Color A every time you use it. If you don’t you will have to stop occasionally and untwist your yarns.
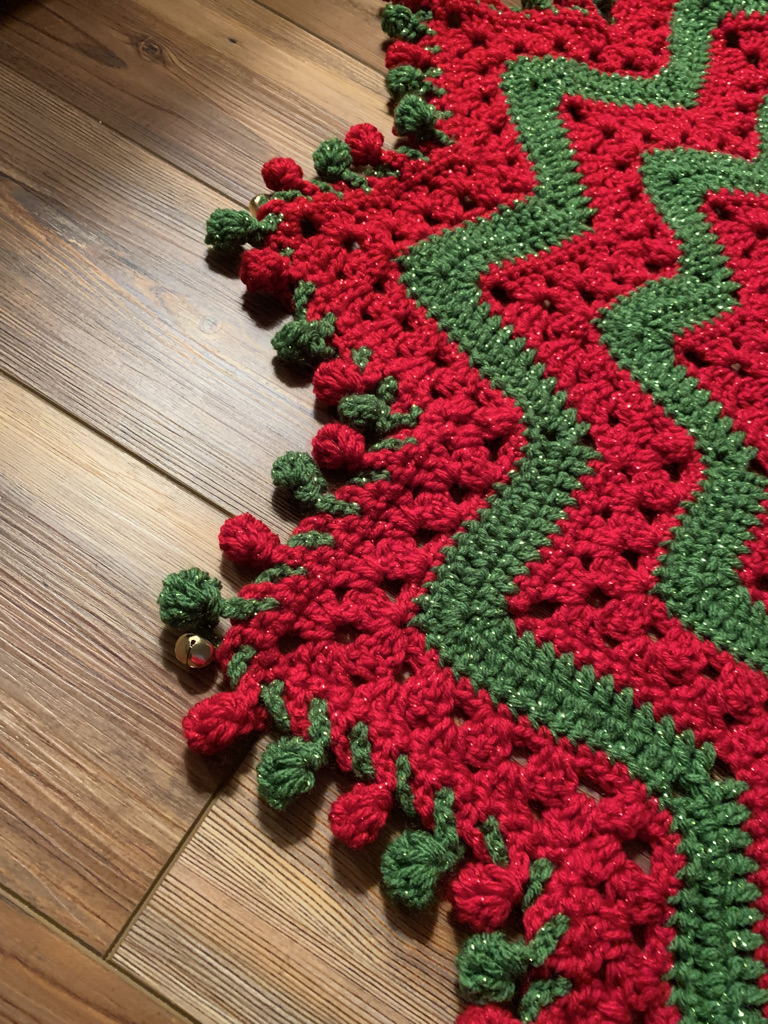
Fasten off. Sew bells at each point. Weave in all ends.
Pattern Tested by KD Wright, Peta Gehrmann, Kassie Colbert, May Khoury, Jacki Warnock, and Jackie Blanchet.
Special thanks to KD Wright for their work on the development of this pattern and to the citizens of the Betty McKnitiverse for their rush-order testing.
Beth McKee Elliott
aka Betty McKnit
Beth McKee Elliott, also known as Betty McKnit, is a crochet and knitting designer, instructor, community leader, and Master Somatic Movement Therapist and Educator. Her signature style, 6-Day Crochet, is showcased in the viral crochet patterns the 6-Day Kid Blanket and 6-Day Star Blanket.
She specializes in Somatic Crochet and Knitting, a mindfulness practice that combines crochet/knitting with body awareness techniques to prevent injury and promote well-being and creativity in crafting.
In addition to being a crochet designer, Beth is a choreographer. She is the creator and director of Small Plates Choreography Festival, Haven Movement Company, and the Dance Maker Podcast.
An international community of yarnful makers and friends.
- Supportive community dedicated to the Power of Positive Crochet
- New pattern pre-releases
- Exclusive patterns never released to the public
- 3-5 patterns each month from Betty’s library (dripped out on pre-determined schedule)
- Somatic Crochet support and education
- Crochet alongs, knit alongs, and classes
- Weekly social and educational events and Zoom Hangout
- Bonus content every month
This page contains affiliate links. If you click these links and buy something on the page they take you to, I may, at no additional cost to you, earn a commission. I only affiliate with products and companies I feel good about. Thank you for your support!
This pattern is the intellectual property of Beth McKee Elliott aka Betty McKnit®. This pattern, The 6-Day Kid Blanket, 6-Day Crochet™, 6-Day Star Blanket™, and all derivative works are protected by copyright. Publishing translations, corrections, variations, or tutorials of this pattern, online or elsewhere without written permission from the owner is a violation of copyright.
The 6-Day Crochet stitch pattern was inspired by “Vivid Chevrons” #110 from 200 Ripple Stitch Patterns by Jan Eaton.
Items created with this pattern may be used for commercial sale with credit to Betty McKnit in your listing. Mass production is not permitted.
Credit the designer by tagging @bettymcknit in social media posts..